
Transforming a corner of your living room into a cozy retreat doesn’t require expensive furniture. A round floor puff with a backrest offers flexibility, comfort, and a modern aesthetic that blends well with minimalist, bohemian, or eclectic interiors. Unlike rigid chairs, puffs are lightweight, easy to move, and can double as ottomans or extra seating. With a bit of creativity and basic crafting skills, you can build a custom piece tailored to your space and style.
Why Choose a Round Puff with Backrest?
A traditional floor cushion provides comfort but lacks lumbar support. Adding a backrest turns a simple seat into an ergonomic lounging solution. This hybrid design supports relaxed sitting for reading, working on a tablet, or enjoying a cup of tea. It’s especially valuable in small apartments, kids’ rooms, or outdoor patios where space-saving, multi-functional furniture is essential.
Building your own also allows full control over materials, dimensions, and aesthetics. You can match the fabric to your existing decor, choose eco-friendly fillings, and adjust firmness based on personal preference.
“Custom seating like DIY floor puffs not only saves money but fosters a deeper connection to your living environment through handmade design.” — Lena Torres, Interior Design Educator and Sustainable Furniture Advocate
Materials and Tools You’ll Need
Before beginning construction, gather all necessary supplies. Most items are available at craft stores or online retailers. Opt for durable, washable fabrics and non-toxic fillings for long-term use.
| Category | Item | Recommended Type |
|---|---|---|
| Fabric | Outer Cover | Durable cotton canvas, upholstery-grade linen, or outdoor polyester |
| Filling | Main Cushion Core | Polyester fiberfill, foam chunks, or kapok fiber (eco-friendly) |
| Filling | Backrest Support | Medium-density foam slab (2–3 inches thick) |
| Structure | Sewing Thread | Heavy-duty polyester thread |
| Tools | Sewing Machine | With zigzag stitch capability |
| Extras | Zippers (2) | One for base, one for backrest panel (at least 18” each) |
| Extras | Measuring Tape, Scissors, Tailor’s Chalk | Essential for precision cutting |
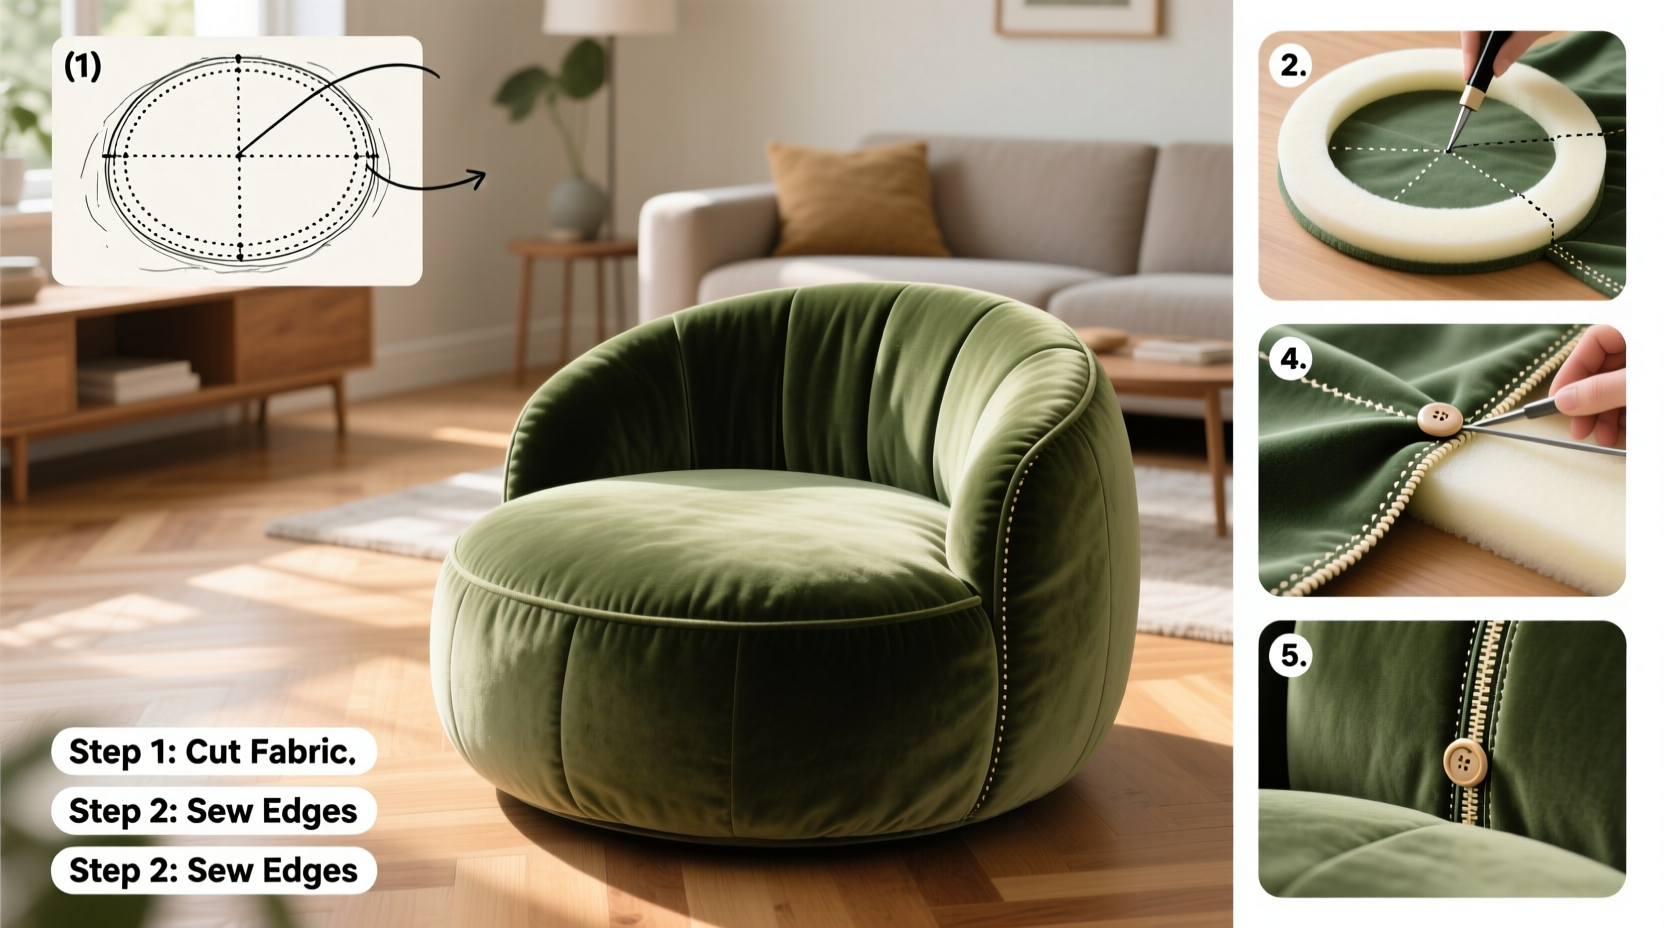
Step-by-Step Construction Guide
Follow this detailed sequence to assemble a sturdy, supportive round puff with integrated backrest. Allow 4–6 hours for completion, depending on experience level.
- Design & Measure: Decide on dimensions. A standard diameter is 30–36 inches; height should be 14–16 inches. The backrest should extend 18–20 inches high from the seat and curve slightly inward for comfort.
- Cut the Base Circle: Using cardboard as a template, trace a perfect circle onto both outer fabric and lining. Cut two identical circles—one for top, one for bottom.
- Create Side Panel: Calculate the circumference (π × diameter). For a 32-inch puff, this is ~100 inches. Cut a fabric strip 100” long and 16” high (height of puff). Add ½” seam allowance on lengthwise edges.
- Sew the Main Body: Attach the side strip between the top and bottom circles using a ½” seam. Use a heavy-duty needle and reinforce corners. Insert a zipper into the bottom seam before closing fully.
- Build the Backrest Frame: Cut a curved rectangle from 3” foam—this will be the internal spine. Wrap it in batting and encase in a removable fabric sleeve with a zipper.
- Attach Backrest Seam: Position the backrest sleeve so it aligns with the center rear of the base. Sew one edge permanently to the side wall of the puff, allowing the other side to remain openable via a second zipper for adjustments.
- Fill the Puff: Through the bottom zipper, add filling gradually. Alternate layers of firm foam chunks and soft fiberfill for balanced support and plushness. Do not overstuff—aim for slight give when seated.
- Final Touches: Close zippers securely. Optional: add handles on the sides for portability, or apply anti-slip fabric to the bottom.
Enhancing Comfort and Durability
The key to long-lasting comfort lies in layering. Start with a base of compressed foam discs to prevent bottoming out, then add loose fill on top for softness. This combination resists compaction better than fiberfill alone.
- Use a removable inner liner bag to contain filling and simplify cleaning.
- Add a moisture-resistant barrier (like polypropylene sheet) beneath the foam if using outdoors or on hardwood floors.
- Stitch horizontal baffles inside the side wall to prevent fill from shifting over time.
Real-Life Example: Sofia’s Reading Nook Upgrade
Sofia, a freelance writer in Portland, wanted a comfortable spot near her sunlit window without cluttering her studio apartment. She built a 34-inch round puff using navy-blue outdoor fabric and recycled foam from an old mattress. She incorporated a flexible backrest filled with shredded memory foam, allowing her to recline while typing on her lap desk. After three months of daily use, she reports less lower back strain and has received multiple compliments from guests. “It looks store-bought,” she says, “but I know every stitch was made with intention.”
Do’s and Don’ts at a Glance
| Do’s | Don’ts |
|---|---|
| Use dual zippers for easy maintenance | Skimp on seam strength—reinforce stress points |
| Choose washable, stain-resistant fabric | Overfill the puff—maintain some compression |
| Test backrest angle before final stitching | Ignore ventilation—allow airflow to prevent mildew |
| Add non-slip backing for safety | Use low-quality thread that frays easily |
Frequently Asked Questions
Can I make this puff without a sewing machine?
Yes, but it will take significantly longer. Use fabric glue and iron-on bonding tape for seams, though durability will be reduced. Hand-sewing with a backstitch is stronger but labor-intensive. A machine is highly recommended for structural integrity.
How do I clean the puff?
Always make the outer cover removable via zippers. Most fabric covers can be spot-cleaned with mild detergent and water. For deep cleaning, unzip and hand-wash or machine-wash on gentle cycle, then air dry completely before refilling. Never soak foam components.
Is this suitable for children or pets?
Absolutely. Use non-toxic fillings and tightly woven fabric to resist claws and spills. Rounded edges make it safe for toddlers. Consider adding a waterproof inner liner if used in playrooms or pet zones.
Final Checklist Before You Begin
- ✅ Measure your intended space
- Ensure the puff fits comfortably with clearance for reclining.
- ✅ Select fabric with wear resistance
- Upholstery weight or outdoor fabric lasts longer than quilting cotton.
- ✅ Test-fill with temporary stuffing
- Use old pillows or packing foam to gauge ideal firmness.
- ✅ Plan for disassembly
- Zippers must allow full access to replace or refresh filling.
- ✅ Reinforce attachment points
- Double-stitch areas where the backrest connects to the body.
Conclusion: Craft Your Comfort Zone
A handmade round puff with backrest is more than just a seat—it’s a personalized sanctuary within your home. By investing time in thoughtful design and quality materials, you create a functional piece that reflects your taste and meets your comfort needs. Whether nestled beside a bookshelf, placed on a balcony, or used as a playful kids’ seat, this project proves that great design doesn’t have to come from a catalog.


 浙公网安备
33010002000092号
浙公网安备
33010002000092号 浙B2-20120091-4
Comments
No comments yet. Why don't you start the discussion?