
Every dog deserves to be recognized, protected, and loved—and a custom dog tag is one of the simplest yet most meaningful ways to ensure your pet stands out while staying safe. Store-bought tags are convenient, but crafting your own at home adds a personal touch that reflects your dog’s personality and your creativity. With just a few common supplies and a little time, you can design unique, durable, and stylish dog tags without spending much. This guide walks you through the entire process—from choosing materials to adding finishing touches—so you can create something both functional and heartfelt.
Why Make Your Own Dog Tags?
Commercially made dog tags serve their purpose, but they often lack character. Homemade versions let you control every detail: shape, color, message, and even texture. Whether you want a rugged military-style tag for your adventure pup or a pastel charm for your tiny companion, DIY gives you full creative freedom. Plus, making them at home can be a bonding activity—especially if you involve kids who adore the family pet.
“Personalized dog tags do more than identify—they reflect the relationship between pet and owner. A handmade tag carries emotional weight no mass-produced item can match.” — Dr. Lena Torres, Animal Behavior Specialist
Materials You’ll Need (And Where to Find Them)
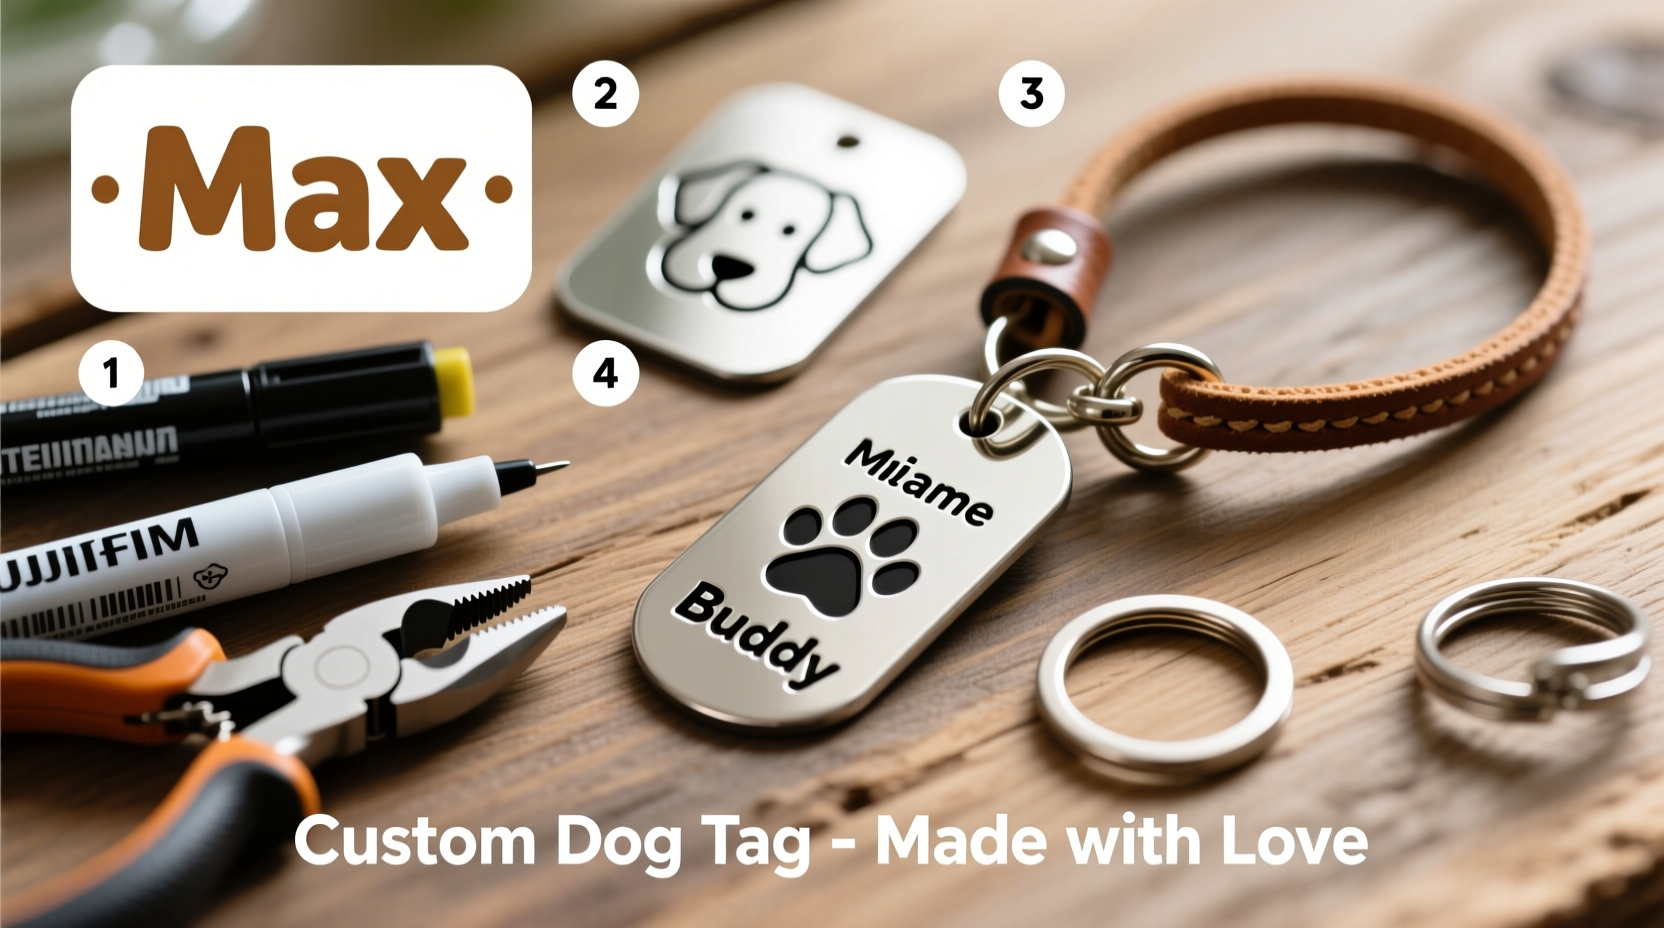
The beauty of homemade dog tags lies in accessibility. Most items can be found around the house or picked up inexpensively at craft stores, hardware shops, or online. Here’s what you should gather before starting:
- Metal blanks – Aluminum, brass, or stainless steel pieces cut into shapes (available on Amazon or Etsy)
- Leather punches or hole-making tools – For attaching to collars
- Permanent markers, engraving pens, or metal stamps – To write names and numbers
- Clear nail polish or spray sealant – To protect ink from fading
- Chain or split ring – For connecting the tag to the collar
- Sandpaper (fine grit) – For smoothing rough edges
- Ruler, pencil, stencil – For layout planning
- Optional: Paints, glitter glue, stickers, or resin for decorative flair
Step-by-Step Guide to Crafting Custom Dog Tags
Follow this clear, practical sequence to turn raw materials into a polished, professional-looking dog tag.
- Choose Your Base Material: Select a flat, rust-resistant metal piece. Aluminum is lightweight and easy to engrave; brass has a classic look but may tarnish over time.
- Cut & Shape (if needed): Use metal shears or a jeweler’s saw to cut circles, bones, paw prints, or any shape. File down sharp edges carefully.
- Sand the Surface: Lightly sand both sides so ink or paint adheres better. Wipe clean with rubbing alcohol.
- Plan the Layout: Sketch out where the dog’s name, your phone number, and any extra details (like “Vaccinated” or “Friendly”) will go.
- Add Text:
- Use a fine-tip permanent marker for quick results.
- For permanence, use a metal engraving tool or stamp set with a hammer.
- Trace letters with a pencil first if freehand writing feels risky.
- Seal the Design: Apply 2–3 thin coats of clear nail polish or acrylic sealer over the text. Let each layer dry completely.
- Punch a Hole: Position the hole near the top edge. Use a leather punch or drill a small hole (1/8 inch) for the split ring. <8> Attach & Test: Slide on a split ring and fasten it to your dog’s collar. Shake gently to test sturdiness and noise level.
Dos and Don’ts of Homemade Dog Tags
| Do | Don't |
|---|---|
| Include at least two contact methods (e.g., phone and email) | Use fragile materials like paper or cardboard |
| Test legibility after sealing—can you read it from 12 inches away? | Overcrowd the tag with too much text |
| Round all corners to prevent snagging | Forget to update info when you move or change numbers |
| Use non-toxic, pet-safe paints and sealants | Make the tag so heavy it bothers your dog |
| Check monthly for wear, fading, or loose rings | Assume one coat of sealer is enough |
Real-Life Example: Max’s Adventure-Ready Tag
Sarah, a hiking enthusiast from Colorado, wanted a tag for her Australian Shepherd, Max, that could survive trail dust, creek crossings, and daily backyard wrestling. She started with a brushed aluminum blank shaped like a mountain. Using a metal engraving pen, she etched “Max | sarah.hiker@email.com | REWARD if found.” After sanding and sealing with outdoor-grade polyurethane spray, she added a second tag with “I hike with my human!” as a conversation starter. Six months later, the tags still look sharp—even after being submerged during a swim. When Max once wandered off at a rest stop, a passerby scanned the email and contacted Sarah within minutes.
Upgrade Ideas for Unique Personalization
Once you’ve mastered the basics, experiment with advanced touches that elevate your design:
- Resin Coating: Pour UV-resistant epoxy resin over artwork or photos for a glossy, waterproof finish.
- Color Fill: After engraving, apply enamel paint into grooves and wipe excess for bold, lasting text.
- Laser Printing Services: Upload your design to online vendors who laser-print onto metal, then attach it to your base.
- Double-Sided Tags: Attach two identical or complementary tags with a spacer for visibility from all angles.
- Themed Shapes: Cut tags into hearts, bones, fire hydrants, or breed silhouettes using templates.
“Adding a QR code linked to your pet’s microchip profile or vet records turns a simple tag into a smart safety tool.” — TechPet Blog, Pet Safety Innovation Review (2023)
Frequently Asked Questions
Can I use regular nail polish to seal the tag?
Yes, but standard nail polish may chip faster outdoors. Opt for a quick-dry, high-gloss formula and apply multiple thin layers. For maximum durability, use a spray-on acrylic sealer designed for outdoor use.
What if my dog has allergies or sensitive skin?
Stick to hypoallergenic metals like surgical stainless steel or anodized aluminum. Avoid nickel-based alloys. You can also add a plastic guard between the tag and collar to reduce direct contact.
How long do homemade tags last?
A well-sealed, high-quality metal tag can last 1–3 years depending on your dog’s activity level. Check every few months for fading, corrosion, or loosening parts. Reapply sealant as needed.
Final Checklist Before You Hang It On the Collar
- ✅ Name clearly visible
- ✅ At least one contact method included
- ✅ Hole reinforced and ring securely attached
- ✅ All edges smoothed and safe
- ✅ Design sealed against moisture and scratches
- ✅ Noise level tested (not too loud)
- ✅ Backup tag or ID method in place (microchip, etc.)
Conclusion: Turn Craft Time Into Peace of Mind
Creating a custom dog tag at home isn’t just a craft project—it’s an act of care. Every line you engrave, every coat of sealant you apply, adds another layer of protection for your loyal companion. These tags do more than jingle on a collar; they speak volumes about how much you value your dog’s safety and identity. With minimal investment and a bit of creativity, you can make something truly special—something store shelves will never offer. So gather your tools, think about what makes your dog unique, and start crafting today. Your four-legged friend might not say thank you in words, but their wagging tail will say it all.


 浙公网安备
33010002000092号
浙公网安备
33010002000092号 浙B2-20120091-4
Comments
No comments yet. Why don't you start the discussion?