
Building a balloon-powered car is more than just a fun weekend project—it's a powerful tool for teaching core principles of physics, engineering, and design thinking. When students construct a vehicle that runs solely on the force of air escaping from a balloon, they engage directly with Newton’s Third Law, friction, aerodynamics, and energy conversion. This hands-on experiment fosters curiosity, problem-solving, and collaboration, making it ideal for both classroom instruction and at-home STEM exploration.
The beauty of this project lies in its simplicity and accessibility. With basic household materials and careful design choices, learners can create vehicles that travel surprising distances. More importantly, each trial teaches something new—why did one car move faster? Why did another stall immediately? These questions spark inquiry and deepen understanding far beyond textbook explanations.
Why Balloon-Powered Cars Work: The Science Behind the Fun
At the heart of every balloon-powered car is a fundamental principle of motion: Newton’s Third Law of Motion. It states, “For every action, there is an equal and opposite reaction.” When the balloon releases air, the gas pushes backward against the surrounding atmosphere. In response, the car is propelled forward with equal force.
This system converts stored potential energy (in the stretched rubber of the inflated balloon) into kinetic energy (the movement of the car). However, efficiency depends on several factors:
- Aerodynamic shape: Reducing air resistance allows smoother forward motion.
- Low-friction wheels and axles: Minimizing rolling resistance helps maintain momentum.
- Balloon size and nozzle control: A steady, controlled release of air generates more consistent thrust than a rapid burst.
- Weight distribution: A balanced chassis prevents wobbling and improves directional stability.
“Simple projects like balloon cars allow students to see abstract physics concepts come alive through direct experimentation.” — Dr. Alan Reyes, STEM Education Researcher, University of Colorado Boulder
Materials and Tools You’ll Need
The best designs emerge not from expensive parts, but from thoughtful use of everyday items. Below is a curated list of common supplies, along with alternatives that encourage creativity and adaptability.
| Component | Recommended Materials | Budget-Friendly Alternatives |
|---|---|---|
| Chassis | Corrugated cardboard, plastic bottle, foam board | Cereal box, old DVD case, styrofoam tray |
| Wheels | CDs, plastic bottle caps, wooden craft wheels | Lids from yogurt cups, poker chips, buttons |
| Axles | Wooden skewers, metal rods, stiff wire | Straws with rigid center, uncoated pencils |
| Balloon & Nozzle | Standard latex balloon, plastic straw | Water balloon + coffee stirrer combo |
| Adhesives | Hot glue gun, epoxy, strong tape | Duct tape, masking tape + staples |
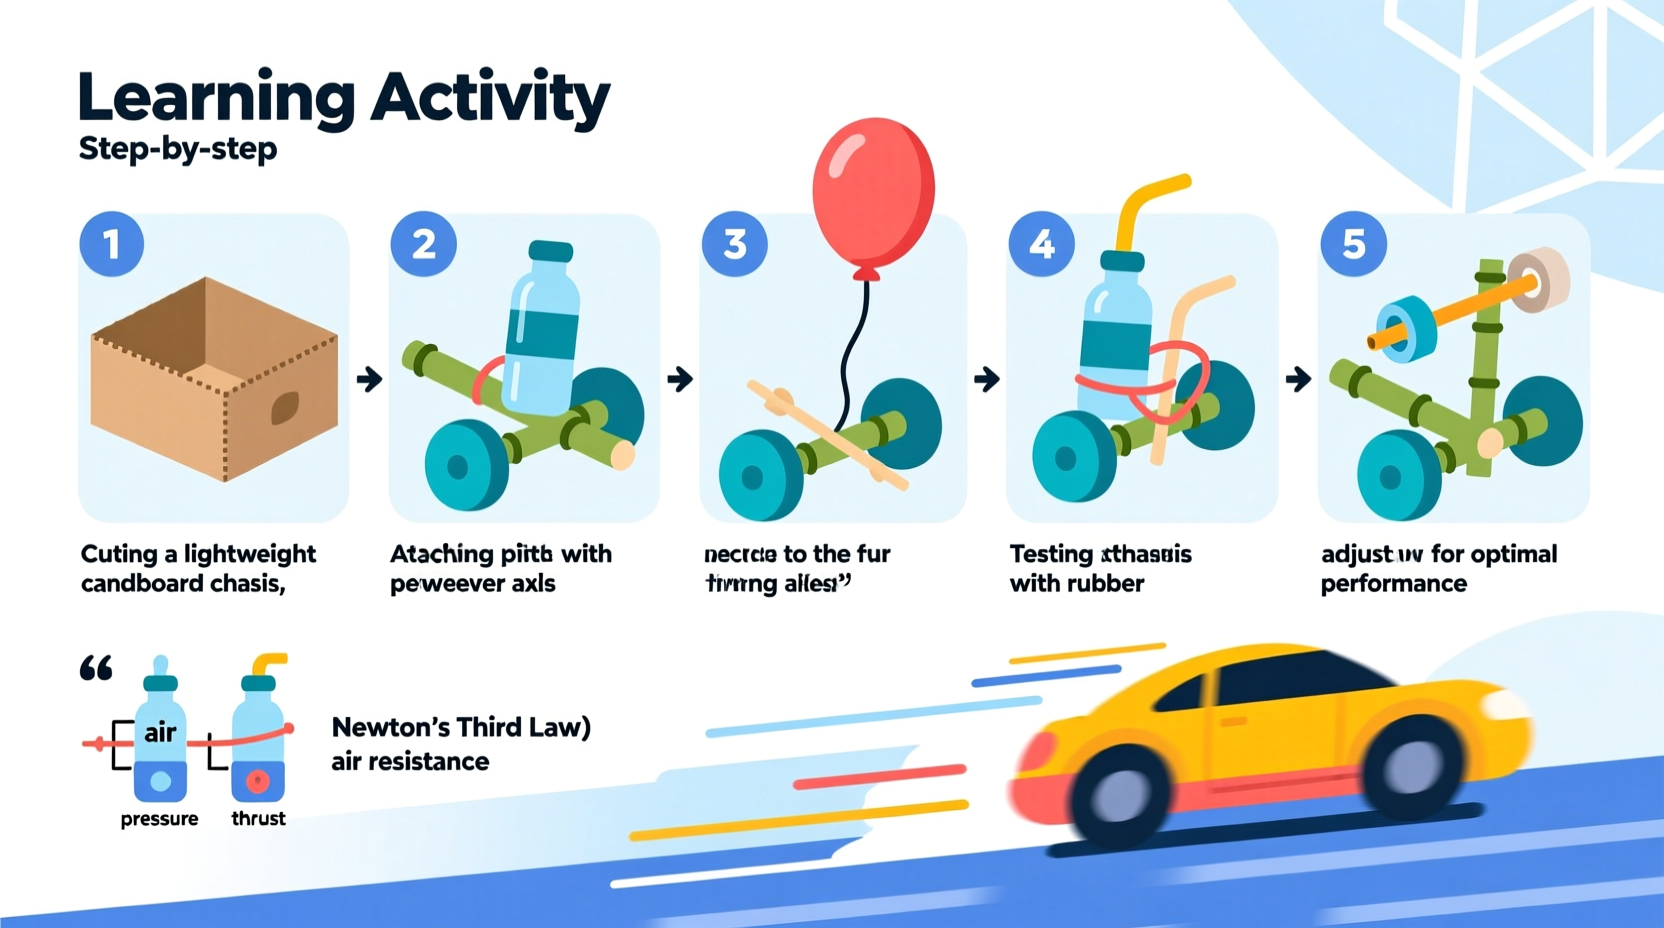
Step-by-Step Construction Guide
Follow this structured process to build a functional, high-performance balloon car. Each phase emphasizes precision, iteration, and scientific observation.
- Design Your Chassis (15–20 minutes)
Sketch your car on paper first. Aim for a lightweight frame between 15–25 cm long. Wider bases offer more stability; longer ones improve straight-line tracking. Cut your chosen material carefully using scissors or a utility knife (with adult supervision). - Attach Axle Mounts (10 minutes)
For rear wheels (powered side), insert straws perpendicular to the chassis ends. These act as bearings for the axles. Ensure they are parallel and securely glued. Front axles can be simpler—often just taped-on straws. - Install Wheels (10 minutes)
Slide axles through the straw mounts. Attach wheels firmly using glue, tape, or push-fit hubs (e.g., hot-glued bottle caps). Check that all wheels spin freely without wobble. - Create the Thrust System (10 minutes)
Tape a balloon securely over one end of a flexible plastic straw. Insert the free end of the straw through a small hole near the rear of the car, pointing backward. Seal gaps around the straw with modeling clay or tape to prevent air leaks. - Final Assembly & Balance Check (5 minutes)
Inflate the balloon through the straw (pinch the end to hold air), place the car on a flat surface, then release. Observe movement. Does it veer off course? Stall quickly? Adjust weight distribution by adding small counterweights (paper clips, coins) if needed.
Troubleshooting Common Issues
- Car doesn’t move: Check for air leaks in the balloon-straw connection or blocked airflow.
- Wheels jam: Realign axles or sand rough edges on skewers.
- Drifts sideways: Verify wheel alignment and ensure equal traction on all sides.
- Short travel distance: Reduce overall weight and increase balloon volume.
Optimization Checklist for Maximum Performance
To turn a working model into an efficient machine, apply these engineering refinements. Use this checklist after your initial prototype succeeds.
- ✔ Minimize chassis weight without sacrificing structural integrity
- ✔ Align all wheels so they point straight ahead
- ✔ Reduce drag with a streamlined front edge
- ✔ Use larger balloons for extended thrust duration
- ✔ Lubricate axles lightly to decrease rotational friction
- ✔ Conduct three timed trials and calculate average distance traveled
Real-World Learning: A Classroom Case Study
In a fifth-grade classroom in Portland, Oregon, students were challenged to build balloon cars that could travel at least three meters. After an initial round, most cars managed only 1–1.5 meters. One group noticed their car kept lifting its front wheels off the ground during launch—a sign of excessive rear thrust.
They hypothesized that shifting the balloon forward would balance the forces. By repositioning the straw mount closer to the center and adding a small paperclip weight to the front, they stabilized the chassis. On the next try, their car traveled 3.7 meters—the longest in the class.
This experience taught them not just about force distribution, but also about iterative design: test, observe, modify, retest. Their teacher noted, “The moment they saw improvement, their confidence soared. They weren’t just building cars—they were thinking like engineers.”
Frequently Asked Questions
How long should my balloon car ideally run?
There’s no fixed time, but well-designed models typically roll for 5–10 seconds and cover 3–6 meters on smooth surfaces. Duration depends on balloon capacity, friction levels, and design efficiency.
Can I use multiple balloons for more power?
Yes, though synchronization is tricky. Attaching two balloons to a single straw often leads to uneven deflation. A better approach is to connect both balloons to a Y-shaped tubing junction (made from cut straws) before linking to the main nozzle.
What age group is this project suitable for?
With supervision, children as young as 8 can participate. Older students (ages 12+) can explore advanced modifications like gear ratios, lightweight composites, or data logging via smartphone video analysis.
Conclusion: Ignite Curiosity Through Hands-On Engineering
Constructing a balloon-powered car transcends entertainment—it’s a gateway to authentic scientific inquiry. Every adjustment, failure, and breakthrough reinforces critical thinking and resilience. Whether in a school lab or a kitchen table workshop, this project proves that profound learning can emerge from simple beginnings.
Encourage learners to document their builds with notes, sketches, and performance metrics. Challenge them to beat their own records or compete in friendly races. Most importantly, celebrate the process—not just the outcome.


 浙公网安备
33010002000092号
浙公网安备
33010002000092号 浙B2-20120091-4
Comments
No comments yet. Why don't you start the discussion?