
Crafting your own bag accessory keychains isn’t just a fun way to spend an afternoon—it’s a meaningful method of personal expression. In a world saturated with mass-produced accessories, a handmade keychain adds character, tells a story, and turns an everyday item into a wearable piece of art. Whether you're accessorizing a tote, backpack, or handbag, a custom keychain can elevate your style while serving a practical purpose. This guide walks you through the entire process—from selecting materials to finishing touches—so you can create something truly one-of-a-kind.
Gather Your Materials and Tools
The foundation of any successful craft project lies in preparation. Before diving into design, assemble the essential supplies. The beauty of this project is its flexibility: you can use what you already have at home or invest in specialty items for a more polished result.
- Base components: Key rings (available in various sizes and finishes), lobster clasps, jump rings
- Fabric & textiles: Felt, leather scraps, embroidery thread, ribbon
- Beads & charms: Glass, wood, metal, or resin beads; letter charms, animal shapes, miniature symbols
- Tools: Scissors, pliers (flat-nose and round-nose), glue (E6000 or fabric glue), needle and thread
- Optional: Polymer clay, paint pens, tassels, pom-poms, mini photo frames
Design Principles for Unique Keychains
A visually appealing keychain balances function and aesthetics. Consider these three core principles when designing:
- Theme Consistency: Choose a unifying idea—such as travel, nature, or pop culture—and build around it. For example, a beach-themed keychain might include a tiny seashell charm, blue beads, and a rope tassel.
- Proportion: Avoid overcrowding small key rings. Limit the number of elements to 3–5 focal points so the design remains balanced.
- Durability: Since keychains are handled frequently, ensure all connections are secure and materials can withstand daily wear.
| Design Element | Do | Don't |
|---|---|---|
| Size | Keep under 4 inches long for easy portability | Attach bulky items that snag on fabrics |
| Color Palette | Use 2–3 complementary colors for cohesion | Mix too many clashing hues |
| Attachment | Double-check jump ring closures with pliers | Leave gaps where charms can slip off |
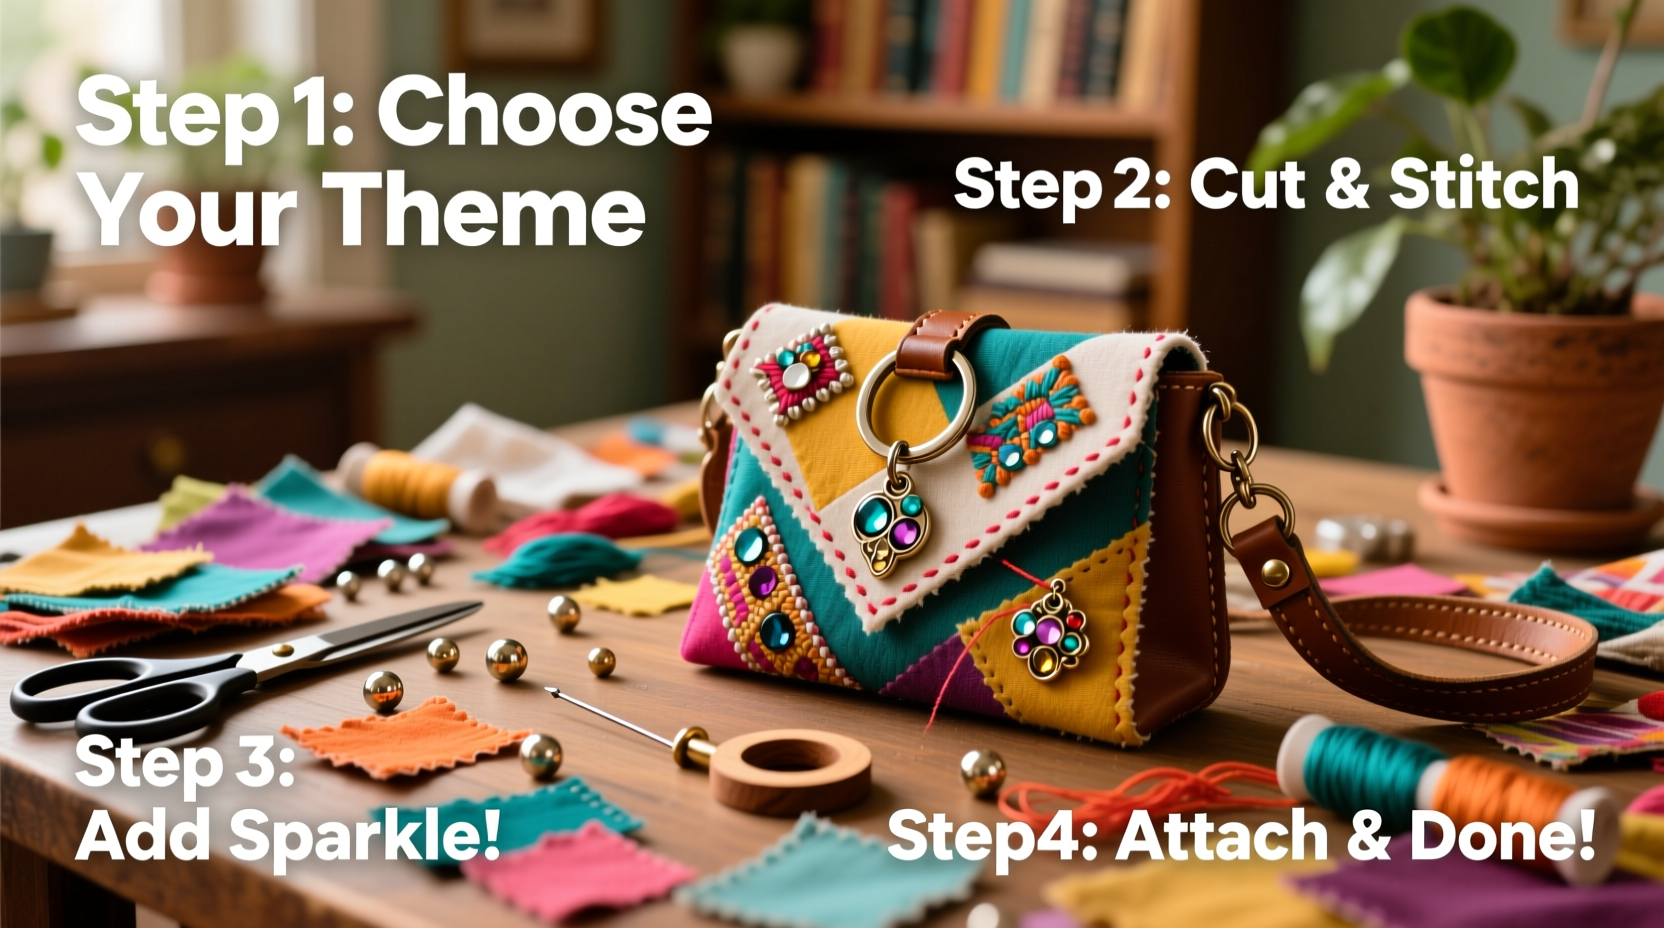
Step-by-Step Guide to Crafting Your Keychain
Follow this detailed sequence to bring your vision to life. Each step builds on the last, ensuring a professional-looking finish.
- Choose Your Theme and Sketch It: Jot down ideas or sketch a rough layout. This prevents haphazard assembly later.
- Prepare Components: Cut fabric shapes, bake polymer clay pieces, or string preliminary beads onto wire or thread.
- Create the Focal Point: This could be a charm, embroidered patch, or hand-molded clay pendant. Attach it to a jump ring using pliers.
- Add Secondary Elements: Layer smaller beads or charms along a short chain or cord, then connect them to the main piece.
- Incorporate Movement: Use split rings or small chains to allow parts to dangle freely—this adds visual interest.
- Secure Everything: Double-check all connections. Squeeze jump rings closed completely; apply a drop of glue to threaded ends if needed.
- Attach to Key Ring: Open the key ring slightly with pliers, slide on your assembled piece, then close securely.
Real Example: Maya’s Memory Keychain
Maya wanted to honor her grandmother who passed away last year. She crafted a keychain featuring a tiny vintage-style locket containing a micro-printed photo. Around it, she wrapped lace from her grandmother’s handkerchief and added a silver “G” charm for her initials. She attached the piece to a brushed gold key ring and used navy-blue thread to tie a small bow. The result wasn’t just functional—it became a cherished keepsake she carries every day.
“Personalization transforms accessories into emotional anchors. A handmade keychain can carry memory, meaning, and identity.” — Lena Torres, Craft Educator and Textile Artist
Advanced Techniques for Customization
Once comfortable with basics, experiment with elevated methods to enhance originality:
- Polymer Clay Pendants: Sculpt miniature animals, food items, or abstract shapes. Bake according to package instructions, then sand and paint for detail.
- Embroidery on Felt: Stitch initials, floral motifs, or geometric patterns onto small felt cutouts before attaching them.
- Resin Encapsulation: Embed dried flowers, glitter, or handwritten notes in silicone molds to create glossy, durable pendants.
- Upcycled Electronics: Reuse old watch gears, circuit board fragments, or keyboard keys for a steampunk or tech-inspired look.
Checklist: Preparing for Success
- ☐ Define your theme or inspiration
- ☐ Gather all tools and materials
- ☐ Sketch a quick design layout
- ☐ Prepare base components (cut, shape, bake)
- ☐ Assemble elements in order of importance
- ☐ Secure all connections firmly
- ☐ Perform a durability test
- ☐ Clean excess glue or marks
Frequently Asked Questions
How do I make a keychain waterproof?
To protect delicate materials, coat them with a waterproof sealant such as clear epoxy resin or spray-on acrylic sealer. Avoid submerging fabric-based designs in water, even after sealing.
Can I make keychains as gifts?
Absolutely. Personalized keychains are thoughtful, affordable, and memorable gifts. Tailor them to the recipient’s interests—favorite colors, hobbies, or initials—for a heartfelt touch.
What if I don’t have crafting experience?
No prior skills are needed. Start with simple designs—like a single charm on a key ring or a braided thread tassel. Practice builds confidence, and mistakes often lead to unexpected creativity.
Final Touches and Creative Confidence
The most compelling keychains aren’t always the most complex—they’re the ones infused with intention. Whether you’re commemorating a milestone, expressing your aesthetic, or simply enjoying the tactile joy of making, each piece reflects a moment of creativity. Don’t worry about perfection. Embrace asymmetry, mismatched textures, or imperfect stitches—they often become the most distinctive features.
Store completed keychains in a small box lined with felt to prevent scratches. When gifting, present them in a handmade pouch or recycled gift tag for added warmth.


 浙公网安备
33010002000092号
浙公网安备
33010002000092号 浙B2-20120091-4
Comments
No comments yet. Why don't you start the discussion?