
In a world where personal expression meets practicality, the DIY mermaid phone chain lanyard stands out as both a functional accessory and a wearable work of art. Inspired by ocean myths, iridescent seashells, and underwater fantasy, these lanyards transform an everyday object into a statement piece. Whether you're a fan of aquatic aesthetics, love handmade crafts, or simply want a secure way to carry your phone in style, creating your own mermaid-themed chain is a rewarding project that blends creativity with craftsmanship.
This guide walks you through every stage—from selecting materials that capture the essence of the sea to assembling a durable, eye-catching design. With attention to detail and a touch of imagination, you’ll craft a lanyard that’s uniquely yours, reflecting your personality while keeping your phone safely within reach.
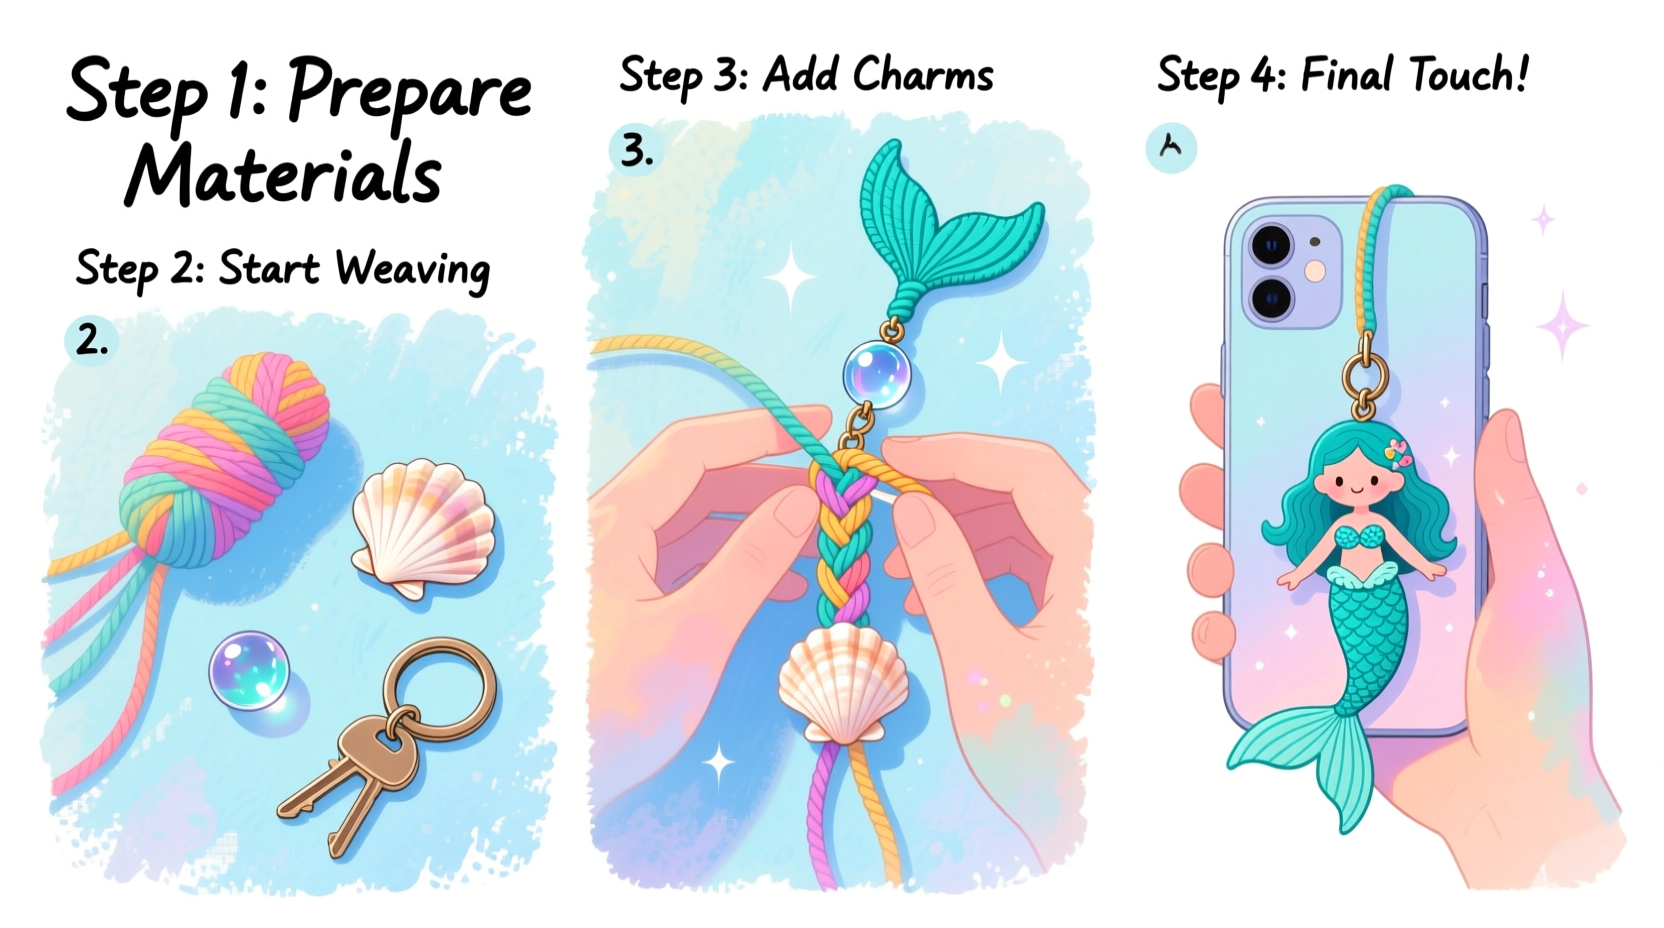
Gather Your Materials: Building the Mermaid Palette
The foundation of any successful DIY project lies in thoughtful material selection. For a mermaid-inspired lanyard, aim for elements that evoke the colors, textures, and mystery of the deep sea. Think shimmer, sparkle, and subtle movement—qualities that mimic sunlight dancing on waves or pearls nestled in coral.
Here’s what you’ll need:
- Chain or cord base: Choose between a stainless steel curb chain for durability, a nylon braided cord for softness, or stretchy beading wire for flexibility.
- Charms: Select ocean-themed charms such as seahorses, starfish, anchors, shells, or mermaid tails. Resin, metal, or enamel options all work well.
- Beads: Use glass seed beads, acrylic “pearl” beads, or iridescent acrylics in aqua, teal, lavender, silver, and pearl white.
- Jump rings and connectors: Small metal loops (6mm recommended) to attach charms securely.
- Clasp system: Lobster clasp or magnetic snap for easy attachment to clothing or bags.
- Phone ring adapter: A slim adhesive ring that fits most phones or cases, allowing the chain to clip on securely.
- Tools: Jewelry pliers (flat-nose and round-nose), wire cutters, and a small ruler.
Design Philosophy: Crafting a Cohesive Underwater Theme
Before assembly begins, consider the story you want your lanyard to tell. Are you channeling a tropical reef at midday? A moonlit cove? Or perhaps a treasure-laden shipwreck? Defining a visual theme helps unify color choices, charm placement, and overall balance.
Aim for harmony rather than clutter. Overloading the chain with too many large charms can make it heavy and impractical. Instead, use a focal point—such as a central mermaid pendant—and build outward with smaller accents.
“A well-designed accessory doesn’t just catch the eye—it tells a story. Let each element of your lanyard feel intentional.” — Lila Monroe, Artisan Jewelry Designer
Consider using a color gradient along the chain, transitioning from deep navy at one end to seafoam green and shimmering silver at the other. This mimics the changing hues of ocean depths and adds dimensionality.
Step-by-Step Assembly Guide
Now that your materials are ready and your vision is clear, follow this detailed sequence to construct your lanyard with precision and flair.
- Measure and cut the base chain: Determine desired length (typically 20–24 inches for neck wear). Add 1 inch extra for connectors. Cut using wire cutters.
- Attach the phone adapter ring: Open a jump ring with pliers, slide it through the end link of the chain and the adapter ring, then close securely. Ensure the ring lies flat against the phone side.
- Plan charm spacing: Lay the chain flat and mark positions for charms using removable tape. Space larger charms 3–4 inches apart; smaller beads can be clustered.
- Add accent beads: Thread small beads onto headpins, create loops above the beads using pliers, and attach them to chain links via jump rings.
- Incorporate major charms: Use jump rings to connect each themed charm to designated chain links. Rotate charms slightly so they face forward when worn.
- Finish with clasps: Attach a lobster clasp to one end and a matching loop or D-ring to the other. Test closure strength before finalizing.
- Test functionality: Clip the adapter to your phone, fasten the clasp, and gently swing the phone to ensure no snagging or imbalance.
Material Comparison: Choosing the Right Base
Not all chains or cords perform the same under daily stress. The right base ensures longevity and comfort. Below is a comparison of common options:
| Material | Pros | Cons | Best For |
|---|---|---|---|
| Stainless Steel Chain | Durable, shiny, resists tarnish | Heavier, less flexible | Statement pieces, frequent outdoor use |
| Nylon Braided Cord | Lightweight, soft, washable | Less sparkle, can fray over time | Everyday wear, sensitive skin |
| Elastic Beading Wire | Flexible, easy to customize | Limited weight capacity | Kids’ accessories, lightweight designs |
| Leather Strap | Vintage nautical look, strong | Not waterproof, harder to modify | Retro maritime themes |
Real-Life Inspiration: Maya’s Festival Lanyard
Maya, a college student and festival enthusiast from San Diego, wanted a phone holder that matched her bohemian-meets-ocean aesthetic. She combined a silver curb chain with turquoise resin shell charms, tiny silver dolphins, and opalescent spacer beads. Her design included a central abalone pendant that caught the sunlight beautifully during daytime events.
She added a removable tassel made from embroidery floss dyed in ombre sea tones, which she could clip off when charging her phone. At her first music festival, multiple attendees asked where she bought it—only to be delighted when she explained it was handmade. Inspired, three friends later joined her for a DIY crafting night using this same method.
Common Pitfalls and How to Avoid Them
Even experienced crafters can make missteps. Here’s a checklist to keep your project smooth and professional-looking:
- ✅ Always pre-plan charm placement on a flat surface before attaching.
- ✅ Use flush-cutters for clean wire ends—protruding bits can scratch skin.
- ✅ Seal resin charms with a clear jewelry varnish if exposed to sweat or saltwater.
- ❌ Don’t skip testing the clasp mechanism—weak closures lead to lost phones.
- ❌ Avoid mixing metals unless intentionally going for a layered look (e.g., rose gold + silver).
Frequently Asked Questions
Can I wash my mermaid phone chain?
Spot clean only. Submerging metal components can cause rust or tarnish. Use a microfiber cloth dampened with mild soapy water, then dry immediately.
Will the charms damage my phone screen?
Not if properly assembled. Ensure all charms hang below the phone level and avoid sharp-edged pendants. Test movement before regular use.
How do I adjust the length later?
If using a chain, remove or add links with pliers. For cord-based designs, re-knotting is possible but less precise—measure carefully upfront.
Bring the Ocean to Your Everyday
Crafting a DIY mermaid phone chain lanyard is more than a fun pastime—it’s a celebration of individuality, creativity, and mindful making. In a culture saturated with mass-produced accessories, a handmade piece carries emotional value and personal significance. Each shimmering bead, each carefully placed charm, becomes part of your daily narrative.
Whether you wear it to the beach, to class, or to a weekend market, your lanyard serves as a reminder of the magic found in small, self-made details. And once you’ve mastered the basics, the possibilities expand: seasonal variations, gift versions for friends, or even starting a small craft business.


 浙公网安备
33010002000092号
浙公网安备
33010002000092号 浙B2-20120091-4
Comments
No comments yet. Why don't you start the discussion?