
Creating a picture frame at home is more than just a craft—it’s a way to personalize memories, express creativity, and add warmth to your living space. Store-bought frames often lack character or come with a high price tag. By making your own, you control the size, design, and materials, ensuring it complements both the photo and your decor. Whether you're framing a cherished family portrait, a child's artwork, or a favorite travel snapshot, this guide walks you through every stage of building a durable, beautiful frame from scratch.
Why Make Your Own Picture Frame?
Homemade frames offer unmatched customization. You can choose wood types, paint finishes, embellishments, and proportions that match your aesthetic. Beyond aesthetics, crafting teaches patience and precision while turning ordinary materials into meaningful objects. According to interior designer Maya Tran, “Handmade frames bring soul to a room. They reflect intention and care—something mass-produced items rarely convey.”
“Handmade frames bring soul to a room. They reflect intention and care—something mass-produced items rarely convey.” — Maya Tran, Interior Designer
Beyond personal satisfaction, DIY framing is economical. A custom wooden frame from a specialty store can cost $50–$150. With basic supplies, you can create one for under $15. Plus, once you master the technique, you can replicate it for gifts, seasonal displays, or gallery walls.
Materials and Tools You’ll Need
Before beginning, gather all necessary components. The right tools ensure clean cuts and secure joints, which are essential for a professional finish.
| Material/Tool | Purpose | Notes |
|---|---|---|
| Wood (poplar, pine, or reclaimed) | Frame structure | Avoid warped pieces; 1x2 inch boards work well for standard sizes |
| Miter box and hand saw (or power miter saw) | Cutting 45° angles | Power tools yield cleaner results but aren’t required |
| Wood glue and clamps | Securing corners | Use wood-specific adhesive for strength |
| Sandpaper (120 & 220 grit) | Smoothing edges | Essential for painted or stained finishes |
| Backing board (cardboard or hardboard) | Support behind photo | Cut to fit inside rabbet of frame |
| Acrylic sheet or glass substitute | Protects image | Lightweight acrylic is safer and easier to cut |
| Brad nails or small finishing nails | Reinforce glued joints | Optional but increases durability |
| Hanging hardware (D-rings, wire) | Wall mounting | Select based on frame weight |
Step-by-Step Construction Process
Follow this detailed sequence to build a sturdy, square frame that holds your photo securely.
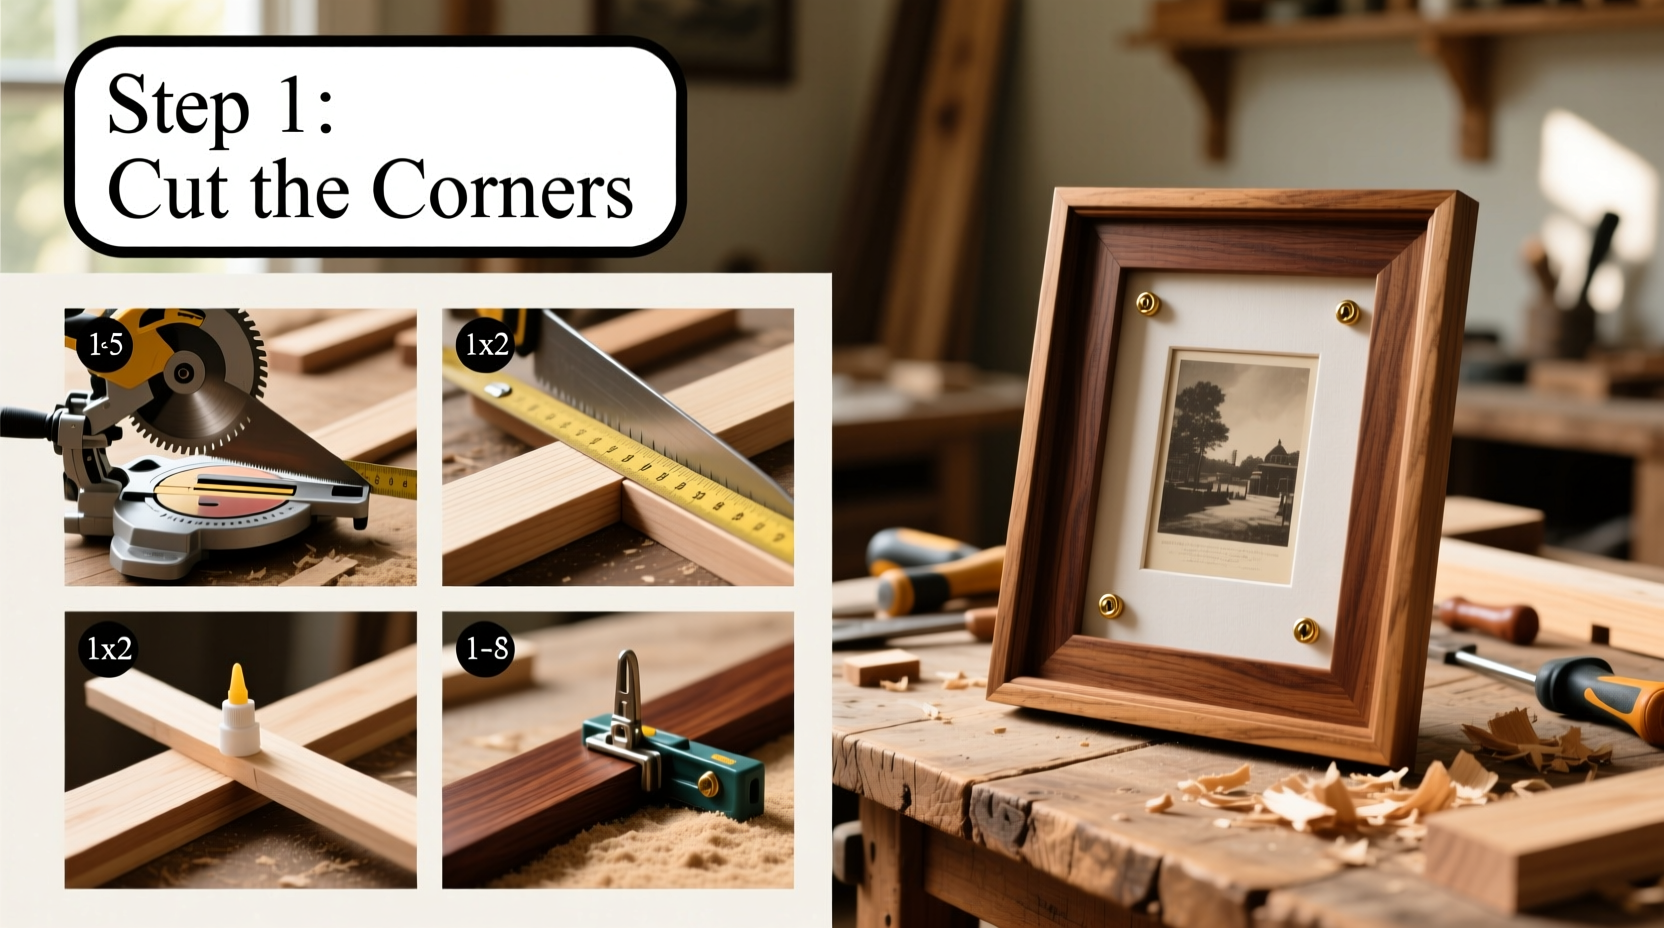
- Measure your photo or artwork. Add 1/4 inch to both height and width to allow space for the backing and glazing. For example, an 8x10 print needs an inner frame opening of 8.25x10.25 inches.
- Cut four frame pieces. Two horizontal and two vertical. Set your miter box to 45 degrees. Cut each end of the boards so they form perfect right angles when joined.
- Dry-fit the pieces. Arrange them face-down on a flat surface to confirm alignment. Adjust if corners don’t meet flush.
- Glue and clamp. Apply wood glue to each mitered edge. Join the corners and use corner clamps or rubber bands to hold them in place. Wipe excess glue immediately with a damp cloth.
- Reinforce with nails (optional). After the glue sets (wait 1–2 hours), insert brad nails through each corner for added strength.
- Sand the frame. Start with 120-grit to remove roughness, then finish with 220-grit for a smooth surface ready for staining or painting.
- Finish the wood. Apply stain with a brush or rag, following grain direction. For paint, use primer first, then two thin coats. Let dry completely between layers.
- Insert components. Place the acrylic sheet, then your photo, followed by the backing board. Secure everything with small metal points or flexible frame clips.
- Attach hanging hardware. Screw D-rings into the side rails (not the top) about one-third down from the top. Connect with picture wire.
Alternative Materials for Unique Styles
Wood isn’t the only option. Consider these alternatives for different textures and themes:
- Cardboard: Layer and glue thick corrugated sheets for a lightweight, modern look. Seal with mod podge.
- Scrap fabric + foam core: Wrap foam board with fabric for a soft, textile-based frame.
- Found objects: Use seashells, buttons, or driftwood glued onto a base frame for eclectic charm.
- PVC trim: Easy to cut and paint, ideal for moisture-prone areas like bathrooms.
Real Example: Framing a Child’s Artwork
Sarah, a parent in Portland, wanted to display her 6-year-old’s vibrant crayon drawing without spending $60 on a custom mat. She used scrap pine from a previous project, cut it to 9x12 inches, and painted the frame bright yellow with chalkboard paint on the outer edge—allowing her daughter to redraw messages monthly. The entire project took 90 minutes and cost less than $7. “It’s not perfect,” she says, “but it feels alive. We change the art every week, and the frame becomes part of the expression.”
Common Mistakes and How to Avoid Them
Even experienced crafters make errors. Learn from these frequent issues:
| Mistake | Consequence | Prevention |
|---|---|---|
| Inaccurate miter cuts | Gaps in corners | Double-check angle settings; use a speed square |
| Skipping sanding | Rough finish, poor paint adhesion | Sand before and after applying finish |
| Overtightening clamps | Warping or misalignment | Apply firm but gentle pressure |
| Using regular glass indoors | Safety hazard if broken | Opt for shatter-resistant acrylic |
| Attaching wire too tightly | Stress on frame over time | Allow slight slack for movement |
Finishing Touches That Elevate Your Frame
A great frame stands out through detail. Consider these enhancements:
- Add a liner or mat: Creates breathing room around the image. Use acid-free mat board to protect paper art.
- Burnish edges: Lightly darken mitered corners with a marker or stain pen to hide tiny gaps.
- Distress for vintage appeal: Sand edges intentionally after painting to reveal underlying wood or primer.
- Incorporate texture: Wrap sections with twine, burlap, or lace using strong craft glue.
Frequently Asked Questions
Can I make a frame without power tools?
Absolutely. A hand saw and miter box provide sufficient precision for small to medium frames. Take your time with cuts and double-check angles with a protractor.
How do I keep my photo from fading?
Use UV-protective acrylic instead of standard plastic. Also, avoid placing the frame in direct sunlight or near heat sources, which accelerate fading.
What if my frame isn’t perfectly square?
Minor imperfections are normal. Focus on clean joints and consistent finish. If the frame sags when hung, reinforce the back with a triangular brace or switch to heavier-duty hanging wire.
Final Checklist Before Display
- Confirm all joints are secure and dried.
- Check that the photo lies flat behind the glazing.
- Ensure no sharp edges or splinters remain.
- Verify hanging hardware is level and tight.
- Test balance by holding the frame against the wall before final mounting.
Bring Your Vision to Life
Crafting a picture frame at home blends practicality with personal expression. It invites mindfulness into everyday spaces and turns ordinary moments into curated displays. Every cut, sand, and brushstroke contributes to a piece that no store can replicate. Whether you’re framing a wedding photo, a child’s first scribble, or a landscape from your last adventure, the process deepens your connection to what matters most.


 浙公网安备
33010002000092号
浙公网安备
33010002000092号 浙B2-20120091-4
Comments
No comments yet. Why don't you start the discussion?