
The intersection of art and function comes alive in the form of handmade lighting. Among the most captivating forms is the puffer fish lamp—a sculptural piece inspired by the rounded, textured silhouette of the marine creature. With its organic shape and soft, diffused glow, this lamp adds an artistic touch to any space. What makes it even more appealing is that you can build one yourself using accessible materials and basic crafting techniques. This guide walks you through every phase of creating your own unique puffer fish lamp, from conceptualization to final assembly.
Understanding the Puffer Fish Lamp Design
The puffer fish lamp draws inspiration from nature’s ingenuity. Its defining features include a spherical body with radiating spines or protrusions and a warm internal light source that casts ambient shadows through the textured surface. Originally popularized by designers like Ingo Maurer, the concept has been adapted into DIY-friendly versions using paper, wire, fabric, or recycled plastics.
What sets this lamp apart is not just aesthetics but also sustainability. By crafting it at home, you reduce reliance on mass-produced decor and gain full control over materials, size, and finish. Whether you place it on a nightstand, hang it above a reading nook, or use it as a centerpiece, your handmade lamp becomes both a conversation starter and a functional work of art.
Materials and Tools Checklist
Before beginning construction, gather all necessary supplies. The beauty of this project lies in its adaptability—you can substitute materials based on availability and preference. Below is a comprehensive checklist to ensure you're fully prepared.
Essential Materials
- Balloon (large, round, durable)
- Papier-mâché paste (flour + water or white glue + water)
- Newspaper strips or tissue paper
- Wire coat hangers or flexible metal rods (for spines)
- LED string lights or small bulb fixture (low heat output)
- Acrylic paint (optional, for finishing)
- Clear sealant spray (matte or gloss)
- Scissors, pliers, utility knife
- Masking tape or hot glue gun
Optional Enhancements
- Fabric scraps for texture
- Recycled plastic bottles (cut into spine shapes)
- Natural dyes or eco-friendly pigments
- Dimmer switch module for adjustable brightness
“Handmade lighting allows for emotional connection. When people see a lamp they built themselves glowing softly in a room, there's pride—and warmth—in that light.” — Lena Torres, Sustainable Interior Designer
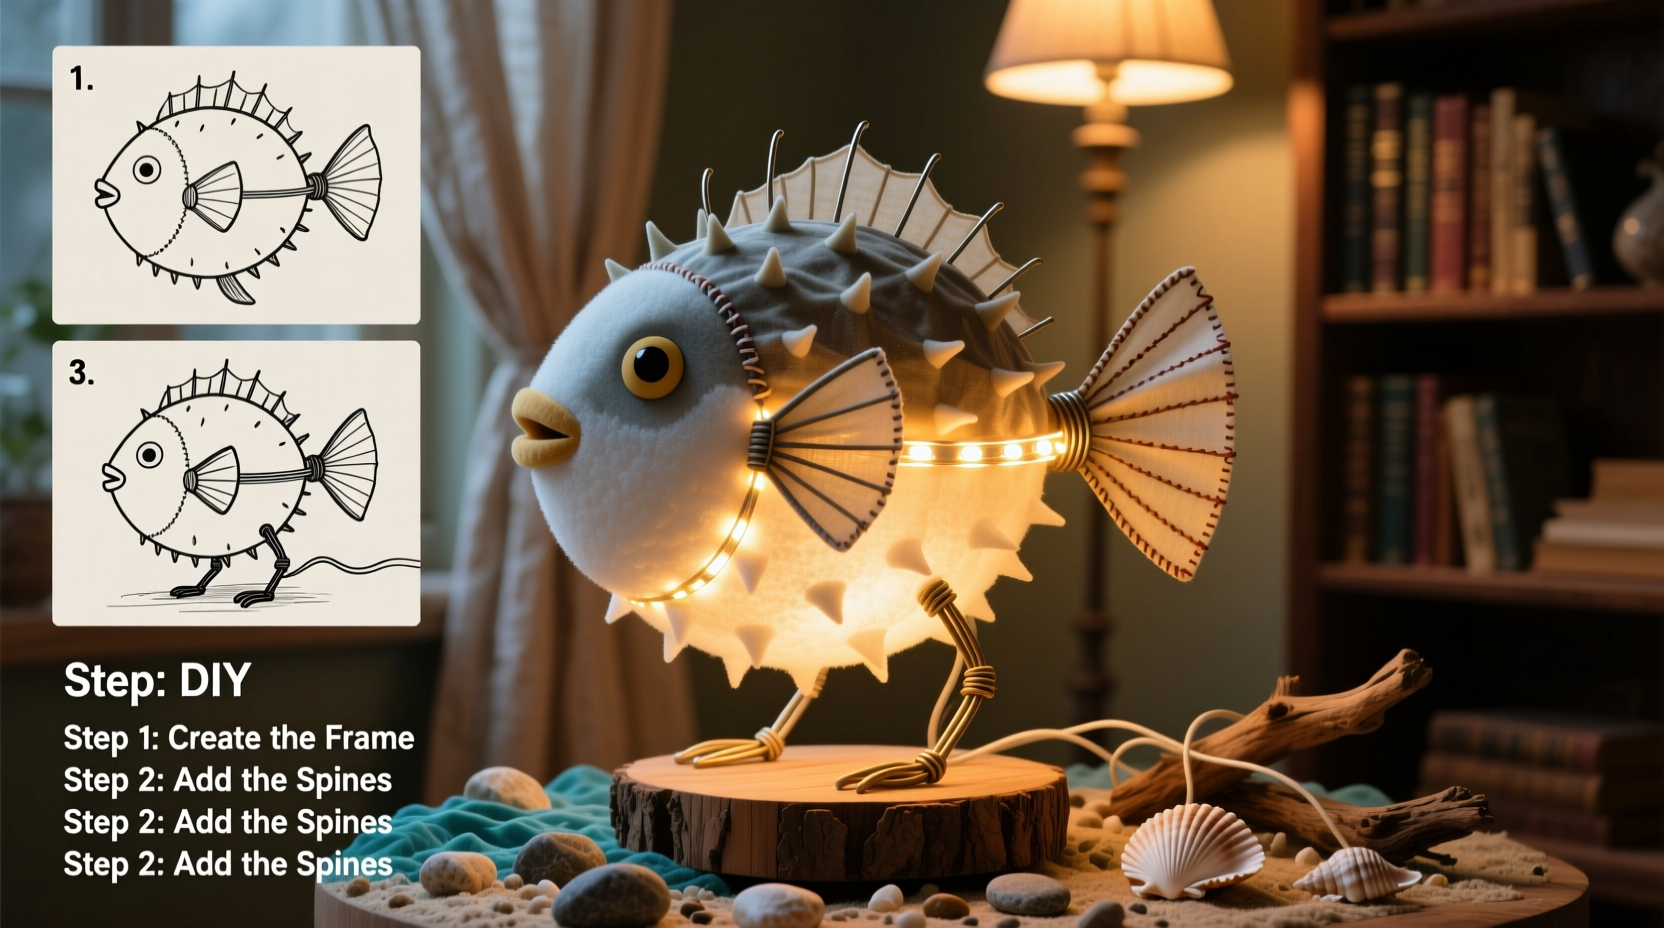
Step-by-Step Construction Process
Follow this detailed sequence to bring your puffer fish lamp to life. Each stage builds upon the last, ensuring structural integrity and visual appeal.
- Inflate and Prepare the Base: Blow up a large balloon to the desired size (8–12 inches diameter). Place it in a bowl to keep it stable during work.
- Apply Papier-Mâché Layers: Dip newspaper strips into flour-and-water paste (mix 1 part flour to 2 parts water), remove excess, and lay them smoothly over the balloon. Overlap slightly. Apply 3–4 layers, allowing each to dry completely (overnight recommended).
- Create the Spine Structure: Straighten wire coat hangers using pliers. Cut into 60–80 pieces, each about 6–8 inches long. Bend one end of each wire into a small hook or loop to anchor into the papier-mâché shell.
- Insert Spines Securely: Once the base sphere is dry, pop the balloon inside and remove it through a small hole. Insert wires evenly across the surface, pressing the hooked ends into the shell. Use hot glue around the base of each wire for added stability.
- Reinforce and Shape: Cover exposed wire bases with additional papier-mâché patches. Let dry again. Trim wire tips if needed to achieve uniform length or varied “spiky” effect.
- Add Light Source: Feed LED string lights or a low-wattage bulb fixture through the opening. Ensure wiring exits cleanly and safely. Never use high-heat bulbs—they can ignite paper or melt adhesives.
- Finish the Surface: Paint the lamp with acrylics if desired. Earth tones, ocean blues, or iridescent finishes enhance the aquatic theme. Seal with a non-flammable clear spray to protect against dust and minor moisture.
Tips for Structural Integrity
- Use multiple thin layers of papier-mâché instead of thick, uneven ones to prevent cracking.
- Test wire placement on a sketch before inserting to avoid clustering.
- Ensure all electrical components are UL-certified and battery-operated or properly insulated.
Design Variations and Material Comparison
Different materials yield distinct textures, weights, and durability. Consider your environment and purpose when selecting your approach.
| Material | Texture & Aesthetic | Weight | Fire Safety | Best For |
|---|---|---|---|---|
| Newspaper + Glue | Rustic, matte finish | Light | Moderate (sealant improves safety) | Beginners, temporary displays |
| Rice Paper + Mod Podge | Semi-transparent, soft glow | Very light | Lower (flammable if unsealed) | Ambient lighting, artistic spaces |
| Recycled Plastic Bottles (cut) | Glossy, modern, reflective | Medium | High (non-combustible) | Durable lamps, kids’ rooms |
| Fabric + Stiffener | Textured, tactile surface | Light to medium | Depends on fabric type | Decorative accent pieces |
Real Example: Maya’s Coastal Living Room Makeover
Maya, a freelance graphic designer from Portland, wanted to add ocean-inspired elements to her coastal-themed living room without buying expensive decor. She crafted a puffer fish lamp using recycled plastic bottle caps and cut PET bottles for the spines, attaching them to a papier-mâché core. She used cool-white LEDs to mimic underwater shimmer. After sealing with waterproof varnish, she hung it near a bookshelf with seashells and driftwood. Friends consistently comment on its uniqueness, and Maya reports it’s become her favorite evening light source—soft, calming, and entirely her own creation.
Frequently Asked Questions
Is the papier-mâché lamp durable enough for daily use?
Yes, when properly layered and sealed. Multiple coats of papier-mâché followed by a protective sealant make the structure surprisingly sturdy. Avoid placing it in high-traffic areas where it might be bumped, especially given the protruding spines.
Can I use a regular light bulb instead of LEDs?
No—incandescent or halogen bulbs generate too much heat and pose a fire risk when enclosed in paper or fabric. Always use LED lights, which remain cool and are energy-efficient. Battery-powered strings offer extra safety and portability.
How do I clean the lamp once it’s finished?
Dust gently with a microfiber cloth or soft brush. Do not wipe with wet cloths unless the surface is fully sealed and waterproof. Avoid spraying cleaners directly onto the material.
Final Thoughts and Call to Action
Crafting a puffer fish lamp is more than a weekend project—it’s an act of mindful creation. You engage with form, light, and texture while producing something genuinely useful and beautiful. Beyond aesthetics, this lamp symbolizes sustainability, patience, and personal expression. Every curve, spine, and shadow tells part of your story.
Now that you have the knowledge and steps, don’t just imagine the glow—build it. Start small, experiment with materials, and let your creativity expand beyond the template. Share photos of your finished lamp online, inspire others, or host a crafting session with friends. The world needs more handmade light.


 浙公网安备
33010002000092号
浙公网安备
33010002000092号 浙B2-20120091-4
Comments
No comments yet. Why don't you start the discussion?