
A small accessory can make a big statement. The mirror keychain is one of those quietly essential items—practical for quick touch-ups and expressive when personalized. Instead of buying generic versions from stores, why not design your own? With minimal materials and a bit of creativity, you can create a unique piece that reflects your personality, fits your style, and even doubles as a thoughtful handmade gift.
This guide walks you through the entire process—from choosing materials to final assembly—with expert tips, real-life inspiration, and smart design ideas. Whether you're new to crafting or looking to refine your technique, this project is accessible, rewarding, and surprisingly versatile.
Selecting Your Materials with Purpose
The foundation of a great DIY mirror keychain lies in the quality and compatibility of materials. While many kits use plastic mirrors, opting for a small glass cabochon mirror offers better clarity and durability. Pair it with a metal bezel (frame) that complements your aesthetic—antique brass, rose gold, or gunmetal are popular choices.
Beyond the mirror itself, consider what will surround it. Embellishments like resin charms, polymer clay accents, beads, or laser-cut wood shapes allow for deep customization. For the chain and clasp, lobster clasps are more secure than simple split rings, especially if the keychain will be used daily.
Essential Supplies Checklist
- Small round mirror (glass recommended)
- Metal bezel that fits the mirror snugly
- E6000 or two-part epoxy glue
- Keychain ring or split ring
- Lobster clasp with jump ring
- Decorative elements (stickers, resin charms, paint, etc.)
- Clear sealant (mod podge or UV resin)
- Tweezers and toothpicks (for precise handling)
- Safety gloves and well-ventilated workspace
Design Planning: Sketch Before You Build
Before gluing anything, spend time visualizing your design. A quick sketch—even on scrap paper—helps avoid mistakes later. Decide whether you want symmetry, bold colors, minimalist lines, or thematic elements (like florals, celestial motifs, or monograms).
If using stickers or printed images behind a transparent charm layer, test placement first. Some crafters use a digital mockup tool or simply lay components on a white sheet to preview contrast and balance.
“Planning prevents waste. I’ve seen so many beautiful pieces ruined by rushing the layout.” — Dana Ruiz, Handmade Accessories Designer
Do’s and Don’ts at a Glance
| Do | Don't |
|---|---|
| Use UV-resistant sealants for long-term color protection | Apply excessive glue inside the bezel (causes cloudiness) |
| Allow 24 hours drying time for epoxy bonds | Handle the piece immediately after gluing |
| Layer embellishments from back to front | |
| Wear gloves when working with strong adhesives | Work in poorly ventilated areas with chemical products |
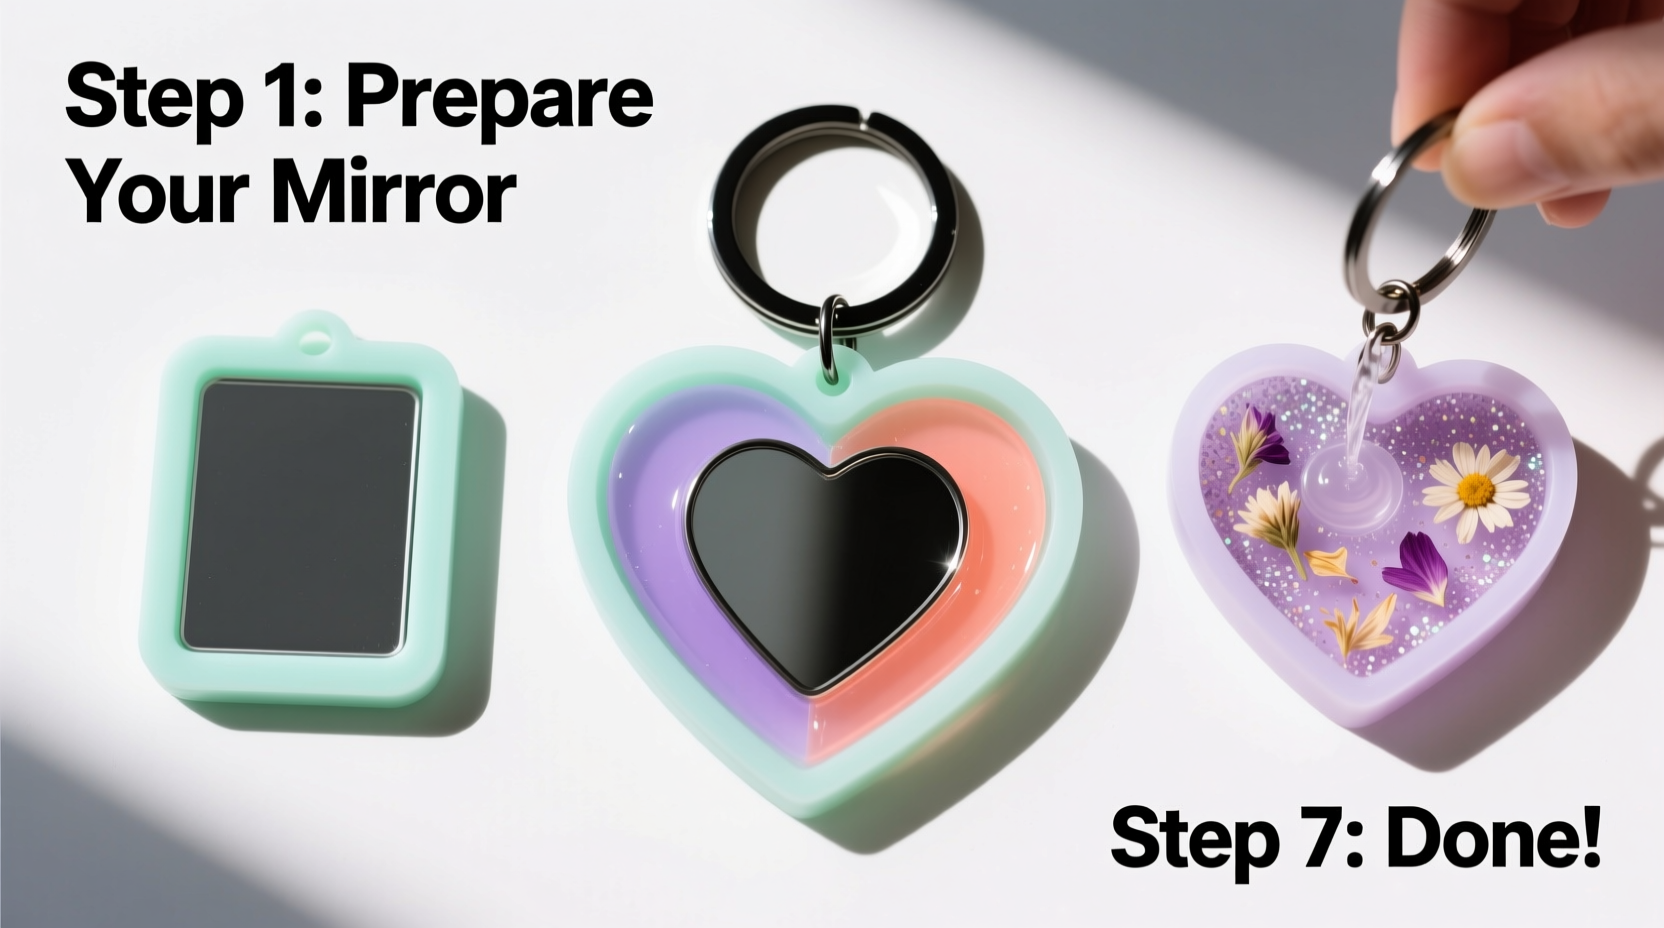
Step-by-Step Assembly Process
With materials gathered and design planned, follow this sequence for a polished result.
- Prepare the workspace: Cover your table with wax paper or silicone mat. Gather all tools within reach.
- Test fit the mirror: Place it into the bezel. It should sit flush without wobbling. If loose, add a thin wire loop as filler; if tight, gently sand inner edges.
- Add decorative layer (optional): If using paper cutouts or fabric, adhere them to the back of a clear cabochon dome first. Seal with mod podge and let dry.
- Apply adhesive: Squeeze a pea-sized amount of E6000 onto the center of the mirror’s back. Use a toothpick to spread evenly—avoid getting glue on the reflective surface.
- Insert mirror into bezel: Press firmly and hold for 10 seconds. Wipe excess glue with rubbing alcohol on a cotton swab.
- Attach embellishments: Position charms, beads, or painted details around the bezel edge. Secure with additional glue as needed.
- Cure overnight: Let the piece rest undisturbed for at least 12–24 hours in a dust-free area.
- Link hardware: Open the jump ring with pliers, thread through the bezel loop and lobster clasp, then close securely.
- Final seal (if applicable): For exposed paper or fabric, brush on a thin coat of UV resin and cure under sunlight or UV lamp.
Real-Life Inspiration: Maya’s Gift Keychains
Maya Torres, a high school art teacher from Portland, started making mirror keychains as end-of-year gifts for her students. She wanted something meaningful yet affordable. Using 20mm glass mirrors and custom-printed student initials on translucent film, she created a series of pastel-themed keychains sealed with glitter resin.
Each took about 20 minutes once she streamlined the process. “They loved seeing their names,” she said. “But more than that, they asked me how to make their own.” She now hosts an annual craft session before finals, teaching teens how to personalize accessories responsibly and creatively.
Her success shows how a simple DIY project can foster connection, encourage self-expression, and even inspire others to explore handmade design.
Customization Ideas to Elevate Your Design
Once you’ve mastered the basics, experiment with advanced touches:
- Themed sets: Create seasonal variations—snowflakes for winter, sunbursts for summer.
- Photo miniatures: Reduce tiny portraits or pet photos, seal under resin, and frame in the bezel.
- Glow-in-the-dark elements: Mix phosphorescent powder into epoxy for a fun nighttime effect.
- Textured backs: Glue on felt pads in fun patterns to protect pockets and add surprise detail.
- Eco-conscious builds: Use recycled bottle glass mirrors or upcycled jewelry parts.
For a professional finish, package your keychains in small kraft boxes tied with twine—ideal for gifting or selling at local markets.
Frequently Asked Questions
Can I use a broken mirror shard for this project?
It's possible, but not recommended unless you have proper safety gear. Glass shards can be sharp and uneven, posing risks during handling and use. Pre-cut cabochon mirrors are safer, smoother, and designed specifically for crafts.
How do I clean my DIY mirror keychain?
Wipe the surface gently with a microfiber cloth dampened with water or lens cleaner. Avoid soaking the bezel or hardware, especially if using non-waterproof adhesives or paper elements.
Is E6000 glue safe to use indoors?
E6000 emits strong fumes during curing. Always use it in a well-ventilated space, preferably near an open window with airflow. Wear nitrile gloves and avoid skin contact. Allow glued pieces to cure away from living areas if possible.
Make It Yours—And Share the Joy
Crafting a mirror keychain isn’t just about function—it’s about intention. Every choice, from color to charm, tells a story. This project proves that beauty doesn’t require complexity. With patience and care, you transform ordinary materials into something deeply personal.
Whether you keep it for yourself or give it to someone special, your handmade keychain carries a quiet pride—the kind that comes from creating something with your own hands. So gather your supplies, trust your instincts, and start building today.


 浙公网安备
33010002000092号
浙公网安备
33010002000092号 浙B2-20120091-4
Comments
No comments yet. Why don't you start the discussion?