
Drawing doesn’t have to be reserved for portraits or landscapes. Sometimes, the most joyful sketches come from everyday objects that spark curiosity—like cat toys. Whether you're a beginner with a pencil and notebook or an experienced artist exploring whimsical themes, illustrating playful feline amusements can sharpen your observational skills, boost creativity, and bring lighthearted fun to your sketchbook. This guide walks you through designing and drawing cat toys in a way that’s accessible, imaginative, and surprisingly educational.
Why Draw Cat Toys?
Cat toys may seem like simple subjects, but they offer rich opportunities for artistic growth. They combine varied textures (feathers, fabric, crinkly plastic), dynamic shapes (wands, balls, tunnels), and movement implied through form. Drawing them helps you practice rendering materials, understanding perspective in small objects, and capturing playfulness in still life. Plus, if you share your home with a cat, observing how they interact with toys adds real-life context to your drawings.
“Small subjects often reveal the biggest details. A feather teaser isn’t just a stick with fluff—it’s a study in motion, texture, and interaction.” — Lila Chen, Illustration Instructor at Bloom Art Academy
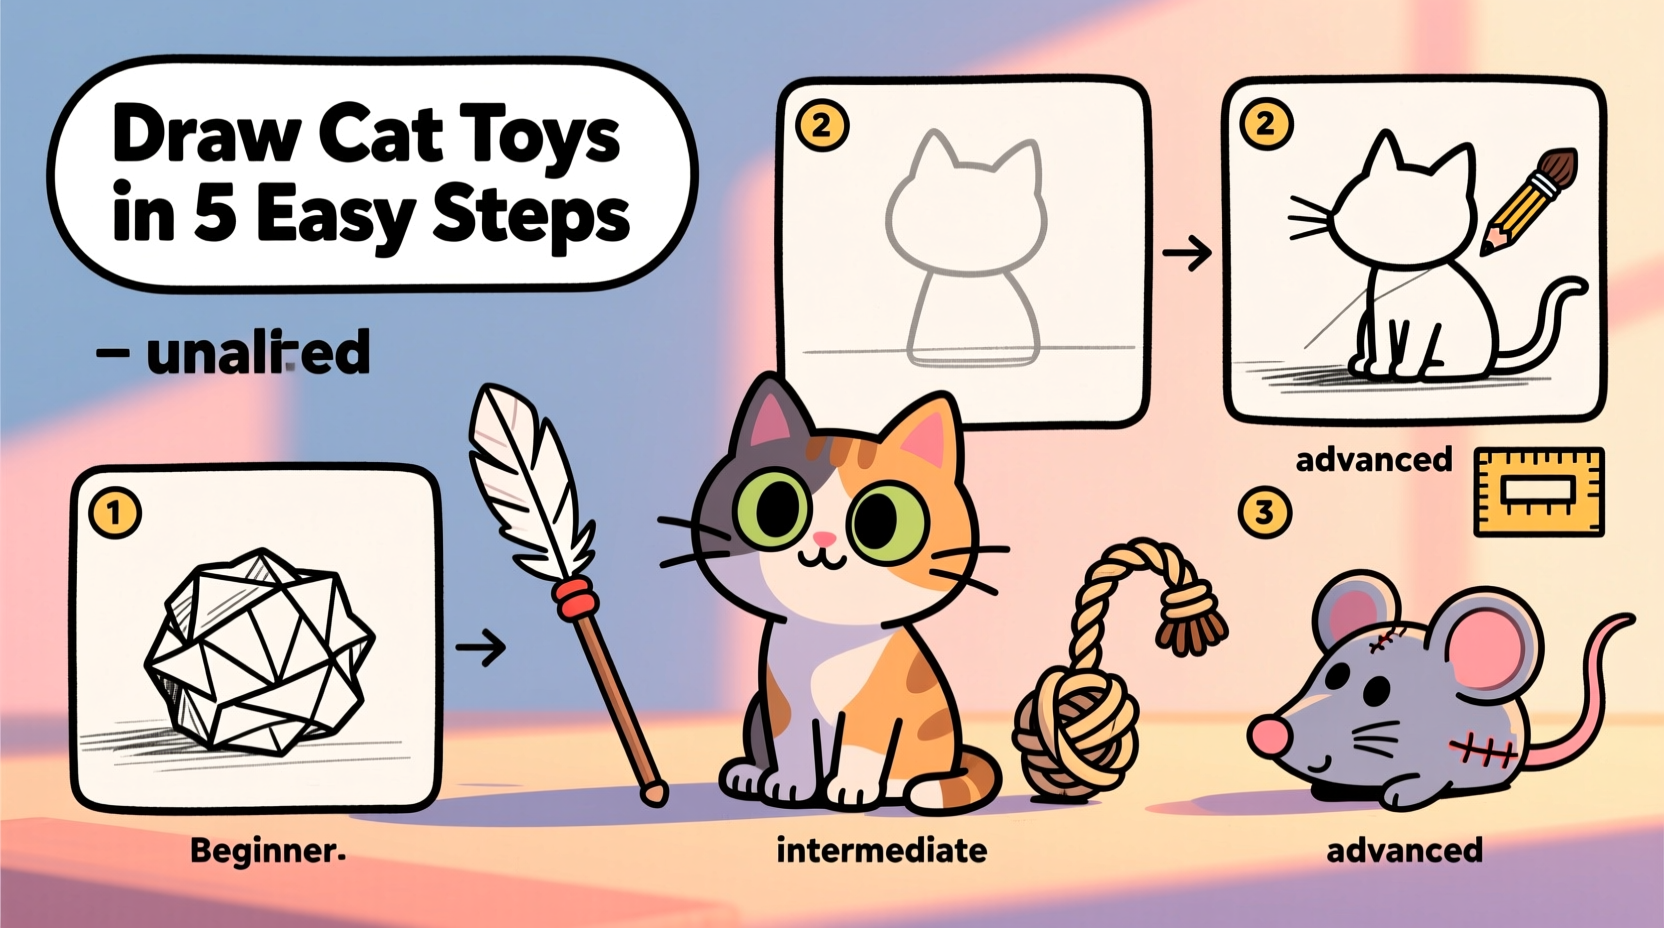
Step-by-Step Guide: From Concept to Completed Sketch
Follow this structured approach to create detailed, expressive drawings of cat toys, regardless of your current skill level.
- Gather Reference Materials: Collect photos or actual toys. Observe how light hits the surface, where shadows fall, and how different materials reflect or absorb light.
- Choose Your Toy Type: Start simple—a felt mouse, a crinkle ball, or a wand toy. Each has distinct features ideal for learning specific techniques.
- Sketch Basic Shapes: Break down complex forms into circles, ovals, cylinders, and rectangles. For example, a feather wand is a long rectangle (stick) with small ovals (feathers).
- Add Details Gradually: Refine outlines, add stitching on fabric mice, layer feathers, or suggest crinkle patterns on plastic.
- Apply Shading and Texture: Use cross-hatching for fabric, stippling for fuzzy surfaces, and smooth gradients for glossy parts.
- Finalize with Context: Place your toy in a mini scene—a paw nearby, a string dangling, or a hint of a cardboard scratcher in the background.
Selecting the Right Tools for Your Skill Level
Your toolkit should match your experience and goals. Here’s a breakdown of recommended supplies based on proficiency:
| Skill Level | Recommended Tools | Best For |
|---|---|---|
| Beginner | Pencil (HB or 2B), eraser, sketchpad | Practicing basic shapes and proportions |
| Intermediate | Mechanical pencil, blending stump, fine liner pen | Adding texture and clean linework |
| Advanced | Graphite set (2H–6B), colored pencils, digital tablet | Realistic shading, color variation, digital rendering |
Designing Original Cat Toys Through Drawing
Once you’re comfortable drawing existing toys, challenge yourself to invent new ones. This exercise combines artistry with imagination and even touches on functional design thinking.
- Think about what cats love: movement, noise, texture, and unpredictability.
- Combine elements—what if a ping-pong ball had tiny bells inside and fur on the outside?
- Sketch multiple variations of a single idea before finalizing one.
- Label materials in your drawing (e.g., “catnip-infused felt,” “crinkle lining”) to give it authenticity.
Inventing toys on paper allows you to explore absurdity and innovation without limits. One artist sketched a “laser disco ball” that projects moving dots in random patterns—inspired by her cat’s obsession with light reflections. Though not yet built, the concept became a popular illustration on pet-themed art platforms.
Mini Case Study: The Scribble & Pounce Project
Jamie Reyes, a graphic designer and cat owner, started doodling toy ideas during work breaks. What began as idle sketches evolved into “Scribble & Pounce,” a personal series of illustrated toy concepts shared weekly on social media. Using only a pencil and iPad, Jamie combined vintage toy aesthetics with modern materials, like a wind-up mouse with LED eyes or a biodegradable feather teaser.
The project gained traction not because the toys were realistic, but because they captured the spirit of play. Veterinarians and cat behaviorists even cited the series in talks about environmental enrichment for indoor cats. Jamie’s takeaway? “You don’t need to build the toy. Just drawing it with intention makes it meaningful.”
Common Pitfalls and How to Avoid Them
Even experienced artists can misstep when drawing small, intricate objects. Here’s what to watch for—and how to fix it.
| Do’s | Don’ts |
|---|---|
| Use light initial lines so mistakes are easy to correct | Press too hard too soon—this limits adjustments |
| Study real toys to understand construction (e.g., how strings attach) | Assume all toys are symmetrical—many are intentionally uneven to trigger curiosity |
| Add subtle imperfections—frayed edges, bent feathers—for realism | Over-detail early; save fine work for the final stages |
Frequently Asked Questions
Can I draw cat toys if I’ve never drawn animals or objects before?
Absolutely. Cat toys are excellent starter subjects because they’re small, stationary, and full of clear shapes. Begin with a felt mouse or a yarn ball—both rely on basic forms like ovals and spirals. As your confidence grows, move to more complex items like interactive puzzle feeders.
How do I make my drawings look more three-dimensional?
Focus on consistent light direction. Decide where the light source is (e.g., top-left) and shade accordingly. Use gradations—from dark near edges to light on exposed surfaces—to create volume. A crinkle ball, for instance, isn’t uniformly gray; it has highlights and deep crevices.
Should I use color in my drawings?
Only when you’re ready. Master grayscale first to understand value and contrast. Once comfortable, introduce color thoughtfully: bright red for a jingle ball, pastel yellow for a soft plush toy. Remember, cats see limited color spectrum—drawing toys in muted blues and yellows can be both realistic and stylistically intriguing.
Checklist: Your First Cat Toy Drawing Session
Before you begin, run through this quick checklist to ensure a productive and enjoyable session:
- ☐ Choose one toy to focus on (start simple)
- ☐ Gather reference images or the actual object
- ☐ Prepare your tools (pencil, eraser, paper, sharpener)
- ☐ Set up good lighting (natural light is best)
- ☐ Sketch basic shapes lightly before adding details
- ☐ Step back every few minutes to assess proportions
- ☐ Sign and date your drawing—track your progress over time!
Conclusion: Turn Play into Art
Drawing cat toys is more than a quirky hobby—it’s a gateway to improving fundamental art skills while celebrating the joy pets bring. Every stroke teaches you something: how light plays on textured surfaces, how to simplify complex forms, or how imagination can turn a ping-pong ball into a masterpiece. Whether you’re sketching for relaxation, building a portfolio, or designing real toys someday, the process matters as much as the result.


 浙公网安备
33010002000092号
浙公网安备
33010002000092号 浙B2-20120091-4
Comments
No comments yet. Why don't you start the discussion?