
Handmade bag charms are more than just decorative accents—they’re tiny expressions of personality, style, and creativity. Whether you're looking to personalize a plain tote, gift a thoughtful handmade item, or simply enjoy a relaxing craft session, creating your own bag charm offers endless possibilities. With basic tools and a bit of imagination, you can design something truly unique that reflects your taste or tells a story. This guide walks you through the entire process—from concept to completion—with practical tips, material suggestions, and expert insights to ensure your charm turns out both beautiful and durable.
Why Make Your Own Bag Charm?
Store-bought charms can be charming, but they often lack personal significance. A handmade piece allows you to choose every detail: color, shape, texture, and symbolism. You might incorporate initials, favorite colors, meaningful symbols like hearts or stars, or even seasonal themes like snowflakes or flowers. Beyond aesthetics, crafting your own charm is a mindful activity that fosters creativity and provides a sense of accomplishment. Plus, handmade items make heartfelt gifts—personalized not just in design, but in effort.
“Handmade accessories carry emotional weight. When someone sees a charm you made, they don’t just see an object—they see care.” — Lila Nguyen, Craft Designer & Educator
Materials and Tools You’ll Need
The beauty of making a bag charm lies in its accessibility. Most materials can be found at craft stores or repurposed from old jewelry or fabric scraps. Below is a list of essentials categorized by function:
| Category | Items |
|---|---|
| Focal Element | Fimo clay pendants, wooden beads, resin shapes, metal charms, felt cutouts |
| Connectors | Jump rings, lobster clasps, key rings, split rings |
| Embellishments | Beads, sequins, embroidery thread, tassels, miniature pom-poms |
| Tools | Pliers (flat-nose and round-nose), scissors, glue (E6000 or fabric glue), needle and thread (if sewing) |
| Finishing Touches | Clear sealant (for clay or paper), ribbon, chain pieces |
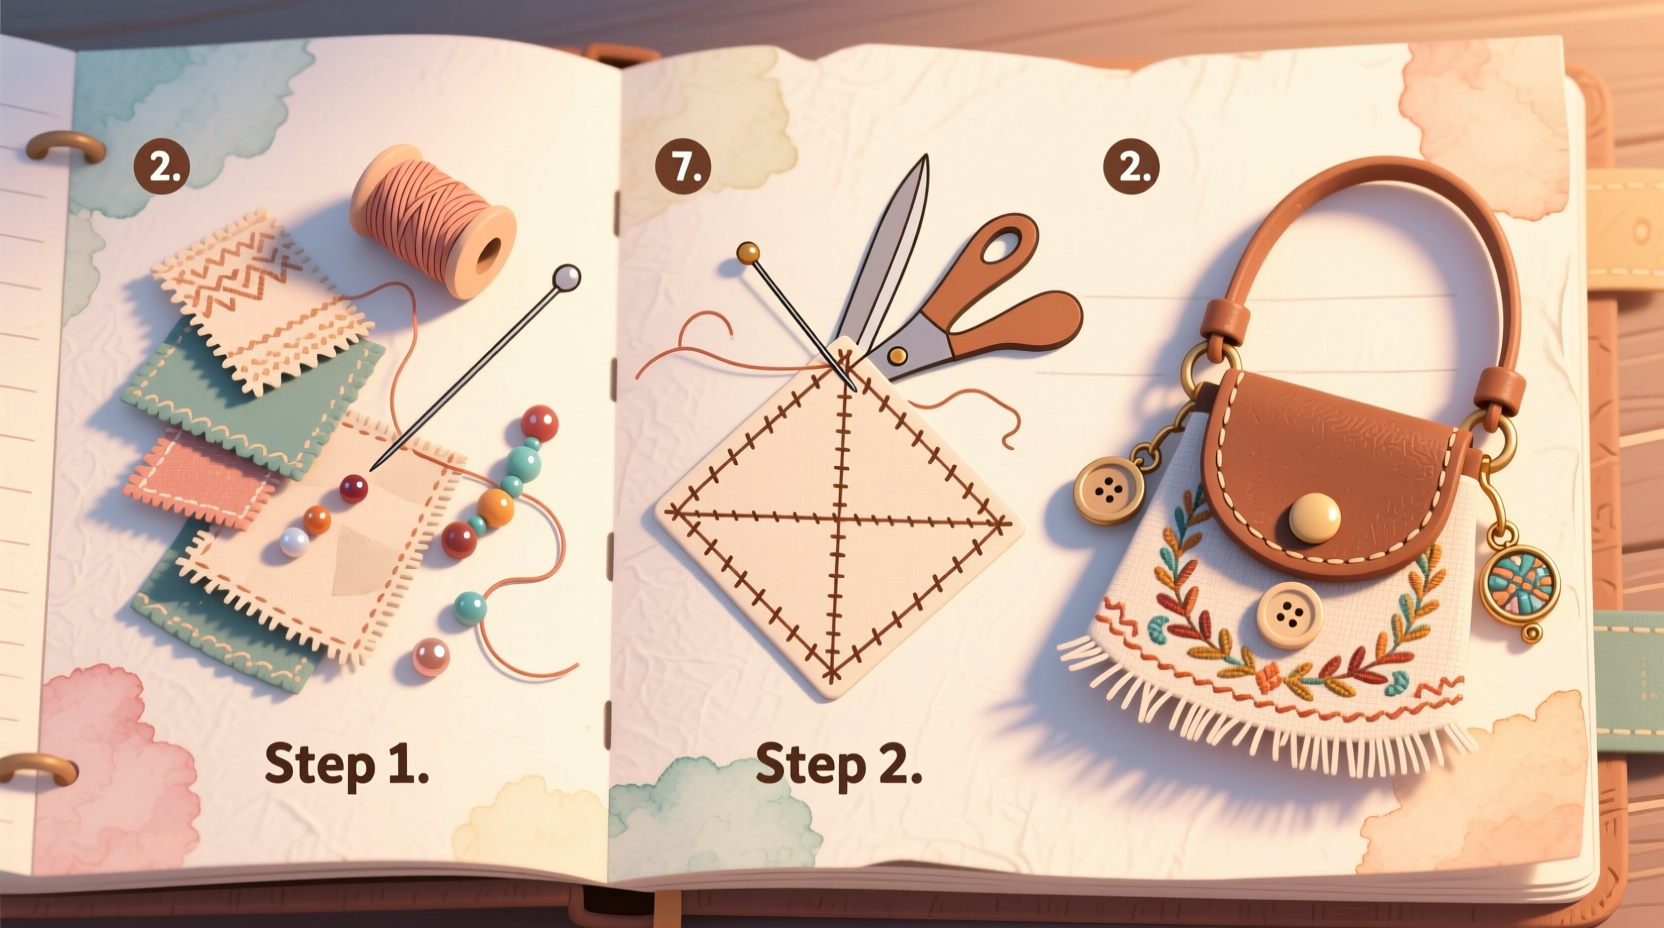
Step-by-Step Guide to Crafting Your Charm
Follow this detailed sequence to create a professional-looking charm that’s both stylish and sturdy.
- Define Your Theme: Decide on a mood or message—playful, elegant, minimalist, whimsical. Sketch a rough idea or gather inspiration from Pinterest or nature.
- Select a Base Element: Choose your central piece. For example, roll and bake a small polymer clay disc with stamped letters, or use a pre-cut wooden heart.
- Add Texture or Detail: Paint, engrave, or embed tiny beads into soft clay before baking. If using fabric, embroider initials or appliqué a smaller shape.
- Attach a Connector: Once your base is dry or cured, open a jump ring with pliers and slide it through the charm’s loop or drilled hole. Close securely.
- Incorporate Layers: Add dangling elements—a few seed beads on a headpin, a mini tassel, or a secondary charm. Use additional jump rings to link them.
- Finish with Protection: Seal porous materials like clay or paper with a clear varnish to resist moisture and wear.
- Link to a Key Ring or Clip: Attach a lobster clasp or large key ring so it can easily hook onto bags, zippers, or backpacks.
Design Ideas and Creative Variations
Don’t limit yourself to traditional shapes. Here are some original concepts to spark inspiration:
- Miniature Nature Scene: Combine a tiny faux leaf with a bead “dewdrop” and hang it from a rustic leather cord.
- Alphabet Charm: Use a single letter bead or hand-sculpted initial to represent a name or mantra (e.g., “B” for bravery).
- Seasonal Miniatures: Create holiday-themed charms—pumpkins for fall, snowmen for winter, suns for summer.
- Memory Tokens: Embed a photo snippet under resin or include a vintage button from a family garment.
- Movement Elements: Design charms with spinning parts using small washers or ball joints for kinetic interest.
Real Example: Maya’s Graduation Gift Charm
Maya wanted to give her best friend a meaningful gift after graduation. She crafted a charm featuring a tiny blue enameled book (symbolizing their shared love of literature), a gold star for achievement, and a silver “F.F.” tag for “Forever Friend.” She strung these on a short chain with a lobster clasp and attached it to a handwritten note. Her friend clipped it to her new work bag—and still uses it two years later. The charm became a daily reminder of their bond.
Common Pitfalls and How to Avoid Them
Even simple projects can go awry without attention to detail. Refer to this checklist before finalizing your charm:
- Weak Connections
- Ensure jump rings are fully closed. A gap can cause components to slip off.
- Overloading
- Too many elements make the charm bulky and prone to snagging. Stick to 2–3 complementary pieces.
- Using Non-Durable Materials
- Avoid paper or untreated wood if the charm will be exposed to rain or frequent handling.
- Unbalanced Weight
- Heavy bases with flimsy connectors may pull apart. Match metal strength to charm size.
“Durability starts with structure. If it can’t survive a bumpy commute, it’s not ready.” — Rafael Torres, Jewelry Artisan
Checklist: Final Quality Review
Before gifting or using your charm, run through this quick evaluation:
- ✅ All connections are secure and closed tightly
- ✅ No sharp edges or loose threads
- ✅ Surface finish is smooth and sealed (if needed)
- ✅ Clasp opens and closes smoothly
- ✅ Charm hangs evenly when attached
Frequently Asked Questions
Can I make a bag charm without any special tools?
Yes. While pliers help with precision, you can use strong tape or adhesive clips to attach lightweight charms. For example, glue a felt heart directly to a key ring using waterproof craft glue and let it cure for 24 hours.
How do I make a charm last longer?
Use weather-resistant materials like coated metal, sealed polymer clay, or synthetic fibers. Avoid placing charms in direct sunlight for long periods, as UV rays can fade colors and weaken adhesives.
Are there eco-friendly options for handmade charms?
Absolutely. Repurpose broken jewelry, use natural fibers like cotton or wool, choose biodegradable felt, or carve shapes from sustainably sourced wood. Even old denim scraps can become stylish fabric charms.
Conclusion: Bring Your Vision to Life
Crafting a handmade bag charm is more than a DIY project—it’s a chance to infuse everyday objects with meaning and artistry. From selecting the perfect shade of thread to choosing a symbol that resonates deeply, each decision adds character. Whether you’re making one for yourself or as a gift, the process cultivates patience, focus, and joy. Now that you have the tools, techniques, and inspiration, there’s no reason to wait. Gather your materials, set aside an hour, and start creating. Your next favorite accessory is just a few steps away.


 浙公网安备
33010002000092号
浙公网安备
33010002000092号 浙B2-20120091-4
Comments
No comments yet. Why don't you start the discussion?