
Every wardrobe has that one forgotten tote—once a favorite, now tucked in the back of a closet. Instead of discarding it, consider giving it new life as a functional, fashion-forward backpack. With minimal tools and a bit of creativity, you can upcycle any sturdy tote into a hands-free companion perfect for commuting, weekend outings, or even light hiking. This guide walks you through the transformation process, offering practical advice, design ideas, and real-world applications to ensure your DIY project is both stylish and durable.
Why Convert a Tote Into a Backpack?
Tote bags are spacious and often made from high-quality materials, but their lack of shoulder support makes them uncomfortable for extended wear. Converting one into a backpack redistributes weight across both shoulders, improving ergonomics while preserving the bag’s original charm. Beyond comfort, this project promotes sustainable fashion—reducing waste and extending the lifecycle of an existing item.
Upcycling also allows for personalization. Whether you want bold straps, contrasting stitching, or added pockets, the transformation becomes a canvas for self-expression. As designer and textile artist Lena Torres notes:
“Reimagining everyday items isn’t just about function—it’s about storytelling. Every stitch on a repurposed bag carries intention.” — Lena Torres, Sustainable Fashion Designer
Step-by-Step Transformation Process
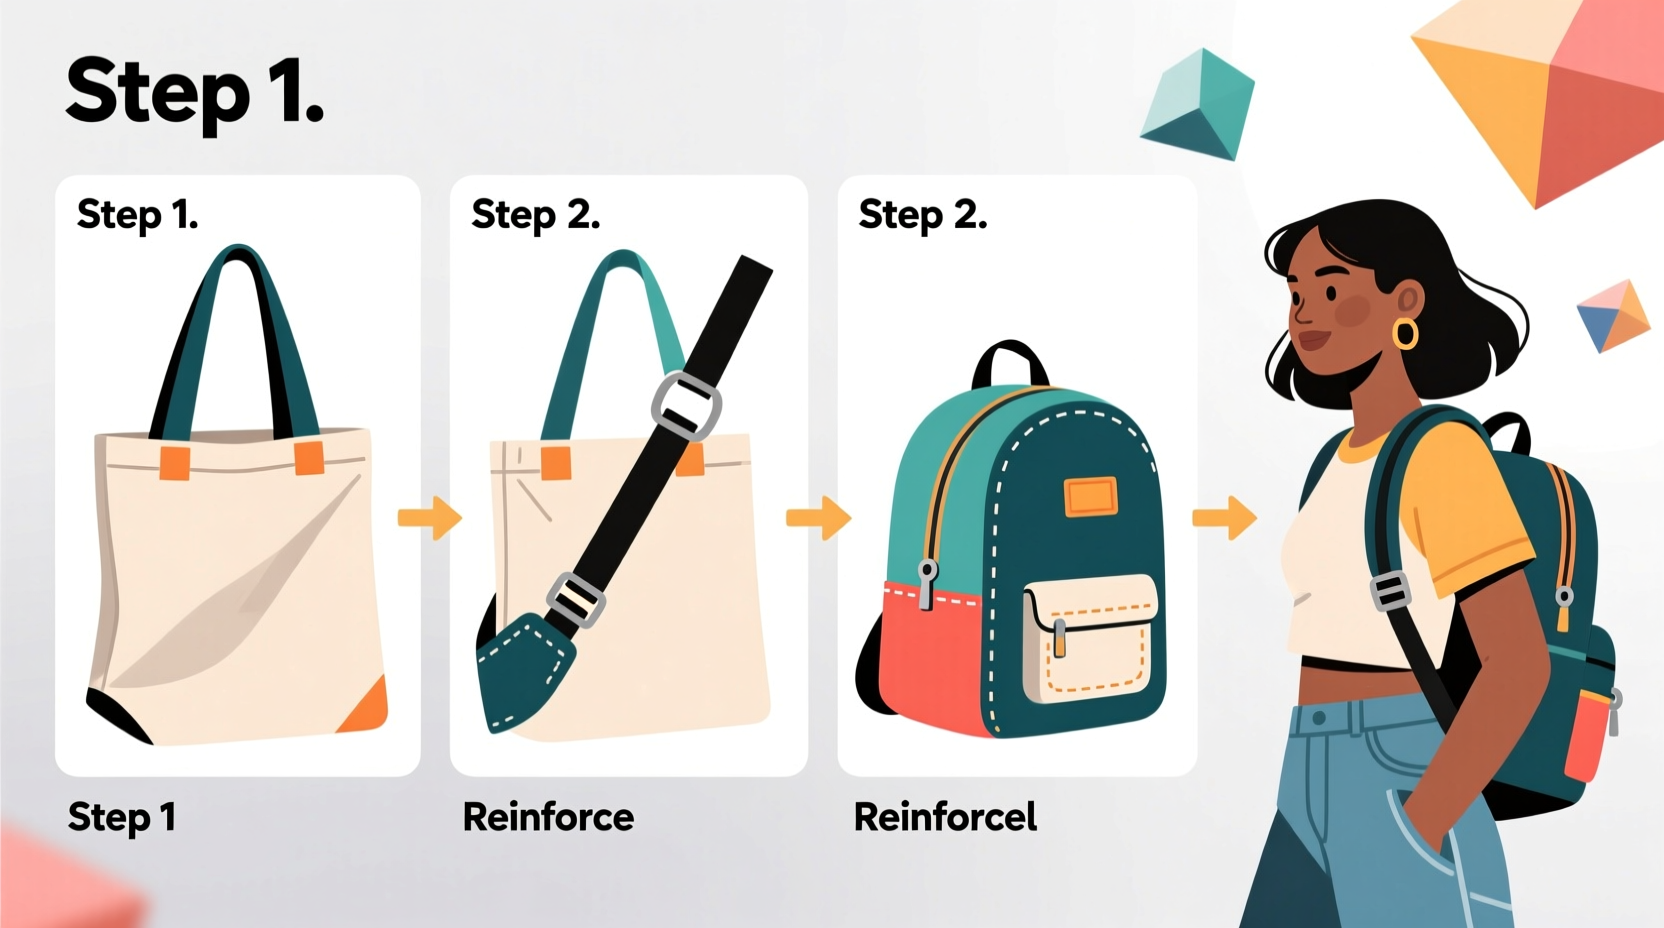
Follow this detailed timeline to convert your tote into a reliable, stylish backpack. Allow 2–3 hours for completion, depending on sewing experience.
- Assess Your Tote: Choose a tote made of durable fabric like canvas, denim, or heavy cotton. Avoid flimsy materials or those with significant wear at the top edges.
- Gather Materials: You’ll need measuring tape, fabric scissors, two strap sections (minimum 45 inches each), a needle and thread or sewing machine, pins, chalk or fabric marker, and optional reinforcement patches.
- Measure and Mark Strap Placement: Turn the tote inside out. Measure 3–4 inches from each side seam and mark the top edge center. These points will anchor your straps.
- Attach Straps Securely: Fold the end of each strap into a ½-inch hem and pin it over the marked spot, forming a “D” shape with the strap loop facing inward. Sew in a box-and-X pattern for maximum strength—this distributes stress and prevents tearing.
- Reinforce Stress Points: Add small fabric patches beneath the stitched areas if working with thinner material. This step is crucial for bags meant to carry books, laptops, or groceries.
- Test and Adjust: Flip the bag right-side out and try it on. Ensure straps are even and sit comfortably on your shoulders. Trim excess length if needed, but leave enough room for future adjustments.
Design Customization Ideas
Once the basic structure is complete, personalize your backpack to reflect your style. Consider these enhancements:
- Add a front zippered pocket using leftover fabric and a zipper from an old jacket.
- Paint or stencil a motif using fabric paint—geometric patterns, botanical prints, or abstract brushstrokes work well.
- Sew on fabric patches, embroidery, or pom-poms for texture and flair.
- Line the interior with waterproof material or add a removable pouch for organization.
For those without sewing skills, fabric glue designed for textiles can secure lightweight additions. However, avoid relying on adhesive alone for structural elements like straps.
Material and Tool Checklist
Before starting, verify you have all necessary supplies. This checklist ensures nothing is overlooked.
- Sturdy tote bag (clean and dry)
- Two adjustable backpack straps (or fabric to make your own)
- Sewing machine or heavy-duty needle and thread
- Fabric scissors
- Pins or clips
- Measuring tape
- Chalk or washable fabric marker
- Reinforcement patches (optional but recommended)
- Iron (if using iron-on stabilizers)
Common Pitfalls and How to Avoid Them
Even simple projects can go awry without proper planning. The table below outlines frequent mistakes and their solutions.
| Mistake | Consequence | Solution |
|---|---|---|
| Uneven strap placement | Bag tilts to one side | Measure precisely and double-check before sewing |
| Weak stitching at anchor points | Straps detach under load | Use box-and-X stitch pattern; reinforce with patches |
| Overloading the converted bag | Bottom seam splits | Add internal support band or limit contents |
| Using stretchy or slippery fabric for straps | Discomfort and slippage | Choose rigid, non-slip materials like nylon webbing |
A Real-World Example: Maya’s Market-to-Metro Makeover
Maya, a graphic designer in Portland, had a large canvas tote from a music festival she no longer used. It featured bold screen-printed artwork but was too bulky to carry by hand daily. She decided to convert it into a commuter backpack.
She measured and attached 50-inch padded straps sourced from an old hiking pack, reinforcing each connection with denim patches from discarded jeans. She added a magnetic snap closure to the flap and lined the interior with a bright yellow fabric for visibility. The result? A unique, conversation-starting backpack that’s been her go-to for over a year—used for farmer’s market runs, subway commutes, and even short weekend trips.
“It feels better than buying new,” she says. “I know exactly how it was made, and it carries memories plus functionality.”
Frequently Asked Questions
Can I convert a leather tote into a backpack?
Yes, but use a leather needle and heavy-duty thread. Pre-punch holes with an awl to prevent cracking. Due to leather’s stiffness, consider shorter straps positioned slightly wider for balance.
What if I don’t own a sewing machine?
Hand-sewing works with patience. Use a backstitch for durability and waxed thread to reduce fraying. Focus on tight, close stitches at stress points. Reinforcement patches are even more important in hand-sewn versions.
How much weight can a converted tote safely carry?
Most upcycled totes handle 10–15 pounds if properly reinforced. Avoid heavy textbooks or electronics unless you’ve added bottom gusset support or internal framing. When in doubt, treat it as a casual-use backpack rather than a technical one.
Final Thoughts and Next Steps
Transforming a tote bag into a backpack is more than a craft project—it’s a statement of mindful consumption and creative confidence. By reworking what you already own, you reduce reliance on fast fashion while crafting something uniquely suited to your lifestyle.
Start with a bag you love but no longer use. Follow the steps carefully, prioritize structural integrity, and let your personality shine through custom details. Once you’ve completed your first conversion, challenge yourself with a second—try reversible linings, modular pockets, or water-resistant finishes.


 浙公网安备
33010002000092号
浙公网安备
33010002000092号 浙B2-20120091-4
Comments
No comments yet. Why don't you start the discussion?