
Adding a personal touch to your everyday accessories doesn’t require expensive upgrades. One of the most expressive and affordable ways to refresh your handbag, backpack, or tote is by attaching a handmade bag charm. These small embellishments do more than just decorate—they reflect personality, spark conversations, and turn an ordinary bag into a statement piece. With minimal supplies and a bit of creativity, you can design a charm that’s entirely your own. Whether you're drawn to whimsy, elegance, or bold minimalism, this guide walks through the process of crafting a one-of-a-kind charm from concept to completion.
Why Make Your Own Bag Charm?
Store-bought charms are widely available, but they often lack originality. Mass-produced designs repeat across brands, making it likely someone else owns the same one. A DIY charm gives you full control over materials, colors, shape, and meaning. You can incorporate meaningful symbols—initials, lucky charms, or cultural motifs—or repurpose sentimental items like broken jewelry or fabric scraps from old clothes. Beyond aesthetics, the act of making something by hand fosters mindfulness and creative confidence.
“Handmade accessories carry emotional weight. They’re not just decorative—they tell stories.” — Lila Nguyen, Textile Artist & Craft Educator
Materials You Can Use (And Where to Find Them)
The beauty of DIY bag charms lies in accessibility. Most materials can be sourced from around the house or inexpensive craft stores. Consider combining textures and layers for visual interest. Here’s a breakdown of common materials grouped by category:
| Material Type | Examples | Best For |
|---|---|---|
| Fabric & Fiber | Felt, embroidery floss, yarn, ribbon, lace | Soft, lightweight charms; ideal for sewing or knotting |
| Paper & Cardstock | Scrapbook paper, photo prints, pressed flowers | Decorative flat charms sealed with resin or laminate |
| Clay & Resin | Polymer clay, air-dry clay, epoxy resin | Durable, sculpted shapes; can be painted or glazed |
| Metal & Hardware | Jump rings, keychains, findings, washers | Structural components and connectors |
| Found Objects | Buttons, beads, broken jewelry, bottle caps | Upcycled, eclectic designs with character |
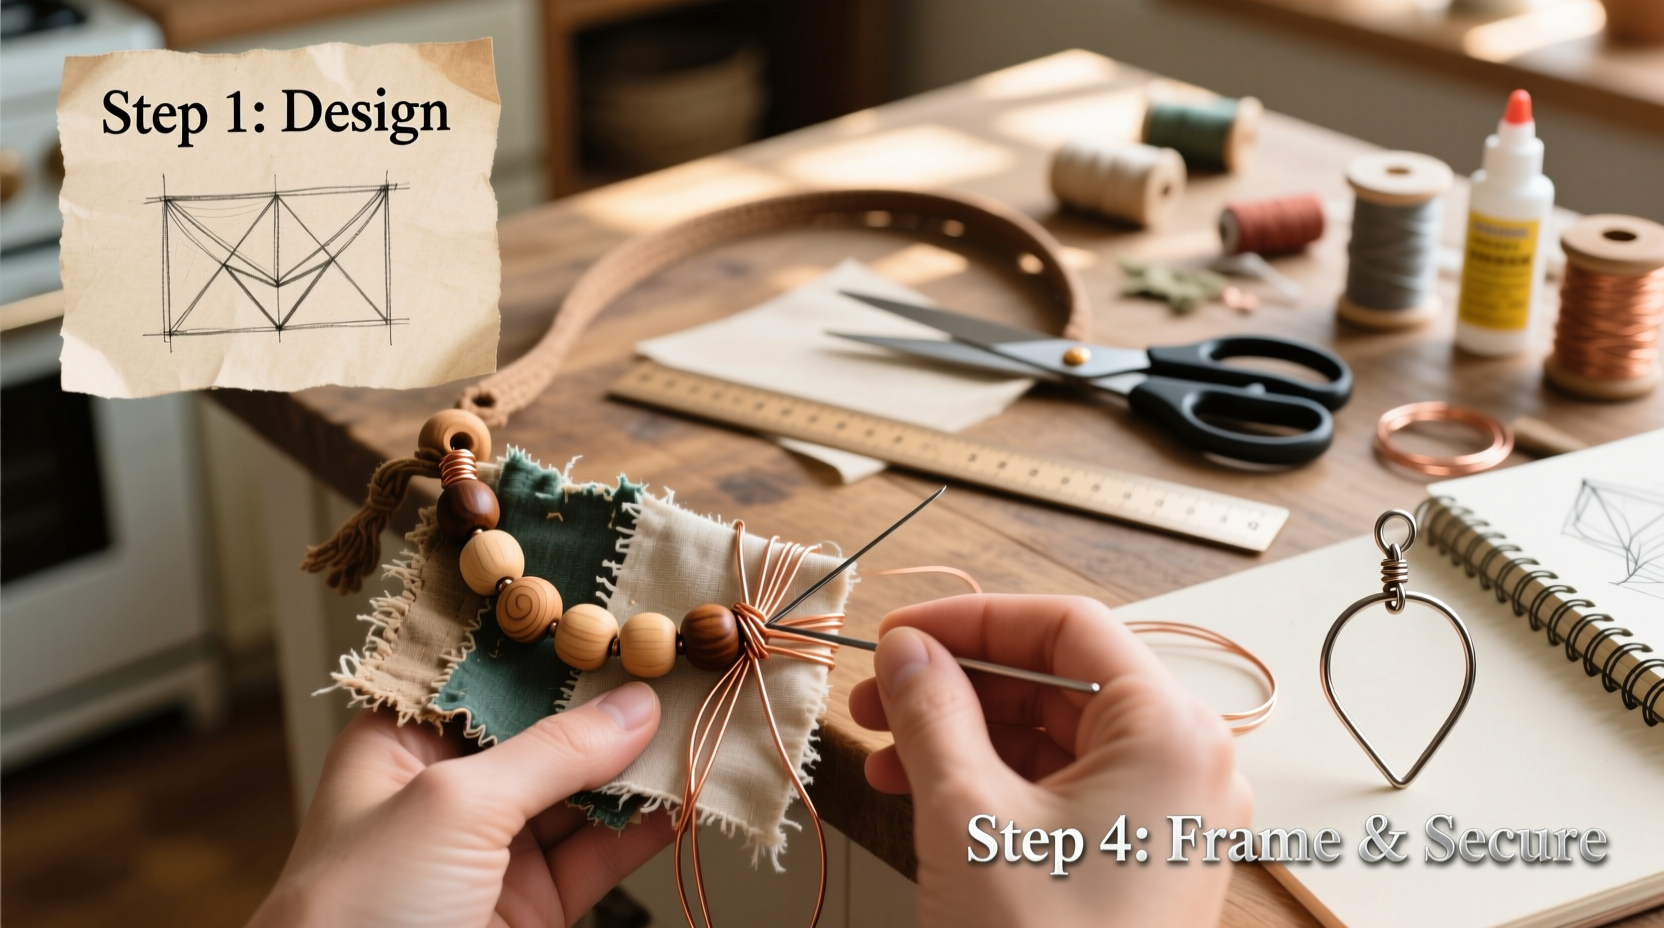
Step-by-Step Guide to Creating Your Charm
Follow this structured approach to bring your vision to life, whether you're a beginner or have prior crafting experience.
- Define Your Theme: Decide on a mood or message—playful, elegant, nostalgic, or seasonal. Sketch a rough idea or collect inspiration from Pinterest or nature.
- Gather Materials: Pull together everything you’ll need. Include tools like scissors, glue, pliers, and a ruler. Organize by color or function.
- Create the Main Element: This could be a felt heart, a clay animal, a folded origami crane, or a miniature photo frame. Focus on durability—avoid overly fragile components unless sealed.
- Add Dimension: Layer materials. Glue a bead inside a metal ring, wrap yarn around a wooden disc, or stitch embroidery details onto fabric.
- Attach the Connector: Use a jump ring or split ring to link your charm to a lobster clasp or keyring. Ensure the connection is secure—test by gently tugging.
- Seal If Necessary: For paper or porous materials, apply a clear sealant or dip in resin to protect against moisture and wear.
- Test It Out: Clip the charm to your bag and assess balance and movement. Adjust weight or length if it drags or swings awkwardly.
Real Example: Maya’s Memory Charm
Maya wanted to honor her grandmother who loved gardening. She pressed a small violet from her garden, sealed it between two resin-coated glass cabochons, then mounted it on a brass filigree setting. She added tiny green seed beads as leaves and attached it to a vintage-style keyring. The finished charm reminded her of afternoon tea in the garden and became a daily source of comfort. “It’s not just cute,” she said. “It feels like carrying a piece of her with me.”
Design Ideas to Spark Inspiration
If you’re unsure where to start, try one of these themed concepts:
- Miniature Books: Roll tiny paper scrolls, tie with thread, and attach to a book-shaped base made from cardboard or clay.
- Emoji Faces: Use felt or polymer clay to create expressive faces—smiling sun, winking star, or dramatic crying cloud.
- Nature-Inspired: Embed dried lavender, seashells, or acorn caps in resin for earthy appeal.
- Travel Tokens: Combine a tiny compass, map snippet, and luggage tag for wanderlust lovers.
- Alphabet Charms: Spell initials or meaningful words using letter beads or hand-painted tiles.
Common Mistakes to Avoid
Even simple projects can go off track. Watch out for these pitfalls:
- Weak Attachments: Flimsy jump rings or poor glue can lead to lost charms. Always use jewelry-grade findings.
- Overloading Weight: Heavy charms strain zippers and straps. Stick to lightweight cores like foam, balsa wood, or hollow beads.
- Ignoring Durability: Unsealed paper or untreated fabric may stain or tear. Consider how the charm will interact with weather and daily use.
- Lack of Balance: Asymmetrical designs might tilt awkwardly. Test placement before finalizing attachments.
FAQ: Your DIY Charm Questions Answered
Can I wash a fabric-based bag charm?
It’s best to avoid washing. If cleaning is needed, spot-clean gently with a damp cloth. To increase resilience, seal fabric with fabric stiffener or mod podge before assembly.
What’s the safest way to attach a charm to a delicate bag?
Use a lobster clasp on a sturdy part of the bag, such as a strap rivet or dedicated charm loop. Avoid clipping directly onto thin fabric or leather trim that could tear.
How long does a DIY charm last?
With proper materials and sealing, a well-made charm can last years. Resin-sealed pieces and metal findings endure the longest, especially when stored with care.
Essential Checklist for Success
Before you begin, run through this quick checklist to ensure a smooth process:
- ☑ Choose a theme or story behind your charm
- ☑ Collect all materials and tools in one workspace
- ☑ Test structural elements (rings, clasps) for strength
- ☑ Seal any vulnerable materials (paper, fabric, natural elements)
- ☑ Attach charm to bag and evaluate look and function
- ☑ Store extras in a small box to protect from dust and damage
Make It Meaningful, Make It Yours
A bag charm is more than a decoration—it’s a wearable expression of identity. By investing time in crafting your own, you create something no store can replicate. Whether it’s a tribute, a joke only you understand, or a celebration of your favorite color, the charm becomes part of your narrative. Start small: try a single bead on a chain, then build up to layered, multi-element designs. Share your creations with friends, gift them to loved ones, or swap with fellow crafters.


 浙公网安备
33010002000092号
浙公网安备
33010002000092号 浙B2-20120091-4
Comments
No comments yet. Why don't you start the discussion?