
For collectors and fans alike, an Iron Man action figure is more than just a toy—it’s a symbol of innovation, heroism, and personal style. While off-the-shelf models are impressive, true enthusiasts know that the real magic happens when you take customization into your own hands. With the right tools and creative vision, you can transform a standard figure into a one-of-a-kind masterpiece that reflects your imagination and craftsmanship.
Whether you're aiming for screen accuracy, futuristic upgrades, or a fully original design, customizing your Iron Man figure offers endless possibilities. From advanced painting techniques to integrating LED lighting and even 3D-printed armor pieces, this guide dives deep into professional-level methods used by top hobbyists around the world.
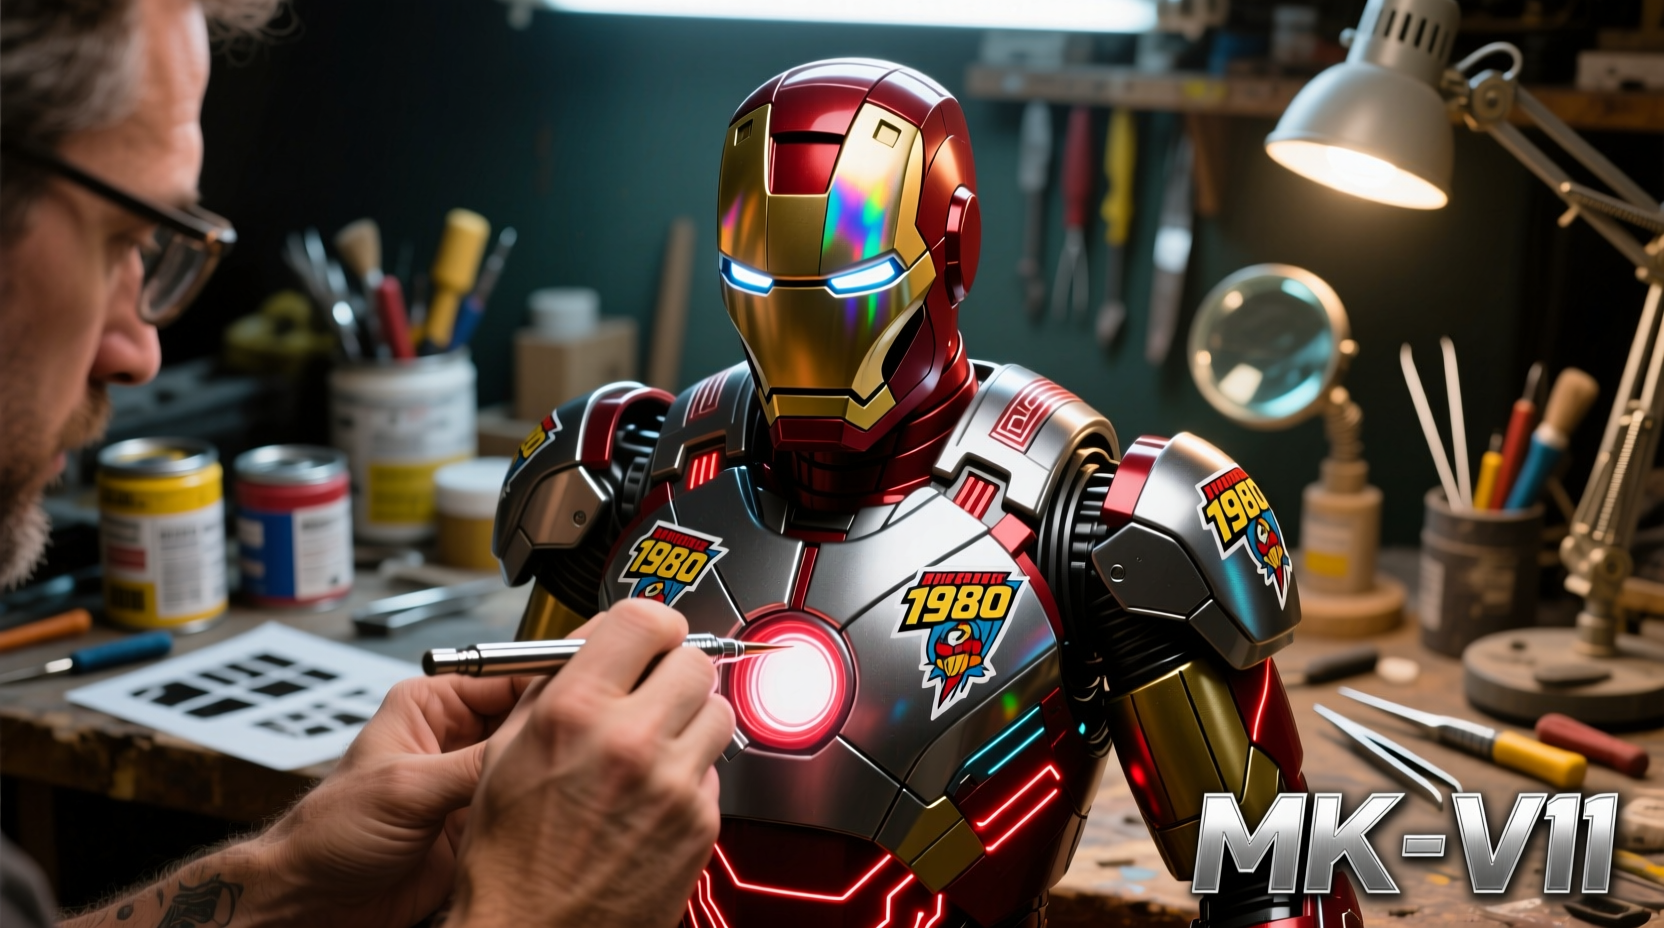
Select Your Base Figure Strategically
The foundation of any great custom starts with the right base. Not all Iron Man figures are created equal when it comes to modifiability. Look for models with clean sculpt lines, durable plastic, and articulated joints that allow for easy disassembly. Figures in the 6-inch scale (such as those from Marvel Legends) are ideal due to their balance of detail and workability.
- Choose figures with minimal paint applications if you plan to repaint.
- Avoid soft vinyl parts—they’re harder to glue and paint cleanly.
- Prioritize figures with interchangeable hands and heads for added flexibility.
Master Precision Painting Techniques
Repainting is the most accessible way to personalize your Iron Man figure. However, achieving a pro finish requires more than just slapping on new colors. The key lies in surface prep, layering, and sealing.
- Dismantle and clean: Remove all parts and wash with mild soap and water. Let dry completely.
- Sand lightly: Use 400–600 grit sandpaper to scuff glossy surfaces for better paint adhesion.
- Prime: Apply a thin coat of plastic primer (like Mr. Surfacer 1000) to create a uniform base.
- Paint: Use acrylics or lacquer-based model paints. Airbrushing delivers the smoothest results; hand-brushing works with patience.
- Detail: Switch to fine-tipped brushes for intricate elements like arc reactor patterns or circuitry lines.
- Seal: Finish with a matte, satin, or gloss clear coat depending on the desired effect.
For a battle-damaged look, try dry brushing with silver or gray over red areas. To simulate heat wear, add subtle gradients near the repulsors using orange and yellow highlights.
| Paint Type | Best For | Tool Recommendation |
|---|---|---|
| Acrylic Enamel | Beginners, hand painting | Fine sable brush (#0–#2) |
| Lacquer | Smooth finishes, airbrushing | Airbrush + compressor |
| Weathering Washes | Dirt, grime, aging effects | Thin brush or sponge |
Integrate Functional Lighting
No Iron Man customization is complete without glowing elements. Adding LEDs to the eyes, palms, chest reactor, and even joints brings your figure to life.
Use surface-mount (SMD) LEDs in warm white or blue tones for authenticity. Small coin-cell batteries or micro lithium packs power the lights discreetly inside the torso. Wiring should be thin (30-gauge) and secured with epoxy or hot glue to prevent strain.
For wireless activation, consider magnetic reed switches. Place a small magnet in the hand or base—the figure “powers up” when the hand closes or touches the stand.
“Lighting transforms a static figure into a dynamic display piece. It’s not just about brightness—it’s about storytelling.” — Rafael Mendez, Custom Action Figure Artist & Exhibitor at San Diego Comic-Con
Design and Attach Custom Armor Pieces
Advanced customizers often replace or augment original armor sections with newly designed components. This is where 3D modeling and printing come into play.
Using software like Blender or Tinkercad, you can design sleeker gauntlets, reinforced shoulder plates, or even a nano-tech inspired helmet. Print in resin for high detail or PLA for durability. Once printed, sand and prime the parts before painting to match the rest of the figure.
Attachment methods vary:
- Glue with super glue or epoxy for permanent fixes.
- Use rare-earth magnets for removable, swappable armor.
- Modify existing pegs or sockets to accept new parts securely.
One popular trend is creating \"Mark 50+\" variants—reimagining Tony Stark’s suits with enhanced plating, asymmetrical designs, or alternate color schemes like black chrome or matte crimson.
Mini Case Study: The Nano-Gold Rises Custom
Jamie Tran, a mechanical engineer and hobbyist from Austin, Texas, spent six weeks transforming a standard Mark LXXXV figure into a museum-quality display piece. He 3D-printed extended nanotech tendrils around the limbs, embedded 11 micro LEDs (including individually lit fingers), and hand-painted weathering effects to suggest post-battle wear.
Using a transparent resin chest piece, he layered fiber-optic strands to make the arc reactor pulse realistically. The figure now sits on a themed base with holographic UI projections made from etched acrylic. Jamie’s build was featured in *Custom Figure Weekly* and inspired dozens of similar projects online.
Essential Customization Checklist
Follow this step-by-step checklist to ensure no detail is overlooked:
- Disassemble the figure safely and catalog all parts.
- Clean and lightly sand surfaces for paint adhesion.
- Apply primer and allow full curing time (24 hours recommended).
- Paint base colors using thin, even coats.
- Add details and weathering effects.
- Seal with appropriate clear coat.
- Install LEDs and test circuits before final reassembly.
- Attach custom armor or accessories securely.
- Reassemble and pose for display.
- Photograph under different lighting to showcase details.
Frequently Asked Questions
Can I customize a budget-friendly figure, or do I need a premium model?
Absolutely. Even affordable figures can be transformed with paint and lighting. However, higher-end models often have better sculpts and articulation, making modifications easier and more visually rewarding.
How do I prevent paint from chipping on moving joints?
Use flexible model paints or apply a rubberized sealant over joints. Avoid thick layers in high-movement areas, and consider leaving some joint interiors unpainted for durability.
Is 3D printing necessary for serious customization?
Not required, but it opens vast creative doors. You can also sculpt parts by hand using epoxy putty (like Milliput) for smaller modifications without needing a printer.
Elevate Your Craft and Share Your Vision
Customizing an Iron Man action figure isn’t just about altering plastic—it’s about expressing creativity, honoring a legacy of innovation, and connecting with a global community of passionate builders. Every brushstroke, soldered wire, and redesigned plate tells a story only you can create.
Don’t wait for perfection to begin. Start small: repaint a helmet, add a single LED, or modify one armor piece. Each project builds skill and confidence. When you’re ready, share your work online. Post timelapses, write tutorials, or join forums where fellow customizers celebrate progress over polish.


 浙公网安备
33010002000092号
浙公网安备
33010002000092号 浙B2-20120091-4
Comments
No comments yet. Why don't you start the discussion?