
In a world increasingly focused on minimalism and personalization, the idea of carrying only essentials has gained momentum. One practical solution is the keychain wallet—a compact, stylish alternative to bulky wallets that fits neatly on your keyring. What makes it even more appealing? You can make one yourself at home with just a few basic supplies. Weaving your own lightweight keychain wallet not only saves money but also allows for full creative control over design, color, and functionality. This guide explores accessible weaving techniques, material choices, and step-by-step construction methods to help you craft a durable, functional, and uniquely yours.
Why Weave Your Own Keychain Wallet?
Commercial keychain wallets often come in limited designs and may use synthetic materials that wear out quickly. By crafting your own, you gain several advantages: customization, sustainability, and cost-efficiency. Handmade items also carry personal significance—each stitch reflects time, care, and intention. Whether you're an experienced crafter or a curious beginner, weaving a wallet from scratch fosters mindfulness and provides a tangible sense of accomplishment.
“Weaving connects function with artistry. A well-made keychain wallet isn’t just practical—it’s a small wearable piece of craftsmanship.” — Lena Torres, Textile Artist & Craft Educator
Materials and Tools You’ll Need
The beauty of this project lies in its simplicity. Most materials are affordable and easy to source, many even repurposed from household items. Below is a checklist of essentials:
- Waxed nylon cord or paracord (550 type) – 6–8 feet per wallet
- Keyring (stainless steel or brass, 1–1.5 inch diameter)
- Scissors (sharp, fabric-grade)
- Lighter or heat tool (for sealing cord ends)
- Ruler or measuring tape
- Clipboard or tape (to hold work in place while weaving)
- Optional: leather patch or fabric liner for added durability
Choosing the Right Cord
The cord you select affects both appearance and durability. Waxed nylon offers a sleek finish and resists fraying, while paracord is thicker and ideal if you prefer a rugged look. For a minimalist aesthetic, consider using thinner embroidery floss (braided into strands), though it’s less durable for daily use.
| Material | Strength | Water Resistance | Best For |
|---|---|---|---|
| Paracord (550) | High | Yes | Durable, outdoor-style wallets |
| Waxed Nylon | Medium-High | Yes | Sleek, urban designs |
| Embroidery Floss | Low-Medium | No | Decorative or temporary pieces |
| Leather Lace | High | Moderate | Luxury finish with natural texture |
Step-by-Step Guide: Weaving a Square Knot Keychain Wallet
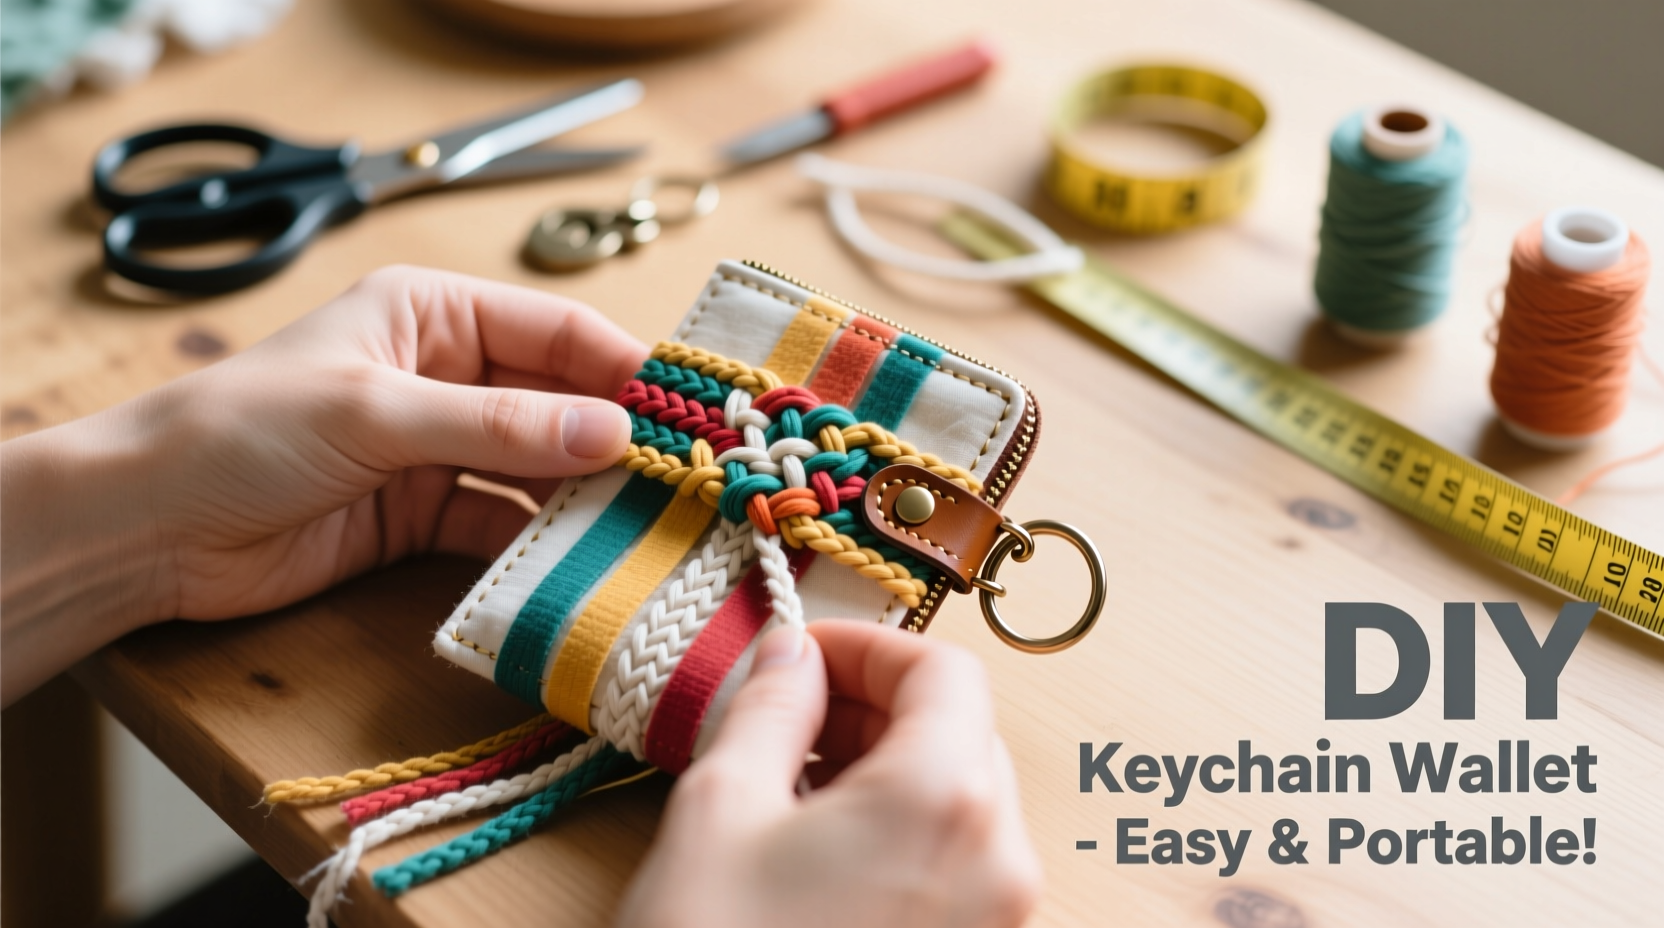
One of the most effective and beginner-friendly techniques is the square knot weave. It creates a dense, interwoven pattern that securely holds folded bills and a card or two. Follow this sequence to build your first wallet:
- Cut four strands of 18-inch paracord or waxed nylon. Fold them in half and attach the looped end to the keyring using a lark’s head knot.
- Divide into two groups of four strands (two left, two right). These will form your working pairs.
- Weave the first square knot: Take the left outer strand over the two center strands and under the right outer strand. Pull the right outer strand under the center and through the left loop. Tighten. Repeat in reverse to complete the knot.
- Repeat for 1.5 inches, ensuring each knot is snug against the previous one. This forms the base pocket.
- Add a card slot (optional): Insert a small strip of stiffened fabric or thin plastic between two central strands before continuing the weave for another inch to create a divider.
- Finish with a locking knot: After 3–4 inches of weaving, tie a final square knot across all strands. Trim excess to 0.5 inch and melt the ends carefully with a lighter to prevent unraveling.
Creative Variations and Design Ideas
Once you’ve mastered the basic square knot, experiment with patterns to personalize your wallet:
- Spiral Weave: Use a single knot repeatedly in the same direction to create a twisted, rope-like effect.
- Diagonal Half Hitch: Ideal for decorative borders or accent lines along the edges.
- Two-Tone Weaving: Combine contrasting cord colors to form stripes or geometric patterns.
- Mini Loom Weaving: Use a tiny hand loom or cardboard frame to create a flat woven panel, then fold and stitch it around the keyring.
For added functionality, incorporate a small snap button or magnetic closure using miniature hardware. Some crafters integrate a second loop to hold a bottle opener or USB drive, turning the wallet into a multi-tool accessory.
Real Example: Maya’s Travel-Friendly Wallet
Maya, a digital nomad based in Portugal, needed a secure way to carry local currency without bulk. She wove a compact paracord wallet using navy and white cords, incorporating a hidden inner pocket stitched from a scrap of denim. The result was slim enough to slip into her pocket yet held three folded bills and two cards. “I’ve used it across six countries,” she says. “It survived rain, sand, and constant use—and still looks sharp.” Her design now inspires others in her online crafting group.
Common Pitfalls and How to Avoid Them
Even simple projects can go awry without attention to detail. Below are frequent issues and solutions:
| Problem | Causes | Solution |
|---|---|---|
| Weave becomes uneven | Inconsistent tension or skipped knots | Practice on scrap cord first; mark progress every 5 knots |
| Cord frays during cutting | Dull scissors or improper sealing | Use sharp tools; seal ends immediately after trimming |
| Wallet too loose or floppy | Too few rows or weak material | Weave at least 3 inches; use waxed or paracord |
| Keyring slips out | Poor initial knot or oversized ring | Double-check lark’s head knot; choose smaller-diameter rings |
Frequently Asked Questions
How long does it take to make a keychain wallet?
For beginners, expect 30 to 45 minutes. With practice, the process can be completed in under 20 minutes. Complex patterns or added features may extend the time.
Can I wash my handmade wallet?
Spot clean with a damp cloth and mild soap. Avoid soaking, especially if using untreated cotton or paper-based liners. Waxed nylon and paracord tolerate moisture well but should be air-dried thoroughly.
Is this suitable for kids or teens?
Yes, with supervision. The project builds fine motor skills and creativity. Use blunt-tipped scissors and non-toxic cords. Opt for bright colors to keep engagement high.
Final Thoughts and Call to Action
Weaving a lightweight keychain wallet at home blends utility with creativity in a surprisingly satisfying way. Beyond serving as a functional item, it becomes a testament to self-reliance and thoughtful design. Whether you're making one for yourself, as a gift, or to sell at a craft fair, the process deepens your appreciation for handmade objects in a mass-produced world.
Start small. Choose two colors, gather your cord, and spend an evening experimenting. Each wallet you make will refine your technique and expand your confidence. Share your creations online, teach a friend, or host a mini workshop. The craft community thrives on shared knowledge—and your journey could inspire someone else to pick up a cord and begin.


 浙公网安备
33010002000092号
浙公网安备
33010002000092号 浙B2-20120091-4
Comments
No comments yet. Why don't you start the discussion?