
Integrating an earphone case into a V-shaped down jacket isn’t just about convenience—it’s about seamless functionality and design cohesion. Whether you're a DIY enthusiast or a fashion-forward designer looking to enhance usability in outerwear, the placement and installation of an earphone case can make or break the user experience. Done poorly, it can bunch, strain, or look haphazard. Done well, it becomes an invisible yet essential feature that elevates the garment. This guide dives deep into the craftsmanship behind a flawless installation, offering tested techniques, insider knowledge, and practical solutions.
Understanding the V-Shaped Jacket Design
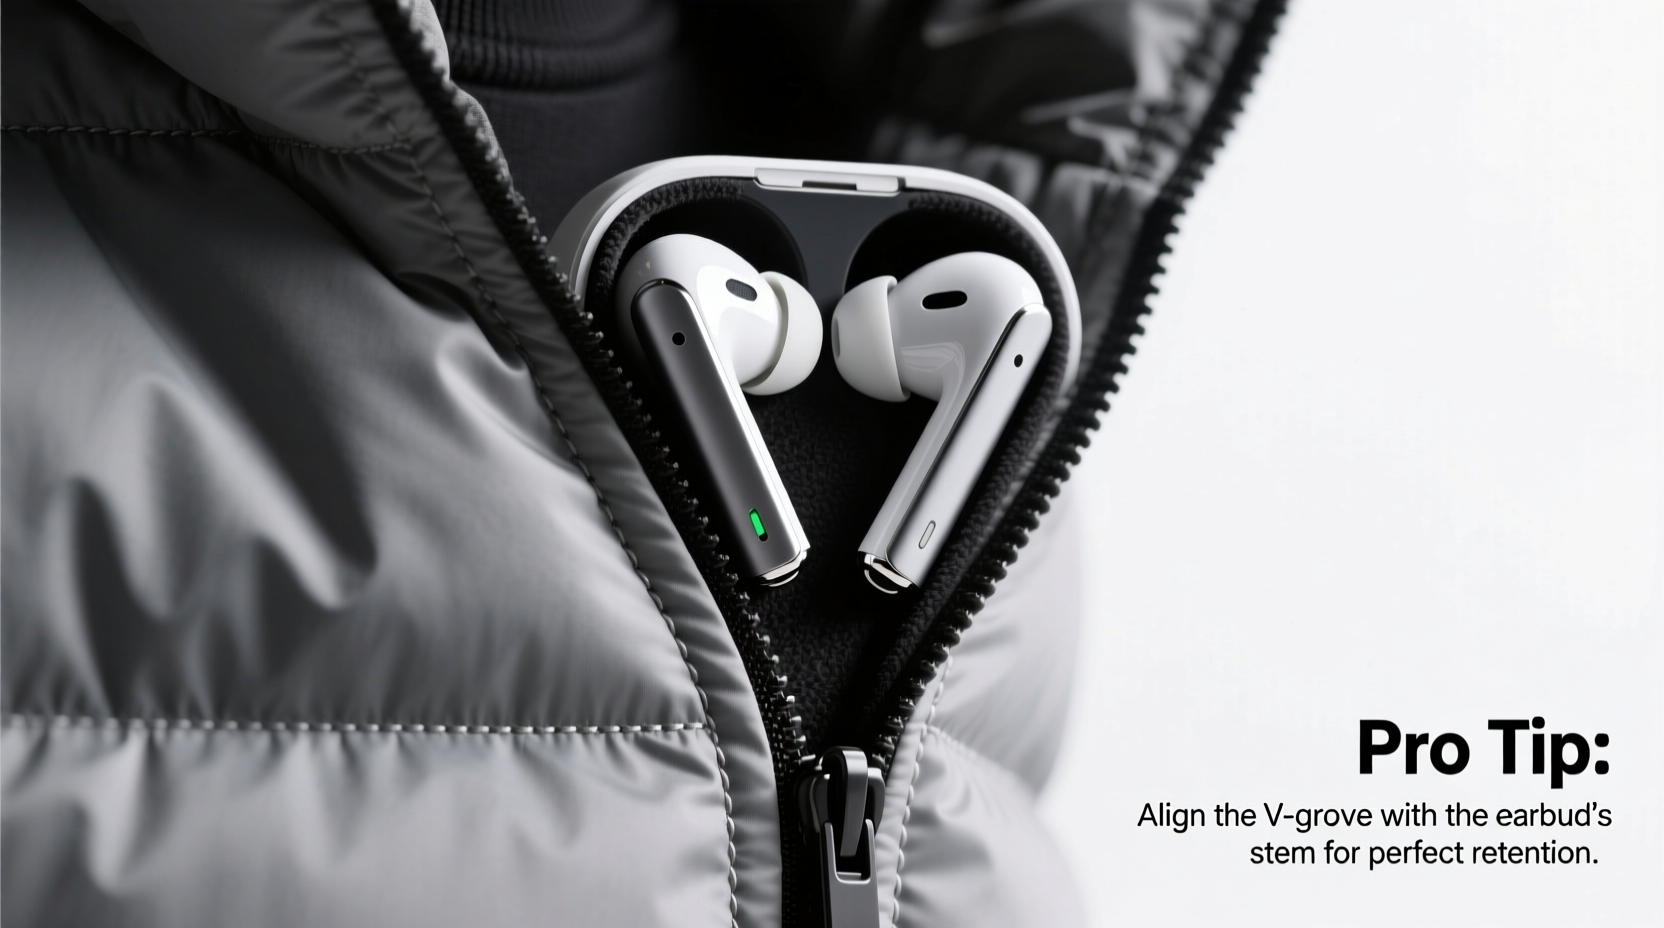
The V-shaped cut in down jackets—often seen in high-performance outerwear or urban technical wear—is designed to improve mobility and reduce bulk around the shoulders and chest. This diagonal seam line creates a dynamic silhouette but also presents unique challenges when adding functional elements like an earphone case. Unlike straight-seam jackets, the angular construction means pockets or accessories must follow the fabric's natural drape and tension lines.
Installing an earphone case here requires more than sewing skills; it demands spatial awareness, material compatibility, and precision alignment. The ideal location is typically along the interior chest panel, just below the collarbone on the wearer’s left or right side—close enough for easy access but hidden from view when zipped.
Step-by-Step Installation Process
- Choose the Right Case Material: Opt for a thin, flexible neoprene or nylon sleeve that won’t add stiffness to the jacket lining.
- Determine Placement: With the jacket on a mannequin or worn by the intended user, mark the optimal spot where the earbud cord naturally rests when in use.
- Transfer Markings Internally: Use tailor’s chalk to outline the case dimensions on the inside liner, ensuring alignment with the V-seam angle.
- Cut Access Slit (if needed): For external cord routing, create a small 1.5 cm slit near the shoulder seam, reinforced with heat-cut fabric tape to prevent fraying.
- Attach the Case: Use a stretch-compatible thread and a zigzag stitch to secure all four edges. Begin at the top edge, easing the fabric to avoid puckering.
- Test Functionality: Insert earbuds, route the cord through the slit (or internally), and check movement, comfort, and accessibility.
- Final Reinforcement: Apply a narrow strip of fusible interfacing behind the stitching line to distribute stress during use.
Material Compatibility and Seam Integrity
Down jackets often use lightweight, tightly woven ripstop nylon or polyester shells with delicate linings. These materials can tear easily under tension if not handled correctly. When attaching any accessory, especially one subject to pulling (like an earphone case), reinforcing the surrounding area is non-negotiable.
Use ultra-thin fusible webbing to bond a patch of matching lining fabric behind the attachment zone. This doubles the layer thickness without adding noticeable bulk. Also, consider the elasticity of your thread—polyester-wrapped cotton or nylon thread offers superior give and durability over standard cotton.
| Factor | Do | Don't |
|---|---|---|
| Fabric Type | Use stretch-thread on synthetic linings | Sew rigid cotton thread on nylon |
| Stitch Type | Zigzag or triple-stretch stitch | Straight stitch under tension |
| Reinforcement | Apply lightweight interfacing patch | Rely solely on stitching |
| Case Size | Match exact earbud model dimensions | Overbuild with excess space |
Expert Insight: Precision Meets Practicality
“Most failures in accessory integration come from ignoring the garment’s kinetic behavior. A jacket moves with the body—the earphone case must move with it.” — Lena Torres, Technical Apparel Designer at Alpine Wear Labs
Torres emphasizes that static measurements aren’t enough. “You have to simulate real motion: raising arms, turning the torso, bending forward. If the case distorts or pulls during these movements, it will fail within weeks.” Her team uses motion capture dummies in climate-controlled labs to test accessory placements before production. While most home sewers don’t have access to such tools, mimicking this process manually—by wearing the jacket and testing reach and stretch—can yield similar insights.
Creative Tips for Flawless Integration
- Invisible Entry Points: Instead of cutting new slits, repurpose existing seams (e.g., the shoulder yoke or side vent) to route cords internally, preserving waterproof integrity.
- Magnetic Closure Upgrade: Replace stitched flaps with micro-magnets embedded in the case lip for silent, secure closure without added bulk.
- Color Matching Thread: Use a thread shade slightly darker than the fabric—it blends better under variable lighting and hides minor imperfections.
- Heat-Seal Adhesive Backup: After stitching, apply a dot of fabric-safe heat-activated adhesive (like Thermofix) at each corner for extra hold.
- Modular Design: Create a detachable case using snap buttons or hook-and-loop tape. Allows for washing the jacket without damage and adaptability across devices.
Real-World Example: Urban Commuter Jacket Retrofit
A freelance audio engineer in Oslo wanted a hands-free solution for her daily bike commute through snowy streets. She owned a premium V-shaped down jacket but found her earbuds constantly slipping out of her pocket or tangling in her scarf. Using the techniques above, she retrofitted a slim neoprene case inside the left chest panel, routing the cord through a discreet opening in the collar seam.
After three months of daily use—including sub-zero rides and machine washes (with the earbuds removed)—the case remained intact, tangle-free, and completely unobtrusive. “It feels like the jacket was made for my AirPods,” she said. “I didn’t expect something so simple to make such a difference.”
Essential Checklist Before Finalizing Installation
- ✅ Confirm correct side (left/right) based on dominant hand or device pocket location.
- ✅ Test fit with actual earphones—do they slide in smoothly?
- ✅ Simulate full arm extension and torso twist—does the fabric pull?
- ✅ Check internal cord routing path—no sharp bends or friction points.
- ✅ Reinforce stitching with interfacing or backing patch.
- ✅ Verify wash safety—will the case survive gentle cycle cleaning?
- ✅ Ensure no interference with existing pockets or zippers.
Frequently Asked Questions
Can I install an earphone case on a jacket with a waterproof coating?
Yes, but avoid puncturing the outer shell. Install the case on the inner lining only and route cords through existing seam gaps or manufacturer-designed cable ports. If drilling new holes is unavoidable, seal them with waterproof tape or liquid seam sealer.
What if my earphones are larger than standard models?
Custom-sizing is key. Measure your earbuds’ width, height, and depth, then add 3–5 mm clearance. Use a moldable thermoplastic sheet (like Worbla) cut to size and sandwiched between fabric layers for structure without rigidity.
Is glue a viable alternative to sewing?
Adhesives alone aren’t recommended for long-term durability. However, fabric glues like E6000 or Aleene’s Fabric Fusion can supplement stitching—never replace it—especially in high-stress areas.
Final Thoughts: Elevate Function Through Detail
A flawlessly installed V-shaped down jacket earphone case isn’t merely a convenience—it’s a testament to thoughtful design and craftsmanship. By respecting the jacket’s architecture, choosing compatible materials, and testing for real-world use, you transform a simple addition into an integral part of the garment’s identity. Whether you’re customizing your own coat or refining a production prototype, attention to detail ensures both longevity and user satisfaction.


 浙公网安备
33010002000092号
浙公网安备
33010002000092号 浙B2-20120091-4
Comments
No comments yet. Why don't you start the discussion?