
Creating a life-size cardboard cutout at home is an engaging way to personalize events, enhance photo opportunities, or surprise someone special. Whether it’s a standee of yourself for a remote birthday party, a favorite celebrity for a themed room, or a fun prop for a retail display, the process can be both rewarding and surprisingly straightforward. With basic tools, a little creativity, and attention to detail, you can produce a professional-looking result without hiring a designer or purchasing expensive kits.
Why Make a Life-Size Cutout at Home?
Life-size cutouts are no longer limited to movie premieres or red carpet events. They’ve become accessible to everyday creators, event planners, and hobbyists. Homemade versions offer customization, cost savings, and personal satisfaction. You control the image, size, materials, and design elements—making each cutout uniquely yours.
Beyond novelty, these standees serve practical purposes: boosting social media engagement at parties, acting as playful decor for weddings or graduations, or even functioning as training aids in retail or educational environments.
Materials and Tools You’ll Need
Gathering the right supplies before starting ensures a smooth workflow. Most items can be found at local craft stores or repurposed from household materials.
| Item | Purpose | Recommended Type |
|---|---|---|
| Cardboard or Foam Board | Main structure | Double-wall corrugated cardboard or 3/16” foam board |
| Printer & Paper | Print the image | Laser printer or print shop for large format |
| Scissors or Utility Knife | Cutting material | Sharp blade with ruler for straight edges |
| Tape or Glue | Securing layers | PVA glue or strong packing tape |
| Measuring Tape | Scaling accuracy | Fabric or retractable metal tape |
| Pencil & Ruler | Tracing and alignment | Metal ruler for safety with utility knife |
“Precision in scaling and clean cutting transforms a simple poster into a convincing three-dimensional presence.” — Dana Reyes, Prop Designer & Visual Artist
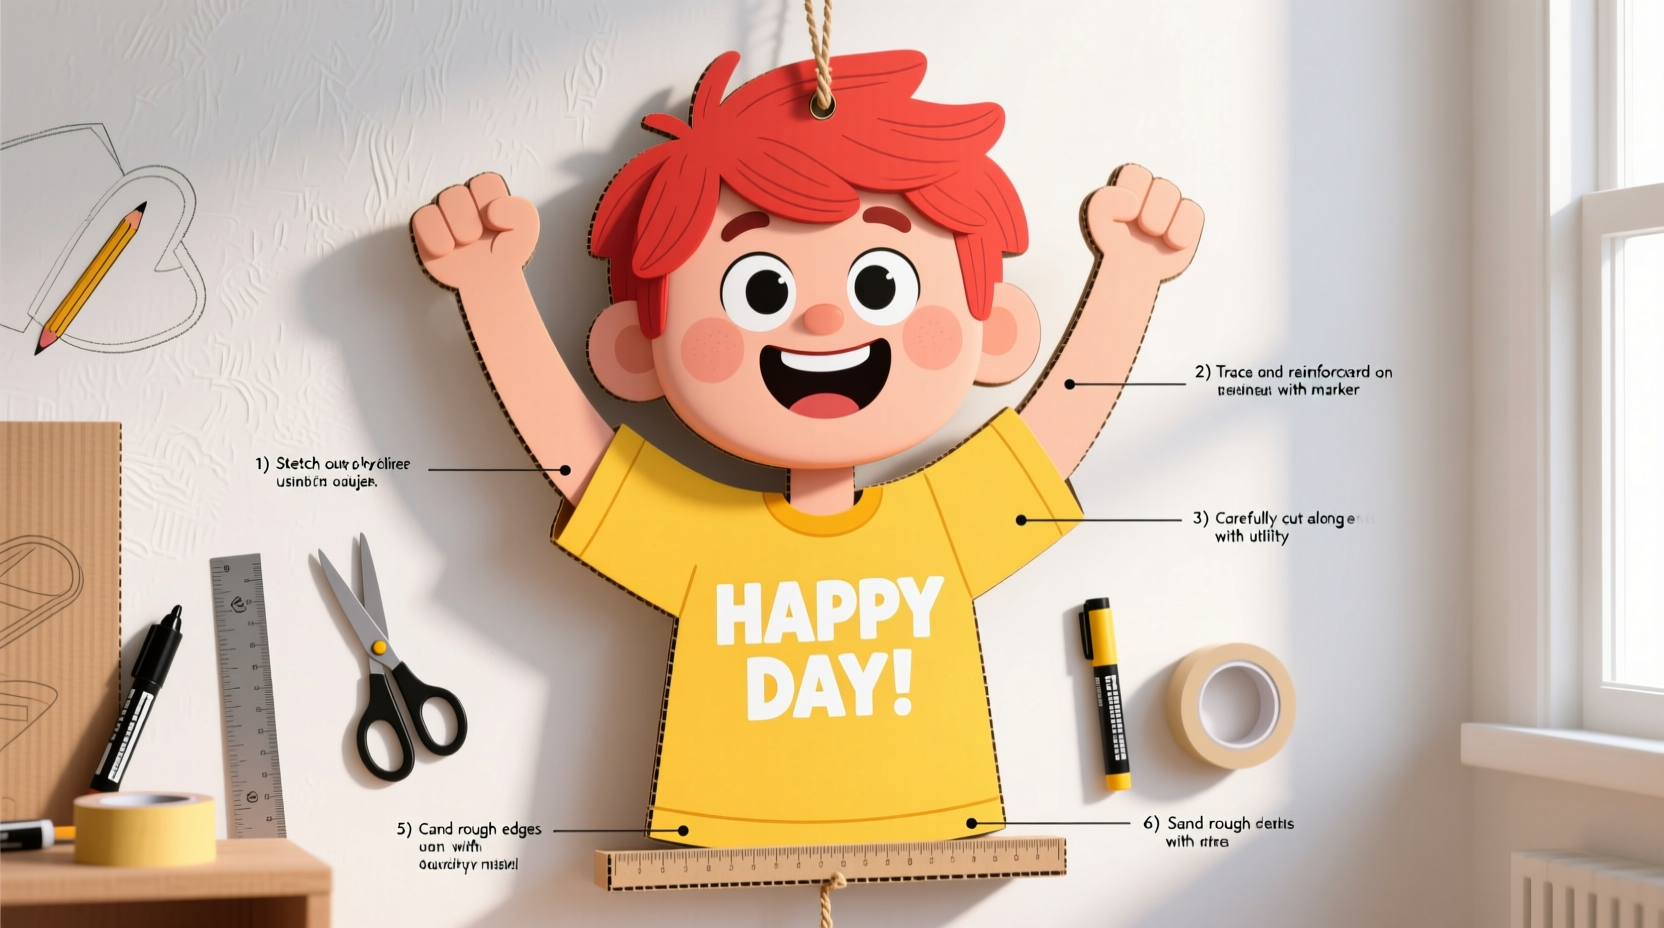
Step-by-Step Guide to Creating Your Cutout
Follow this detailed sequence to produce a sturdy, accurate, and visually appealing life-size figure.
- Choose Your Image: Select a full-body photograph with good lighting and contrast. Side profiles work best if frontal views aren’t available. Ensure the person is standing straight and fully visible.
- Determine Scale: Measure the subject’s height in the photo relative to known objects. Use a reference point (e.g., average adult height is ~5'6\" to 6') to calculate scale. For example, if the person is 6 feet tall and appears 6 inches tall in the image, the scale is 1:12.
- Enlarge and Print: Use graphic software (like Photoshop, Canva, or free tools like GIMP) to resize the image to actual dimensions. If your printer can't handle large sheets, use the “poster printing” feature to split the image across multiple pages.
- Assemble the Printed Sections: Lay out all printed pages on a flat surface, aligning them using grid lines or overlap guides. Tape the backside neatly to create one continuous sheet.
- Transfer the Outline: Place the assembled print onto your cardboard or foam board. Trace the silhouette using a pencil. For complex shapes (hair, clothing folds), mark key contours lightly first.
- Cut Out the Shape: Use a sharp utility knife and cut slowly along the traced lines. Change blades frequently to avoid jagged edges. Support the material with a cutting mat or spare cardboard underneath.
- Reinforce the Back (Optional): Attach a second layer of cardboard to the back for added stability, especially if the cutout will stand upright. Use glue or tape along the edges.
- Add a Stand or Base: Create support legs by cutting a “T” or “L” shaped brace from leftover board. Attach it vertically to the back using strong tape or staples. Angle the base slightly backward for balance.
- Finishing Touches: Erase visible pencil marks, touch up edges with paint if desired, or laminate sections for durability.
Creative Tips for a Professional-Looking Result
- Use Contrast to Your Advantage: Choose backgrounds that contrast sharply with the subject. Solid colors or blurred backdrops help define edges during tracing.
- Add Dimension with Layering: Cut out individual parts (hat, hand, pet) separately and attach them with spacers (foam dots or rolled tape) to create depth.
- Incorporate Lighting: Place LED string lights behind translucent foam board cutouts for a glowing effect at night events.
- Personalize It: Add speech bubbles, accessories, or interchangeable props (masks, signs) to increase interactivity.
- Test Stability First: Before finalizing, prop up the cutout and test it on different surfaces. Adjust the base angle if it wobbles.
Mini Case Study: The Surprise Graduation Display
When college student Maya couldn’t attend her sister’s graduation due to travel restrictions, she created a life-size cutout of herself holding a congratulatory sign. She used a full-length selfie taken in sunlight, scaled it to 5'7\", and printed it across 24 letter-sized pages. After assembling and mounting it on a foam board base, she shipped it to her parents’ house. The family placed it among the crowd during the ceremony, and guests loved taking photos with “Maya.” The project cost under $20 and took six hours over two evenings. Her sister later said it was one of the most touching gestures she’d ever received.
Avoiding Common Mistakes
Even experienced DIYers can stumble on small oversights. Steer clear of these pitfalls:
- Using low-resolution images: Pixelation becomes glaring at large sizes.
- Skipping the scale check: Misjudging proportions leads to distorted figures.
- Weak support structures: Flimsy bases cause tipping, especially indoors near AC vents.
- Rushing the cutting phase: Hasty cuts ruin clean lines and reduce realism.
- Ignoring environmental factors: Cardboard weakens in humidity; avoid outdoor use unless sealed.
“Every great cutout starts with patience. Take time with alignment and cutting—it shows in the final presence.” — Marcus Lin, Event Production Specialist
FAQ
Can I make a life-size cutout without a printer?
Yes. Project the image onto a wall using a projector, then trace the outline directly onto pinned-up paper or cardboard. Alternatively, use a grid method: draw a grid over the photo and a larger grid on your material, then transfer the image square by square.
How long does a homemade cutout last?
Indoors, with careful handling, it can last several months. Reinforced foam board versions may endure over a year. Avoid moisture, direct sunlight, and foot traffic to extend lifespan.
What’s the best way to transport a large cutout?
Disassemble if possible. Remove the base and wrap the figure between two rigid panels (like old shelving or packaging). Label fragile areas and carry flat in a vehicle.
Checklist: Build Your Cutout in Order
- ☐ Choose a high-quality, full-body image
- ☐ Confirm the subject’s real height for accurate scaling
- ☐ Resize and print the image (or use poster mode)
- ☐ Assemble printed sections with tape
- ☐ Transfer the silhouette onto sturdy board
- ☐ Carefully cut along the outline with a sharp blade
- ☐ Reinforce the back if needed
- ☐ Design and attach a stable base
- ☐ Test balance and make adjustments
- ☐ Add personalized details or protective coating
Conclusion
Creating a life-size cutout at home blends craftsmanship with personal expression. It doesn’t require advanced skills—just attention to detail, access to basic materials, and a vision. From birthday surprises to promotional displays, the possibilities are limited only by imagination. Once you complete your first cutout, you’ll likely find new uses for this versatile medium. Whether you’re crafting for fun, celebration, or business, the impact of a well-made standee is undeniable.


 浙公网安备
33010002000092号
浙公网安备
33010002000092号 浙B2-20120091-4
Comments
No comments yet. Why don't you start the discussion?