
Layering images is more than just stacking visuals—it’s a foundational technique in digital design that transforms ordinary photos into compelling compositions. Whether you're crafting social media content, designing digital collages, or experimenting with photo art, knowing how to effectively place one image over another opens up a world of creative possibilities. This guide explores proven methods, tools, and principles to help you master image layering with confidence and precision.
Understanding the Basics of Image Layering
At its core, image layering involves placing multiple pictures on top of each other within a single canvas. Each layer can be adjusted independently for position, opacity, blending mode, and size. This flexibility allows for seamless integration of elements from different sources—like merging a portrait with a landscape background or overlaying text graphics on a product shot.
The key to successful layering lies in alignment, contrast, and context. A well-layered composition maintains visual harmony while drawing attention to the intended focal point. Tools like Adobe Photoshop, GIMP, Canva, and Figma provide robust layering capabilities, but even smartphone apps such as PicsArt and Photopea offer accessible options for beginners.
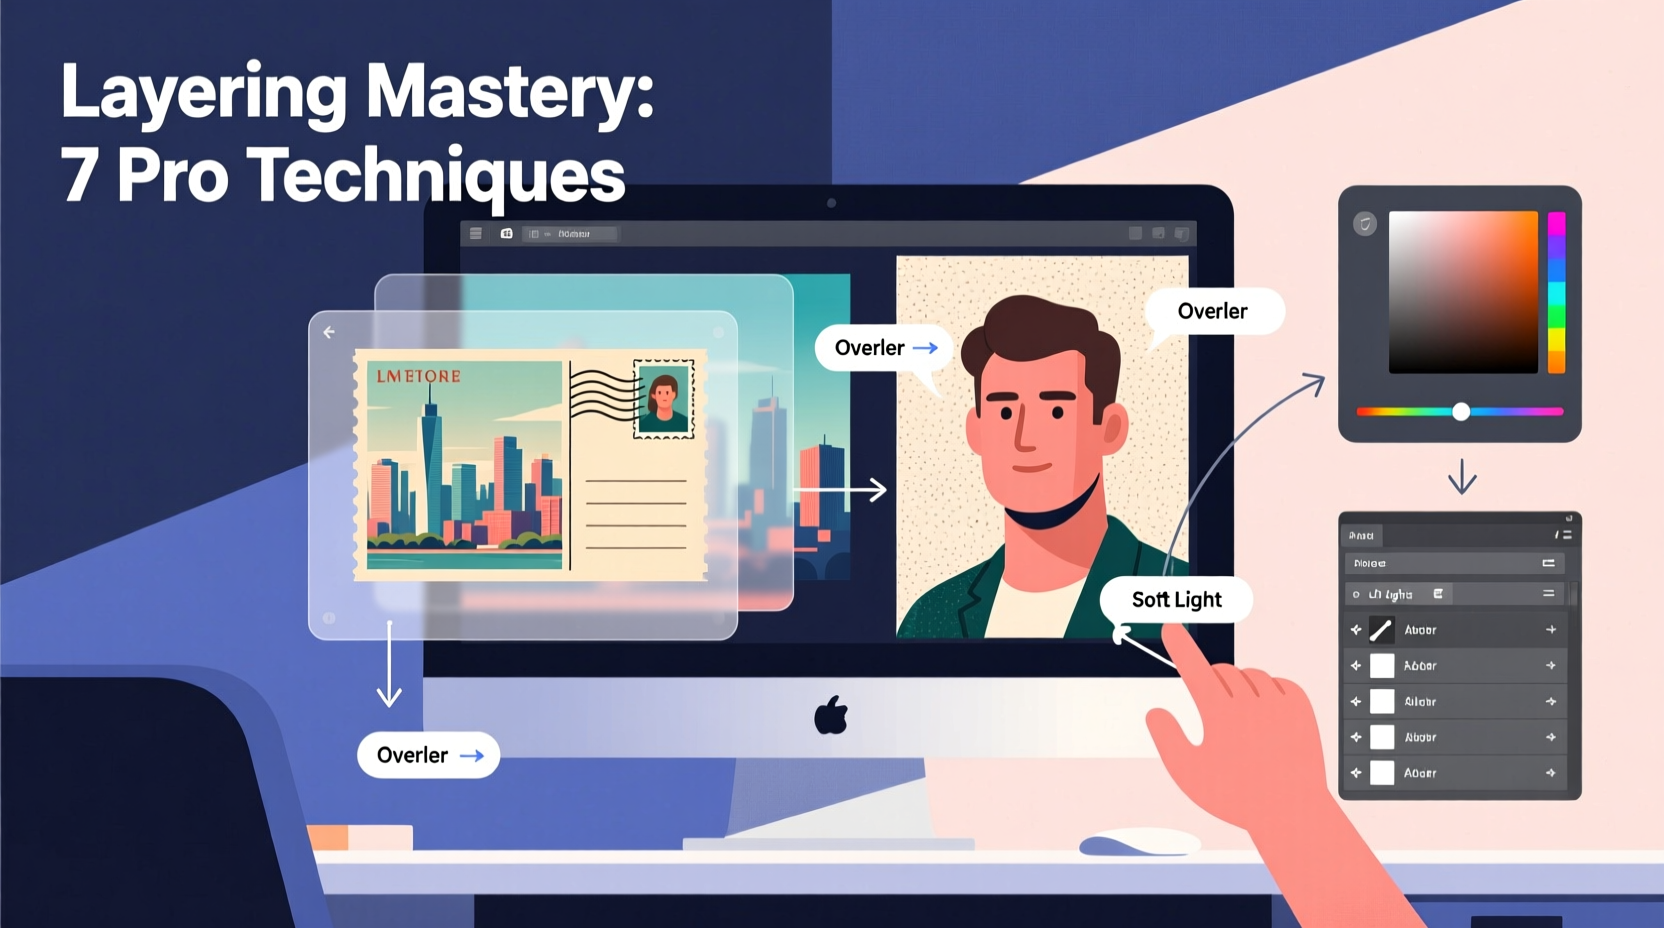
Step-by-Step Guide to Layering Images
Follow this structured process to create professional-looking layered images, regardless of your experience level.
- Select Your Base Image: Choose a strong background image that sets the tone—this could be a solid color, texture, or scenic backdrop.
- Add Secondary Layers: Import additional images (e.g., people, objects, textures) and position them using alignment tools.
- Adjust Opacity and Blending Modes: Reduce opacity for subtle overlays or use blending modes like Multiply, Overlay, or Screen to merge colors naturally.
- Apply Masks and Cropping: Use layer masks to hide parts of an image non-destructively, allowing smooth transitions between layers. <5> Refine Edges and Shadows: Add drop shadows or soft glows to create depth and realism.
- Finalize and Export: Flatten the image only after saving a layered version for future edits; export in appropriate format (PNG for transparency, JPEG for general use).
Real Example: Creating a Travel Poster
A freelance designer wanted to promote a travel blog featuring Bali. She began with a serene beach sunset as her base layer. On a new layer, she added a semi-transparent map of Indonesia, set to \"Multiply\" blending mode so the colors beneath showed through. Overlaid on top was a silhouette of a traveler against a mountain ridge, carefully masked to blend with the horizon. Finally, she added text in a clean font, slightly rotated for dynamic effect. The result was a visually rich poster that told a story through layered imagery.
“Layering isn’t about complexity—it’s about intention. Every added element should serve the narrative.” — Lena Torres, Digital Art Director at Visual Echo Studio
Creative Techniques for Advanced Compositions
Once you’ve mastered basic layering, experiment with these advanced techniques to elevate your designs.
Double Exposure Effects
This popular method blends two images—typically a portrait and a landscape—so one appears inside the contours of the other. Start by placing the subject photo on the bottom layer. Add the secondary image (like a forest or cityscape) above it, then apply a clipping mask so it only shows within the subject’s shape. Adjust brightness and contrast to ensure clarity.
Textured Overlays
Adding grunge textures, paper grain, or film noise can give digital images an analog feel. Place the texture layer on top and set it to “Overlay” or “Soft Light” mode. Lower the opacity to around 20–40% to avoid overpowering the original image.
Transparent Object Integration
Use glass, windows, or mirrors in your base image as natural frames for secondary photos. Position the inset image behind the transparent surface, then adjust perspective using transform tools to match the angle of the scene.
| Technique | Best For | Recommended Tool |
|---|---|---|
| Double Exposure | Portraits, album covers | Photoshop (with clipping masks) |
| Texture Overlays | Vintage aesthetics, editorial design | Canva or GIMP |
| Reflection Blending | Architectural and urban photography | Figma or Affinity Photo |
| Multipanel Collage | Social media storytelling | PicsArt or Photopea |
Common Pitfalls and How to Avoid Them
Even experienced creators make mistakes when layering images. Awareness of these issues can save time and improve results.
- Ignoring Scale and Perspective: Objects that don’t align with the scene’s depth look artificial. Use vanishing points and grid guides to maintain realism.
- Overusing Blending Modes: While fun to experiment with, excessive blending can muddy colors. Stick to one or two effective modes per project.
- Poor Edge Quality: Jagged or haloed edges break immersion. Zoom in and refine selections using feathering or refinement brushes.
- Clashing Color Palettes: Mismatched tones make layers appear disjointed. Use adjustment layers (e.g., Hue/Saturation, Color Balance) to harmonize hues across images.
Checklist: Preparing a Polished Layered Image
Use this checklist before exporting your layered composition:
- ✅ All images are properly licensed or original
- ✅ Layers are named and organized
- ✅ Alignment is precise (use rulers and snapping)
- ✅ Opacity and blending settings enhance, not distract
- ✅ Edges are clean and masks are refined
- ✅ Lighting direction is consistent across all elements
- ✅ Final output resolution matches intended use (web vs. print)
Frequently Asked Questions
Can I layer pictures without professional software?
Yes. Free tools like Photopea (browser-based), GIMP, and mobile apps such as Snapseed and Canva allow basic to intermediate layering. While they may lack some advanced features, they’re sufficient for most personal and small business projects.
How do I make one image look like it belongs in another scene?
Match lighting, perspective, and color temperature. If the base image has warm golden-hour light, adjust the overlaid image to mimic that warmth. Use shadow layers beneath floating objects to ground them visually. Subtle blurring on distant elements enhances depth perception.
Is it legal to combine pictures from different sources?
It depends on usage rights. Personal experimentation is generally safe, but commercial use requires permission or royalty-free licensing. Always verify the license terms of stock photos or downloaded images. When in doubt, create your own source material.
Mastering the Art of Visual Storytelling
Layering pictures is not merely a technical skill—it’s a form of visual storytelling. Each added layer contributes to mood, meaning, and message. From surreal digital art to polished marketing visuals, the ability to seamlessly combine images gives you control over how viewers interpret your work.
Start simple: try placing a person in a new environment, or blending two nature scenes into one dreamlike landscape. As you grow more confident, challenge yourself with complex narratives—layer timelines, emotions, or abstract concepts into a single frame.


 浙公网安备
33010002000092号
浙公网安备
33010002000092号 浙B2-20120091-4
Comments
No comments yet. Why don't you start the discussion?