
A fabric cover notebook is more than just a place to jot down notes—it’s a personal artifact, a reflection of identity, and an opportunity for creative expression. Unlike rigid leather or plastic covers, fabric offers a soft, tactile surface that welcomes customization. Whether you use it for sketching, planning, journaling, or brainstorming, personalizing your notebook enhances both its aesthetic appeal and practical value. The right modifications can make it easier to navigate, instantly recognizable in a stack of similar items, and deeply meaningful to you.
Why Personalize Your Notebook?
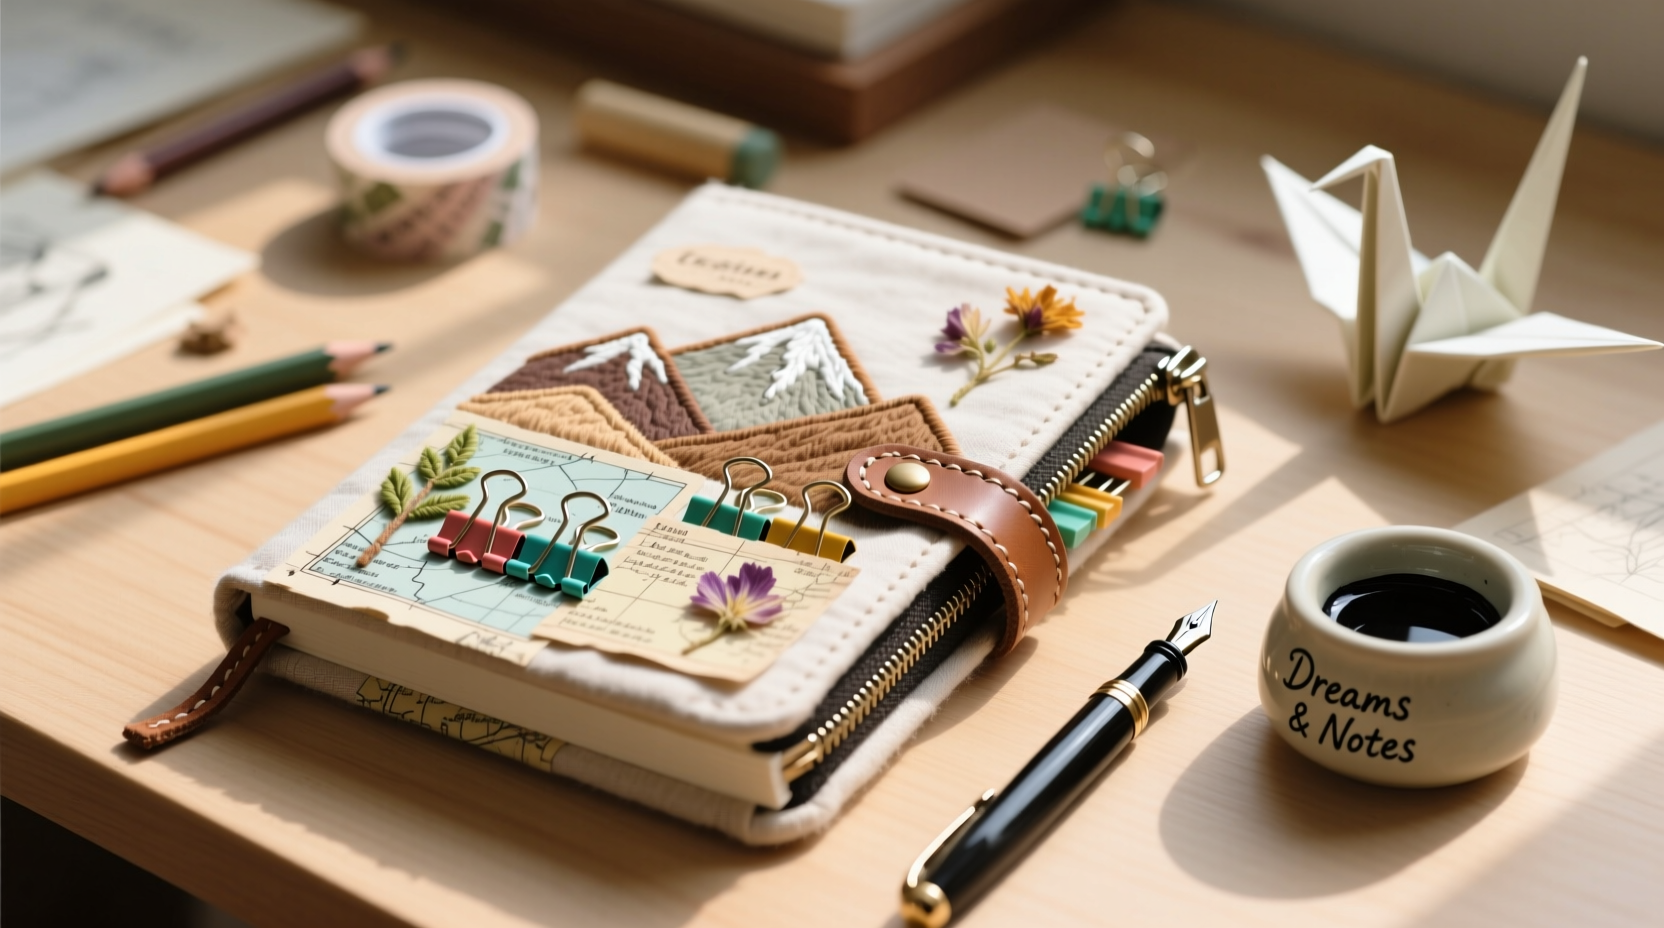
Personalization transforms a generic object into something intimate and purposeful. When your notebook reflects your personality, you're more likely to use it consistently. It becomes less of a tool and more of a companion. Fabric covers are especially ideal for this because they accept a wide range of materials—from paint and thread to adhesive elements—without cracking or peeling like synthetic surfaces might.
Moreover, functional customizations such as built-in pockets, page markers, or categorized sections increase usability. Aesthetic touches like embroidery, painted motifs, or collage work elevate the notebook from utilitarian to artistic. The combination of form and function creates a daily-use item that feels uniquely yours.
“Customization isn’t just about appearance—it’s about creating ownership. When people invest creativity into their tools, they engage with them more deeply.” — Lila Nguyen, Productivity & Design Consultant
Step-by-Step Guide: Transform Your Notebook Cover
Start with a blank fabric-covered notebook and follow these steps to create a personalized masterpiece that serves both style and purpose.
- Assess your needs: Determine how you’ll use the notebook. Is it for work, art, travel logs, or bullet journaling? This will guide both design and functionality choices.
- Gather materials: Collect fabric paints, embroidery floss, patches, washi tape, iron-on transfers, or small trinkets. Choose washable, flexible adhesives if needed.
- Clean the surface: Wipe the cover gently with a damp cloth and let it dry completely before applying any media.
- Sketch your design (optional): Use a water-soluble marker or chalk to lightly outline patterns, initials, or scenes.
- Apply decorative elements: Begin with permanent techniques first (e.g., painting or stitching), then add temporary or removable features (like clips or magnets).
- Add functional upgrades: Sew on a pocket, attach a pen loop, or embed a magnetic closure.
- Seal if necessary: For painted designs, apply a fabric sealant spray to prevent flaking.
Functional Upgrades for Everyday Use
While visual flair grabs attention, functional enhancements ensure long-term satisfaction. Consider what would make your notebook easier to use day-to-day.
- Pen or pencil loops: Sew a loop from ribbon or elastic near the spine so your writing tool stays attached.
- Interior pocket: Glue or stitch a small fabric pouch inside the back cover for receipts, sticky notes, or flashcards.
- Magnetic closures: Attach small neodymium magnets to keep the notebook closed securely without damaging the fabric.
- Page flags: Use contrasting washi tapes vertically along the edge to mark sections like “Ideas,” “Meetings,” or “To-Dos.”
- Index tabbing: Reinforce the side edges with cardstock tabs labeled by category for quick navigation.
Real Example: Maria’s Travel Journal Upgrade
Maria, a freelance photographer, turned her plain navy-blue fabric notebook into a field-ready travel companion. She painted a minimalist world map on the front using fabric paint, then embroidered tiny stars over cities she’d visited. Inside, she glued a zippered cosmetic pouch (repurposed from toiletries) to hold SD cards and lens caps. A leather cord with a sliding bead acts as a bookmark. These changes didn’t just beautify the notebook—they made it a practical tool during shoots and flights. “Now I never lose my memory cards,” she says, “and the cover tells a story every time someone sees it.”
Creative Decoration Techniques
The fabric surface invites experimentation. Here are five distinctive methods to explore:
| Technique | Materials Needed | Best For |
|---|---|---|
| Freehand Painting | Fabric paint, brushes, sealant | Abstract designs, quotes, illustrations |
| Embroidery | Needle, floss, stabilizer | Text, floral patterns, geometric lines |
| Iron-On Transfers | Printed transfer paper, iron | Detailed images, photos, typography |
| Fabric Collage | Scraps, fusible webbing, glue | Texture-rich mosaics, memory keepsakes |
| Appliqué & Patches | Sewing needle or fabric glue | Branding, symbols, quick fixes |
For those hesitant about freehand work, stencils or painter’s tape can help achieve clean lines. Mixing techniques—such as combining embroidery with painted borders—adds depth and dimension.
Checklist: Personalization Project Prep
Before starting your notebook transformation, run through this checklist to ensure success:
- ☐ Choose a notebook with a tightly woven, cotton-based fabric cover (easier to paint and sew)
- ☐ Decide on a theme (e.g., nature, minimalism, retro, professional)
- ☐ Gather all materials: paints, needles, patches, adhesives, rulers, etc.
- ☐ Set up a clean, well-lit workspace with protective covering
- ☐ Sketch your design on paper first
- ☐ Allow drying time between layers (especially for paint or glue)
- ☐ Test durability by gently rubbing finished areas before sealing
Do’s and Don’ts of Fabric Notebook Customization
| Do’s | Don’ts |
|---|---|
| Use flexible, fabric-specific paints that won’t crack | Apply heavy embellishments that warp the spine |
| Reinforce stitched areas with fabric backing if needed | Wash the notebook aggressively after painting |
| Incorporate removable elements like clip-on charms | Use permanent vinyl on porous fabric (may peel) |
| Balance decoration with usability—leave space for grip | Overload the cover with bulky items that hinder closing |
| Let each layer dry fully before adding the next | Ignore manufacturer care instructions for the base notebook |
Frequently Asked Questions
Can I wash my customized fabric notebook?
Spot cleaning is safest. If washing is unavoidable, hand-wash gently in cold water and air-dry flat. Avoid wringing or machine washing, especially if you've used paint or glue. Always check the original notebook’s care label first.
How do I fix a mistake on the fabric cover?
For paint errors, try carefully scraping with a dull blade while damp. For embroidery, unpick stitches with a seam ripper. Small flaws can be covered with a patch, button, or appliqué shape—sometimes mistakes become design highlights.
Will glue damage the fabric or pages inside?
Use fabric-safe, flexible adhesives like E6000 or Aleene’s Fabric Fusion. Apply sparingly and clamp only the intended area. Place wax paper inside the cover to protect inner pages from seepage.
Make It Yours—And Use It Fully
A personalized fabric cover notebook isn’t meant to sit on a shelf. It’s designed to be held, written in, carried around, and lived with. The wear and tear it accumulates become part of its story—the coffee stain on the corner, the frayed edge of a well-used pocket, the fading of a once-bright paint stroke. These marks aren’t flaws; they’re evidence of engagement.
When you take the time to customize your notebook, you’re not just decorating an object—you’re investing in a relationship with your thoughts, goals, and creativity. That investment pays dividends in consistency, clarity, and joy.


 浙公网安备
33010002000092号
浙公网安备
33010002000092号 浙B2-20120091-4
Comments
No comments yet. Why don't you start the discussion?