
Resin art has transformed from a niche craft into a mainstream creative outlet, offering endless possibilities for personal expression. One of the most accessible and rewarding applications is customizing keychains. Lightweight, portable, and deeply personal, resin keychains serve as both functional accessories and wearable art. Whether you're making a gift or treating yourself, embedding meaningful elements in glossy, glass-like resin creates a keepsake that stands out. This guide walks through everything you need to know—from materials and techniques to advanced design ideas—so you can craft unique resin keychains with confidence.
Why Resin Keychains Are Worth Making
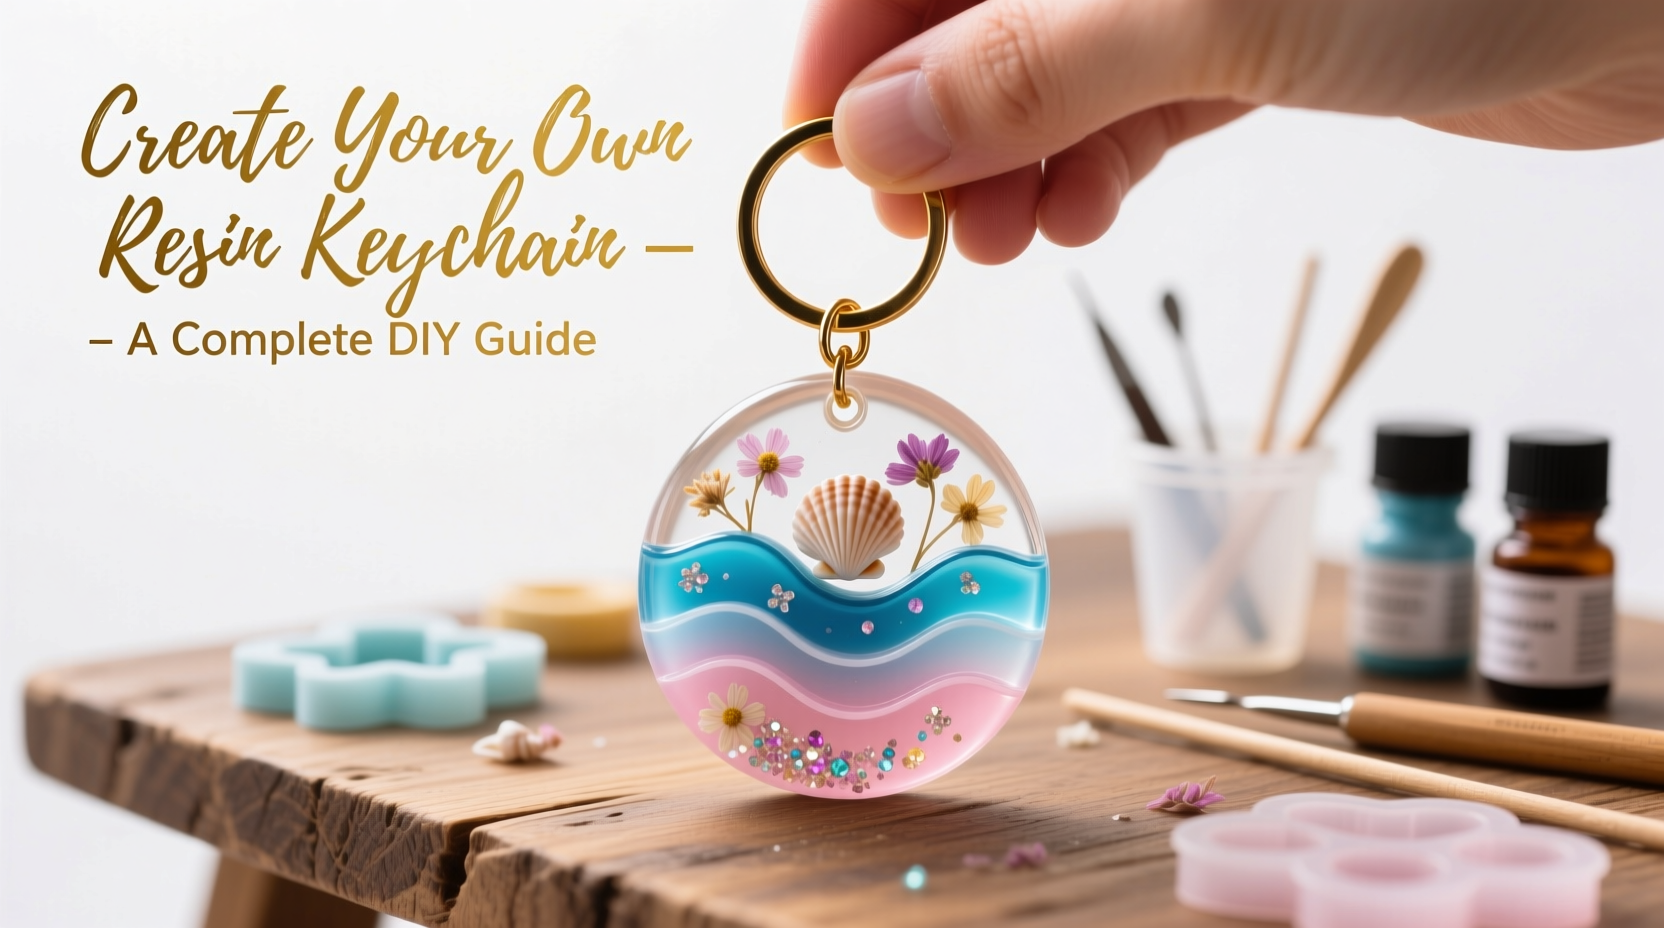
Unlike mass-produced accessories, handmade resin keychains carry emotional weight. They can commemorate events, showcase favorite colors, or preserve small mementos like dried flowers, handwritten notes, or even fabric scraps. The transparency and depth of cured epoxy resin give designs a professional, jewel-like finish that’s surprisingly durable.
Beyond aesthetics, working with resin builds fine motor skills and patience. Each piece requires attention to detail, from measuring ratios to eliminating bubbles. Many crafters find the process meditative, especially when layering pigments or arranging tiny inclusions. With minimal startup cost and reusable molds, this hobby scales easily from beginner experiments to polished gifts or even small-batch sales.
Essential Materials and Tools
Before diving into design, gather the right supplies. Quality matters: cheap resin may yellow over time or fail to cure properly. Invest in a reputable brand designed for crafts, such as ArtResin or EasyCast.
- Epoxy resin and hardener (preferably UV-stable)
- Silicone keychain molds (shapes like circles, hearts, tags)
- Disposable plastic cups and wooden mixing sticks
- Pigments: alcohol inks, mica powders, or resin dyes
- Fine-tipped pipettes or syringes for precision pouring
- Torch or heat gun to remove bubbles
- Jewelry findings (stainless steel or nickel-free key rings, jump rings)
- Optional: Dried botanicals, glitter, photos, micro charms
“Resin rewards precision. Take your time with mixing and pouring—it’s the foundation of a flawless finish.” — Lena Torres, Resin Artist & Workshop Instructor
Step-by-Step Guide to Crafting Your First Resin Keychain
Follow this timeline to create a simple yet stunning keychain. Allow at least 24–72 hours for full curing, depending on resin type and thickness.
- Prepare your workspace: Cover surfaces with parchment paper or silicone mats. Ensure good airflow and have all tools within reach.
- Measure and mix resin: Follow manufacturer instructions (typically 1:1 or 2:1 ratio). Stir slowly for 3–5 minutes to avoid introducing air bubbles.
- Pour a thin base layer: Fill each mold cavity about 1/3 full. Let sit for 15–20 minutes to allow bubbles to rise.
- Add inclusions: Gently place dried flowers, glitter, or small charms using tweezers. Avoid overcrowding.
- Pour the final layer: Slowly top off the mold until just below the rim. Use a heat gun in quick passes to pop any bubbles.
- Cure undisturbed: Cover with a box to prevent dust. Cure for 12–24 hours before demolding.
- Finish and assemble: Lightly sand sharp edges with 600-grit paper. Attach a metal key ring using a jump ring or pre-molded loop.
Creative Design Ideas to Personalize Your Keychain
Once you’ve mastered the basics, experiment with advanced techniques to elevate your designs.
Color Swirls and Marbling
Mix a few drops of alcohol ink into separate resin portions. Pour them into the mold and gently swirl with a toothpick. For oceanic effects, use blues and whites; for galaxy themes, blend black, purple, and silver with fine glitter.
Preserved Memories
Embed tiny meaningful items: a snippet of wedding invitation, a baby’s first curl, or a postage stamp from a memorable trip. Seal paper items with a clear sealant spray before placing them in resin to prevent discoloration.
Glow-in-the-Dark Elements
Incorporate glow powder for a fun nighttime effect. Charge it with light before use, and mix into a clear resin layer. Ideal for kids’ backpacks or festival gear.
Layered Depth
Create dimension by pouring in stages. After the first layer sets (tacky but not liquid), add a second with suspended elements. This prevents sinking and gives a 3D illusion.
Photo Miniatures
Print tiny images (inkjet works best), cut to size, and seal both sides with Mod Podge. Place face-up in the first resin layer, then cover completely in the next pour.
| Design Style | Ideal Inclusions | Best Resin Color Base |
|---|---|---|
| Nature-Inspired | Dried lavender, ferns, pressed leaves | Crystal clear |
| Retro/Vintage | Micro film strips, typewriter keys | Amber tint |
| Galaxy Theme | Blue/purple mica, silver glitter | Black or deep blue |
| Personalized Gift | Name initials, birthstones, dates | Custom color match |
Avoiding Common Mistakes: Do’s and Don’ts
Even experienced crafters encounter issues. Learning what not to do saves time and materials.
| Do’s | Don’ts |
|---|---|
| Measure resin precisely with digital scale | Guess ratios by volume in cups |
| Cure at room temperature (70–75°F) | Place in cold garage or direct sun |
| Use a torch sparingly (3-second passes) | Hold heat too close and burn the surface |
| Let each layer set slightly before adding next | Pour wet-on-wet without control |
| Store unused resin away from sunlight | Leave bottles in windows or hot cars |
Mini Case Study: From Idea to Heirloom
Sophie, a high school teacher from Portland, wanted to make end-of-year gifts for her students. She collected small drawings they’d made throughout the year, scanned and resized them to 0.75 inches, and sealed each with decoupage glue. Using heart-shaped molds, she poured a base layer, positioned the mini artworks, then topped with clear resin. After curing, she attached engraved tags with each student’s name. The keychains became cherished keepsakes—some parents reported hanging them on graduation caps. “It wasn’t just a gift,” Sophie said. “It was a memory they could hold.”
Frequently Asked Questions
Can I use fresh flowers in resin keychains?
No—fresh flowers contain moisture that causes rotting and cloudiness. Always use fully dried botanicals. Press flowers between book pages for 1–2 weeks or use silica gel for faster drying.
How long do resin keychains last?
High-quality, UV-resistant resin can last years without yellowing. Avoid prolonged sun exposure (e.g., leaving in a car) to maximize lifespan. With care, they remain scratch- and fade-resistant for daily use.
Is resin safe once cured?
Yes. Fully cured epoxy resin is inert and non-toxic. However, during mixing and curing, vapors can be irritating. Always work in ventilated spaces and avoid skin contact with uncured resin.
Your Turn to Create Something Meaningful
Personalizing a keychain with resin isn’t just about crafting an object—it’s about capturing moments, emotions, and identity in a format you carry every day. Whether you’re commemorating a milestone, expressing your style, or creating heartfelt gifts, the process invites mindfulness and creativity. Start small, learn from each pour, and let your imagination guide the layers.


 浙公网安备
33010002000092号
浙公网安备
33010002000092号 浙B2-20120091-4
Comments
No comments yet. Why don't you start the discussion?