
In an age dominated by digital calendars and scheduling apps, there’s still unmatched clarity and focus in handwriting your meeting schedule. A lined notebook offers flexibility, portability, and tactile engagement that boosts memory retention and accountability. But simply jotting down meetings isn’t enough—strategic organization turns your notebook into a powerful planning tool. With thoughtful printing techniques and layout designs, you can transform a basic notebook into a dynamic, personalized scheduler.
This guide explores inventive methods to print and structure your meeting agenda in a lined notebook, blending analog simplicity with systematic efficiency. Whether you're managing team check-ins, client calls, or personal development sessions, these approaches will help you stay on track without relying on screens.
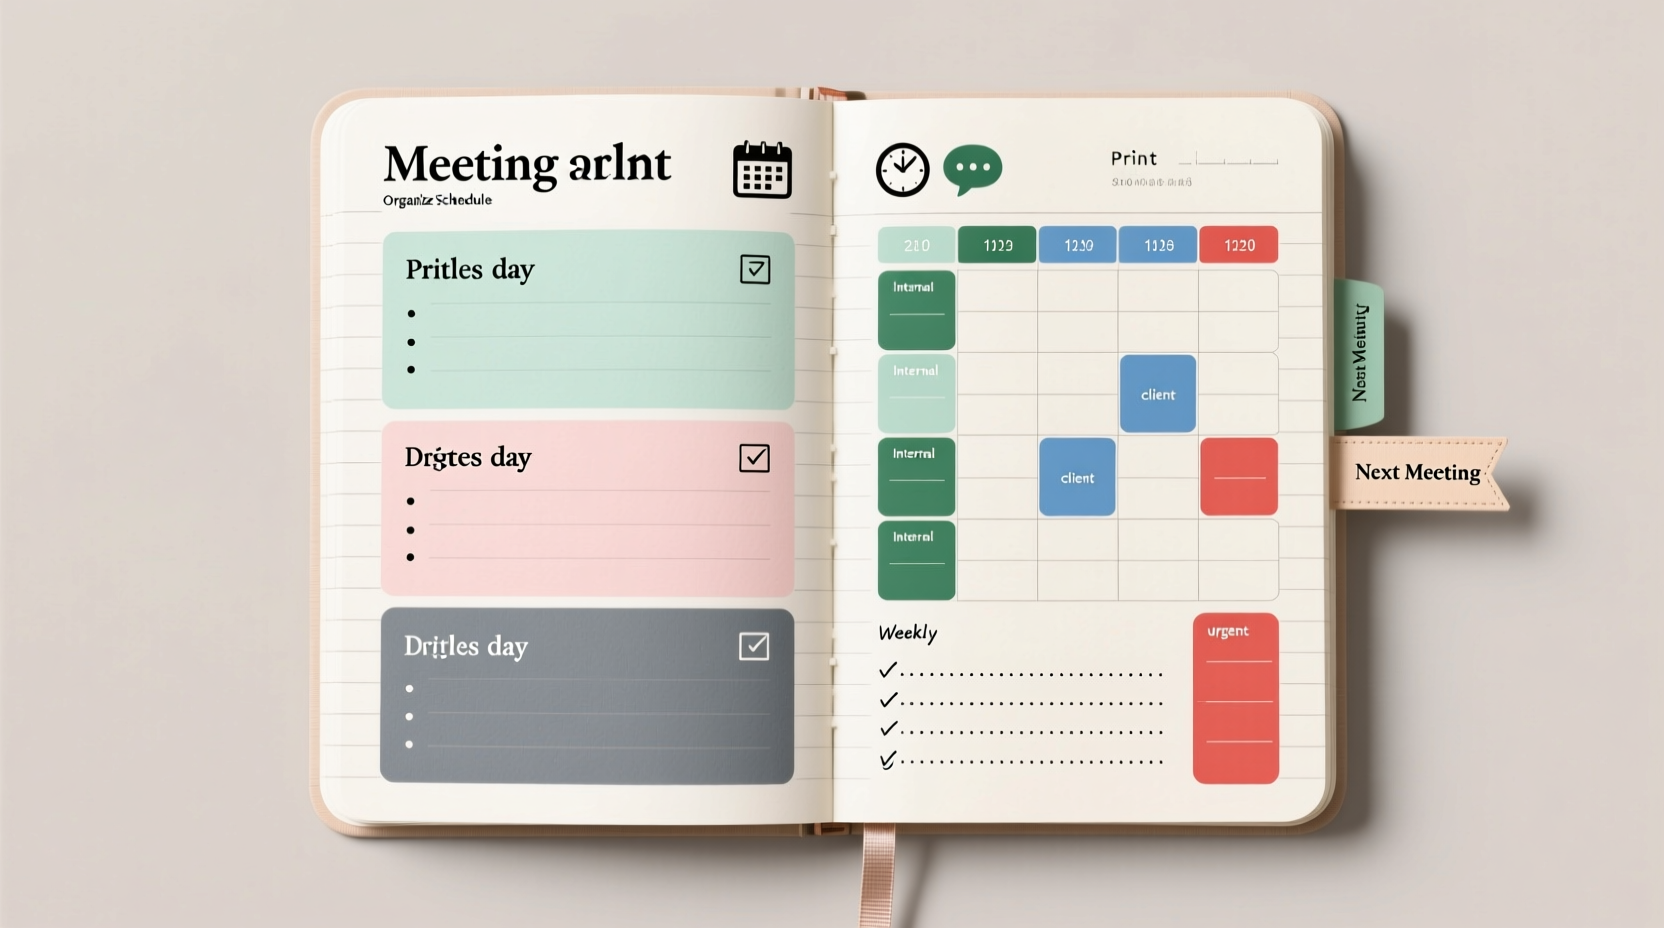
Print Your Schedule: Methods That Work
Before organizing your meetings, you need them physically present on the page. Since most lined notebooks don’t come pre-formatted like planners, you’ll need to transfer your digital calendar manually or semi-automatically. Here are several effective ways to get your schedule onto paper:
- Manual transcription: Copy your weekly meetings by hand after reviewing your digital calendar. This method reinforces memory and allows immediate customization.
- Template printing: Design a weekly schedule template in Word or Google Docs using tables, then print it and paste it into your notebook using glue or washi tape.
- Mini-printouts: Use a portable printer (like the HP Sprocket or Canon Ivy) to generate small strips of your day’s meetings directly from your phone.
- Digital export with alignment: Export your Google Calendar as a PDF, resize it to fit notebook dimensions, and use a photo editing app to align days with individual lines.
Create a Custom Layout System
Organization begins with structure. Lined notebooks offer uniformity but lack inherent divisions. By designing your own layout system, you gain control over how information is displayed and accessed.
Daily Block Format
Divide each page into time blocks corresponding to standard meeting durations (e.g., 30 minutes, 1 hour). Label horizontal sections with times (9:00 AM – 10:00 AM), leaving space for notes beneath each entry.
Weekly Grid Method
Use a table-style approach where each row represents a time slot and each column a weekday. Draw light pencil lines to create a grid across two facing pages. Fill in recurring meetings once and highlight changes daily.
Vertical Time-Line Style
Turn the notebook sideways and write time vertically along the left margin, then list events horizontally. This mimics Gantt charts and helps visualize overlaps and gaps.
“Physical writing engages spatial memory—when you design your own schedule layout, you’re more likely to remember appointments.” — Dr. Lena Torres, Cognitive Psychologist
Step-by-Step Guide: Building Your Printed Schedule
Follow this sequence every Sunday or Friday afternoon to prepare your notebook for the upcoming week:
- Review your digital calendar: Identify all confirmed meetings, deadlines, and reminders for the next 7 days.
- Choose your format: Decide whether to use a daily, weekly, or hybrid layout based on workload density.
- Design and print: Create a clean template with room for titles, attendees, objectives, and follow-ups. Print at 80% scale if needed.
- Adhere to notebook: Paste printed sheets neatly using double-sided tape or glue stick. Avoid wrinkling.
- Highlight key items: Use colored pens or pencils to mark high-priority meetings, video calls, or preparation tasks.
- Add blank note zones: Reserve areas adjacent to each meeting block for real-time note-taking during discussions.
- Update dynamically: If new meetings arise, add them in red ink or with sticky notes to maintain accuracy.
Do’s and Don’ts of Notebook Scheduling
| Do’s | Don’ts |
|---|---|
| Use consistent symbols (e.g., 🎥 = video call, ✅ = completed) | Overcrowd entries—leave breathing room between lines |
| Color-code departments or project types | Rely solely on pencil—erasures reduce permanence and urgency |
| Include meeting goals or prep questions next to each entry | Forget to archive old weeks—file or scan them monthly |
| Review past notes before repeating meetings | Use permanent marker—it bleeds through most paper |
Real Example: How a Project Manager Uses Her Notebook
Sarah Kim, a senior project manager at a tech startup, transitioned from digital-only scheduling after noticing she missed action items during back-to-back Zoom calls. She now uses a lined Moleskine notebook with a custom-printed weekly grid.
Each Friday, she exports her Google Calendar view, resizes it to fit two open pages, and prints it on lightweight adhesive paper. After sticking it in place, she adds handwritten details: the goal of each meeting, names of decision-makers, and one question she wants answered. During calls, she takes notes directly under each block.
At week’s end, she scans the pages into Notion using Adobe Scan and archives the physical copy. “Seeing everything laid out on paper forces me to prioritize,” she says. “I catch conflicts earlier and show up more prepared.”
Enhance Functionality with Add-On Systems
A standalone schedule is useful, but integrating complementary systems increases long-term value. Consider pairing your printed calendar with:
- Index tabs: Label tab dividers for each month or project phase.
- Meeting log: Dedicate the last few pages to a running log of decisions made, action items, and unresolved issues.
- Prep checklist: On the opposite side of a meeting block, include a mini-checklist: “Slides ready? Agenda sent? Tech tested?”
- Follow-up tracker: Add a small box next to each meeting to mark when follow-up emails were sent or tasks completed.
Checklist: Weekly Setup Routine
- ☐ Export digital calendar for the coming week
- ☐ Format and print schedule template
- ☐ Paste into notebook with alignment
- ☐ Highlight priority meetings in color
- ☐ Write prep notes or objectives beside each event
- ☐ Review previous week’s notes for continuity
- ☐ Store backup scan digitally (optional)
Frequently Asked Questions
Can I reuse this system with different notebook brands?
Absolutely. The key is adjusting your print template to match the line height and page size of your notebook. Most standard lined notebooks have 8mm or 1/4-inch spacing—design your template accordingly.
What if I run out of space during the week?
Leave a blank page after each weekly spread labeled “Overflow & Updates.” Use it for last-minute additions, cancellations, or rescheduled items. Mark cross-references (e.g., “See p. 24”) in the original entry.
Is this method suitable for remote teams?
Yes, especially when combined with shared digital calendars. Team members can print synchronized schedules and annotate them individually, then bring insights to collaborative sessions. It bridges digital coordination with personal reflection.
Final Thoughts: Turn Paper Into Productivity
Printing and organizing meeting schedules in a lined notebook isn’t just nostalgic—it’s strategic. The act of transferring, formatting, and interacting with your agenda deepens engagement and improves recall. Unlike digital alerts that fade from memory, handwritten plans stay visible, tangible, and thoughtfully curated.
By combining print technology with intentional design, you create a hybrid system that leverages the best of both worlds: digital precision and analog mindfulness. Start small—try one week with a printed layout—and observe how your meeting readiness and time awareness improve.


 浙公网安备
33010002000092号
浙公网安备
33010002000092号 浙B2-20120091-4
Comments
No comments yet. Why don't you start the discussion?