
In an age where smartphones are nearly extensions of our hands, losing grip—or worse, dropping—your iPhone is more than just inconvenient; it can be costly. Whether you're commuting, traveling, working out, or juggling groceries, a secure hold on your phone makes all the difference. While many rely on bulky grips or pop sockets, one increasingly popular solution is integrating a wristband directly into your iPhone case. This simple addition offers stability, peace of mind, and hands-free mobility.
But how do you securely attach a wristband without damaging your device or compromising style? The answer lies not in one universal method, but in choosing the right approach based on your case type, lifestyle, and aesthetic preferences. From DIY hacks to commercially available accessories, there are numerous creative and effective ways to achieve this functionality.
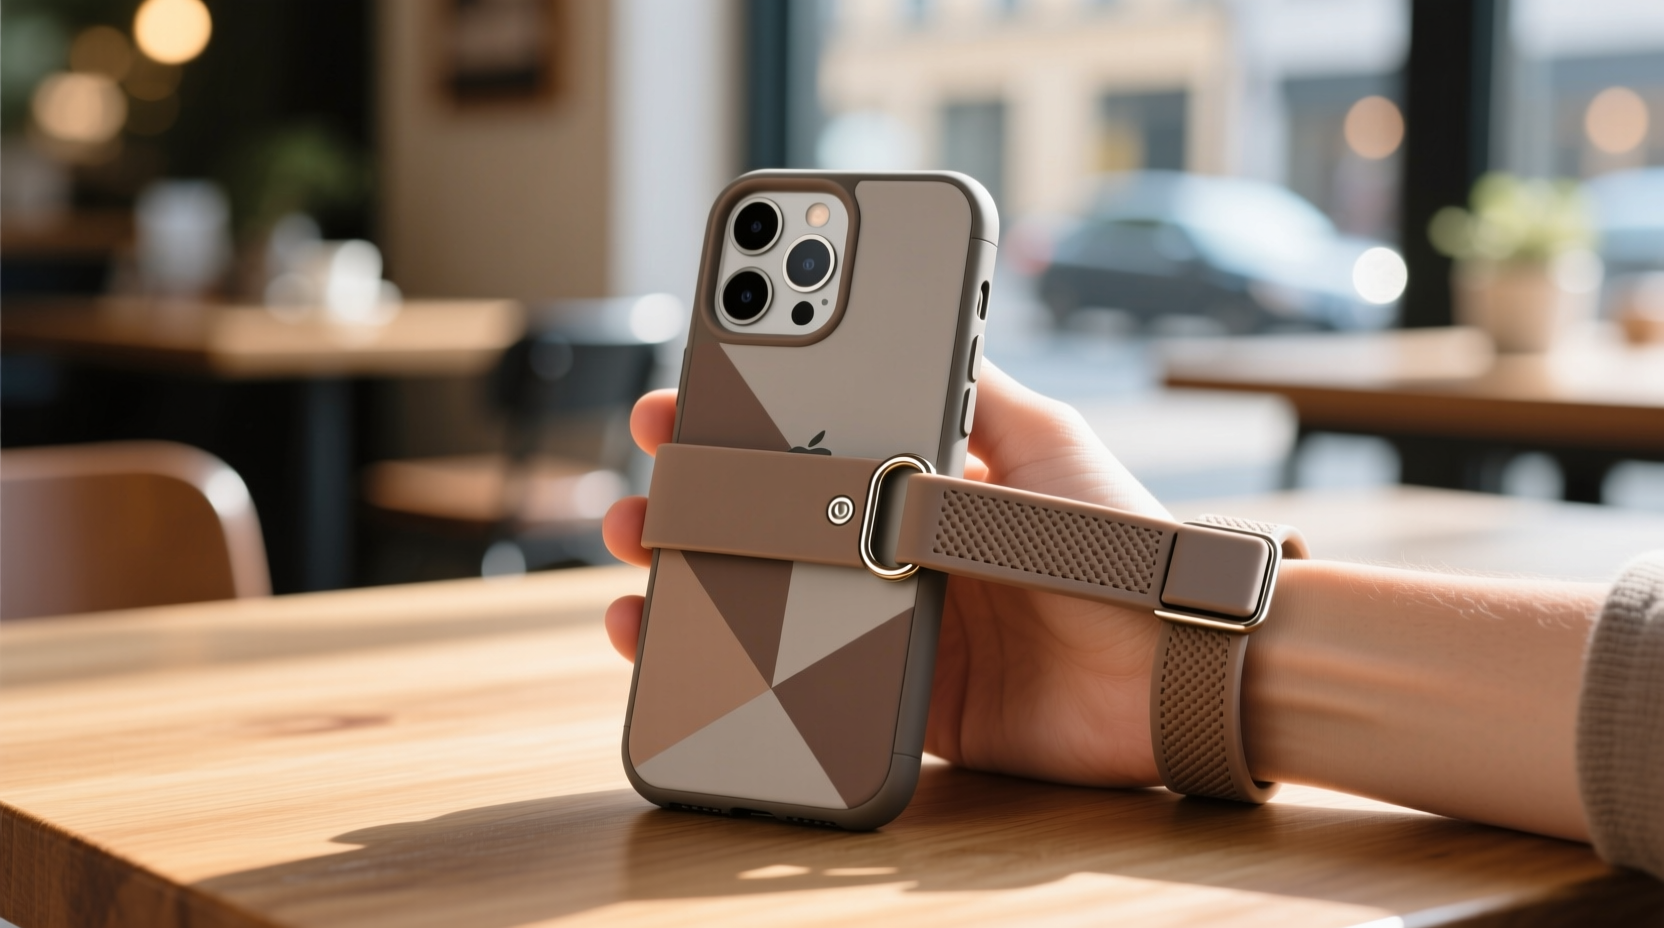
Why Add a Wristband to Your iPhone Case?
The benefits go beyond preventing drops. A well-secured wristband enhances usability across various scenarios:
- Improved grip – Especially helpful for those with slippery cases or larger phones.
- Hands-free convenience – Hang your phone while cooking, shopping, or navigating busy streets.
- Safety during movement – Ideal for runners, cyclists, or travelers who need both freedom and security.
- Style and personalization – Wristbands come in colors, textures, and materials that complement your look.
Unlike adhesive add-ons that wear out or interfere with wireless charging, a properly attached wristband becomes a seamless part of your everyday carry.
Method 1: Using Cases with Built-In Loops or Attachment Points
The simplest way to integrate a wristband is by selecting a case designed with attachment features. Many modern protective cases now include small loops, metal rings, or reinforced side cutouts specifically for lanyards or straps.
Brands like PopSockets GripTight Pro, Olixar Lanyard Series, and Spigen Ultra Hybrid offer models with integrated anchor points. These allow you to thread a thin strap or silicone band through the top or side, creating a secure loop around your wrist.
If your current case lacks these features, consider upgrading to one that supports modular accessories. Some even support magnetic mounts and dual-function stands, giving you multiple utility options in one design.
Method 2: DIY Rivet or Grommet Modification (For Durable Cases)
For users with rugged or custom cases, adding physical anchor points via grommets or rivets provides a permanent, industrial-strength solution. This method works best with thicker TPU, polycarbonate, or leather cases that can withstand minor drilling.
- Select a discreet spot near the top center of the case.
- Use a precision drill bit (1/16” recommended) to create two small holes.
- Insert a tiny brass grommet or eyelet using a setting tool.
- Thread a flat nylon or elastic strap through the loop and knot securely on the inside.
This technique mimics professional accessory integration and ensures no slippage over time. However, proceed with caution—this modification is irreversible and may void warranties.
“Adding hardware like micro-grommets transforms a standard case into a functional tool. It’s especially useful for outdoor workers and active users.” — Jordan Lee, Product Designer at Urban Gear Labs
Method 3: Adhesive-Backed Loop Mounts
A non-invasive alternative involves using ultra-strong adhesive mounts. Products like 3M VHB tape or specialized silicone adhesive pads can bond small plastic or metal loops directly onto the back of your case.
Steps:
- Clean the surface thoroughly with alcohol wipe.
- Align the loop mount at the top center of the case.
- Press firmly for 30 seconds to ensure full adhesion.
- Wait 24 hours before attaching any tension-bearing strap.
These mounts are removable with dental floss or fishing line if needed, though residue may remain. They work particularly well with smooth silicone or glass-backed cases.
Method 4: Magnetic Integration System
Leveraging Apple’s MagSafe ecosystem opens up sleek possibilities. You can combine a MagSafe-compatible case with a magnetic wristband adapter.
Some third-party accessories feature slim magnetic discs embedded in soft wrist loops. When snapped onto the back of a MagSafe case, they provide instant attachment and quick release. Though not ideal under high tension (like jogging), they excel in casual settings such as cafes, museums, or retail environments.
Additionally, DIY enthusiasts have begun embedding neodymium magnets into custom straps, allowing them to pair seamlessly with existing MagSafe setups without obstructing charging capabilities.
Comparison Table: Wristband Attachment Methods
| Method | Installation | Reversibility | Durability | Best For |
|---|---|---|---|---|
| Built-in Loop Case | None (ready-to-use) | Fully reversible | High | Everyday users seeking simplicity |
| DIY Grommet | Permanent modification | Irreversible | Very High | Outdoor/active professionals |
| Adhesive Mount | Easy, temporary | Semi-reversible | Moderate | Renters or frequent case changers |
| Magnetic Band | No tools needed | Fully reversible | Medium (depends on magnet strength) | Urban commuters, minimalists |
Real-World Example: A Photographer’s On-the-Go Solution
Sophia Ramirez, a freelance street photographer in Brooklyn, needed a way to keep her iPhone 15 Pro accessible while shooting with her primary camera. She disliked bulky grips and wanted something subtle yet reliable.
She opted for a hybrid solution: a transparent MagSafe case paired with a custom-woven nylon strap embedded with a rare-earth magnet. By placing the strap vertically along the top edge and securing it with a micro-snap closure, she created a low-profile wrist tether. During shoots, she could quickly grab her phone for notes or maps without fear of dropping it—even when switching lenses mid-walk.
Her only adjustment was reinforcing the magnet with a thin layer of rubber coating to prevent scratching. “It feels invisible until I need it,” she says. “Now I don’t second-guess pulling my phone out in crowded spaces.”
Checklist: How to Choose & Install Your Wristband
- ✅ Assess your case material and thickness.
- ✅ Determine your primary use case (e.g., gym, commute, travel).
- ✅ Decide between permanent vs. removable solutions.
- ✅ Measure wrist size to ensure proper band length.
- ✅ Test tension by gently tugging after installation.
- ✅ Confirm compatibility with wireless charging (if applicable).
- ✅ Opt for sweat-resistant, washable materials if used during exercise.
Frequently Asked Questions
Can I attach a wristband to any iPhone case?
Most cases can accommodate a wristband, but success depends on material and structure. Soft silicone or thin plastic cases may not support heavy-duty modifications like grommets. For those, adhesive loops or MagSafe-compatible bands are safer choices.
Will a wristband interfere with phone functions?
Not if installed correctly. Avoid blocking ports, speakers, or the camera module. Position the band toward the top center of the case to maintain balance and accessibility. Magnetic options should be tested for interference with NFC or Apple Pay.
Are wristbands safe for children or seniors?
Yes—with precautions. Use adjustable, soft-material bands to prevent pinching. Ensure the fit allows easy removal in emergencies. For seniors, a slightly longer band improves ease of access; for kids, shorter lengths reduce snag risks.
Final Thoughts and Action Steps
Securing a wristband to your iPhone case isn’t just about preventing drops—it’s about enhancing control, confidence, and convenience in your daily routine. Whether you choose a ready-made case with built-in support, a smart magnetic system, or a personalized DIY upgrade, the goal remains the same: making your device an effortless extension of your movements.
The key is matching the method to your lifestyle. Active users may lean toward rugged, fixed attachments. Minimalists might prefer sleek magnetic options. And tinkerers will enjoy crafting their own perfect fit.


 浙公网安备
33010002000092号
浙公网安备
33010002000092号 浙B2-20120091-4
Comments
No comments yet. Why don't you start the discussion?