
Personalizing accessories is no longer limited to fashion houses or boutique labels. With a little creativity and the right tools, anyone can transform an ordinary bag into a statement piece. Brooches offer a versatile, elegant, and customizable way to elevate your everyday carry. Whether you're revamping a vintage tote, adding flair to a minimalist crossbody, or expressing your personality through wearable art, DIY brooch accessories are an accessible entry point into fashion customization.
Beyond aesthetics, brooches carry historical weight—they’ve been used for centuries as symbols of status, identity, and artistry. Today, they serve as dynamic focal points on bags, jackets, hats, and scarves. By crafting your own, you not only save money but also ensure your accessory reflects your individuality. This guide walks you through the process of designing, constructing, and attaching brooches to personalize your bag with confidence and style.
Selecting Your Materials and Tools
The foundation of any successful DIY project lies in preparation. Choosing quality materials ensures durability and visual appeal. For brooch-making, consider both functional and decorative components.
- Finding the Base: Use sturdy backings like felt circles, metal plaques, or repurposed buttons. These provide stability and prevent fabric tearing when pinned.
- Embellishments: Mix textures—think beads, sequins, fabric scraps, vintage jewelry parts, dried flowers (resin-coated), or embroidery floss.
- Attachment Mechanism: Brooch pins or safety clasps are essential. Opt for nickel-free or stainless steel options if you have sensitive skin.
- Adhesives: E6000 industrial glue or fabric-safe epoxy holds heavy elements securely.
- Tools: Needle-nose pliers, wire cutters, scissors, hot glue gun, tweezers, and a thimble for hand-sewing.
Design Inspiration and Planning
Before assembling, sketch a rough layout of your brooch. Consider symmetry, color harmony, and scale relative to your bag. A well-planned design prevents overcrowding or imbalance.
Themes can range from botanical (daisies, leaves) to geometric (cubes, spirals), whimsical (mini animals, clouds), or even abstract expressions using layered fabrics. Mood boards help visualize combinations. Pinterest, vintage fashion archives, and textile museums are excellent sources.
“Personalization isn’t about following trends—it’s about embedding narrative into objects. A brooch should tell part of your story.” — Lila Monroe, Textile Artist & Educator
Step-by-Step Guide to Crafting Your First Brooch
- Choose a Theme: Decide on a concept—floral, retro, steampunk, minimalist. This guides material selection.
- Prepare the Base: Cut a circular or shaped piece of felt or thin wood (about 1.5–3 inches in diameter). This will anchor all elements.
- Arrange Components: Lay out beads, fabric, or trinkets on the base without gluing. Adjust until balance and flow feel right.
- Secure Elements: Begin attaching with strong adhesive or hand-stitching. For beads, use beading thread; for heavier items, apply E6000 and allow 24 hours to cure.
- Add Dimension: Layer smaller pieces over larger ones. Use wire loops to raise certain elements for depth.
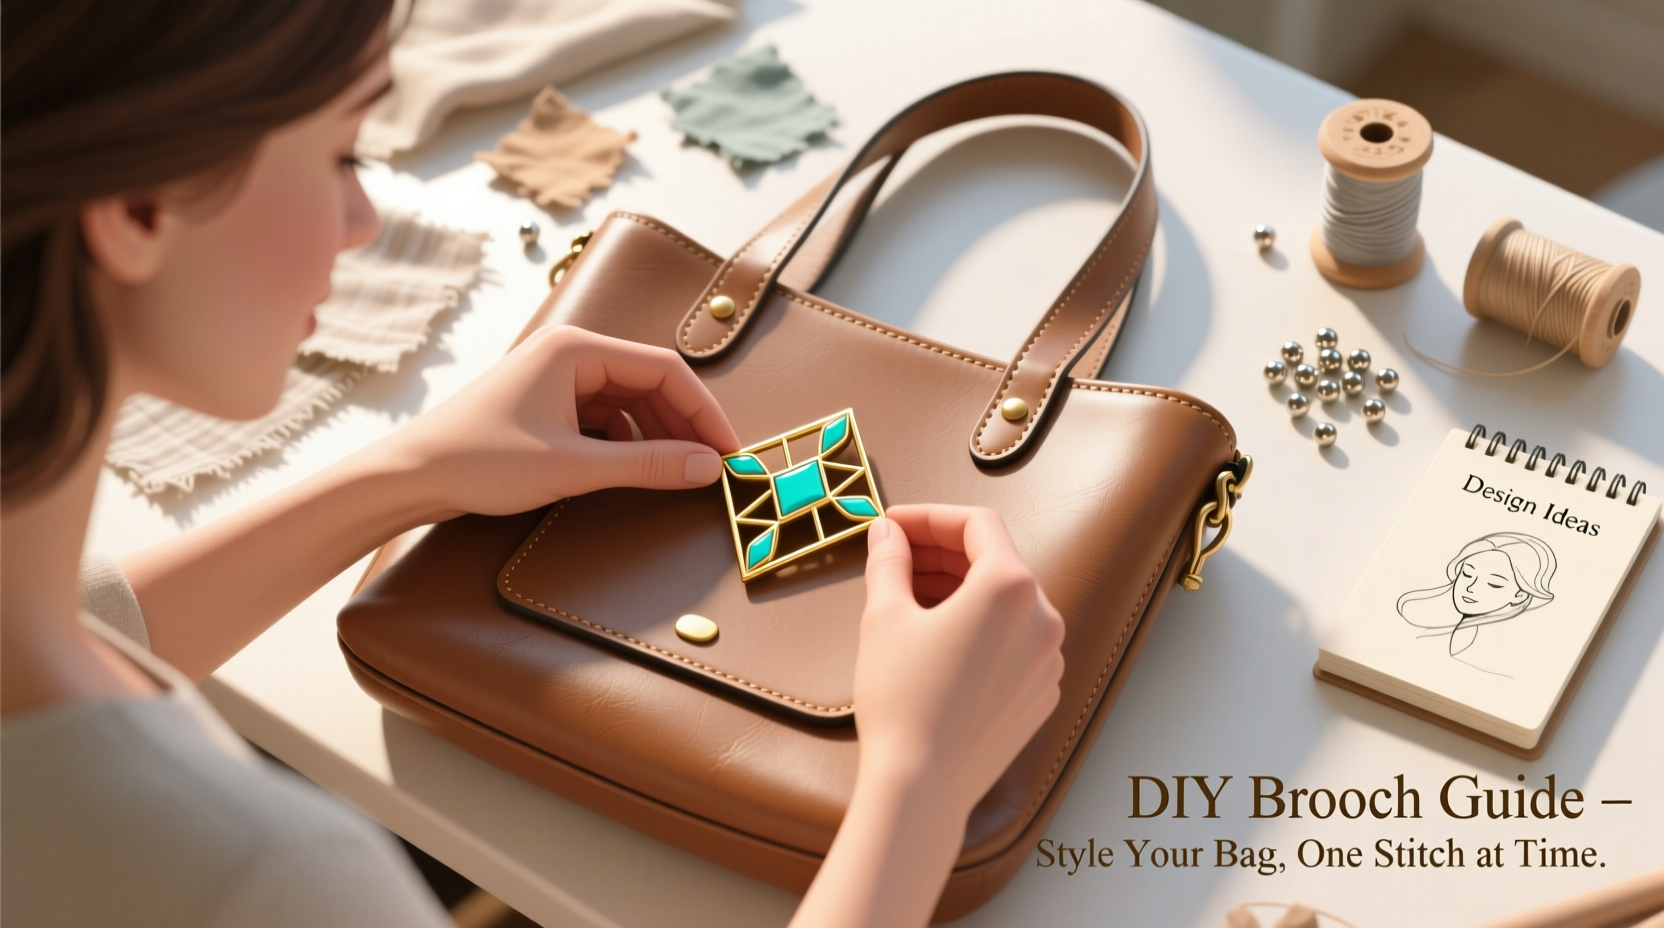
- Attach the Pin Back: Position the brooch clasp on the reverse side. Secure firmly with epoxy or rivets if working with metal.
- Final Inspection: Check for loose parts, sharp edges, or uneven weight distribution. Trim excess threads or glue residue.
Attaching Brooches to Your Bag: Techniques That Last
A beautifully made brooch is only effective if it stays put. The attachment method depends on your bag’s material and structure.
| Bag Material | Recommended Attachment | Risks to Avoid |
|---|---|---|
| Canvas or Denim | Sewing + adhesive reinforcement | Thread snapping under strain |
| Genuine Leather | Leather needle stitching or rivet setting | Puncturing too close to edge causing tears |
| Synthetic Fabric | Strong fabric glue + pin backing | Glue seeping through and staining |
| Vintage or Delicate Fabrics | Magnetic brooch backs or removable clips | Permanent damage from holes |
For permanent installations, sew the brooch directly using waxed thread and a saddle stitch for strength. For temporary flair, opt for magnetic backs or clip-on adapters that preserve the bag’s integrity.
Mini Case Study: Reviving a Worn Tote with Custom Brooches
Sophie, a graphic designer in Portland, inherited her grandmother’s aged leather satchel. Though structurally sound, it lacked luster and felt outdated. She decided to modernize it with three handmade brooches inspired by Pacific Northwest flora—ferns, mushrooms, and cedar berries.
Using green-tinted resin leaves, copper wire stems, and tiny red beads for berries, she crafted each piece over a weekend. She attached them near the bag’s flap and handle base using leather stitching. The result transformed the satchel into a conversation starter at work and farmers’ markets. More importantly, the act deepened her emotional connection to the heirloom.
Care and Maintenance of DIY Brooch Accessories
Handmade doesn’t mean high-maintenance, but thoughtful upkeep preserves both brooch and bag. Store bags in dust bags away from sunlight to prevent fading. Remove brooches before cleaning or storing long-term if they contain delicate materials like silk or unsealed wood.
For cleaning, gently wipe metal components with a microfiber cloth. Avoid submerging glued pieces in water. Inspect attachments monthly—especially after frequent use—to catch loosening pins early.
Checklist: Creating and Applying DIY Brooches Safely and Effectively
- ☐ Choose a theme and gather inspiration images
- ☐ Collect materials: base, embellishments, pin back, adhesives
- ☐ Test layout before securing elements
- ☐ Use appropriate glue or stitching for each material
- ☐ Allow adhesives full curing time (up to 24 hours)
- ☐ Match attachment method to bag fabric type
- ☐ Attach brooch securely and test durability
- ☐ Document your design for future replication or gifting
Frequently Asked Questions
Can I make brooches without sewing or gluing?
Yes. Use pre-made brooch bases with prong settings or snap-on frames. These allow you to insert flat designs like photographs, fabric swatches, or printed paper without permanent alterations.
Are DIY brooches durable enough for daily use?
When constructed with quality materials and proper techniques, yes. Reinforce high-stress areas, avoid overly bulky designs, and inspect regularly. Resin-coated or sealed pieces withstand moisture better.
How do I remove a brooch without damaging my bag?
If sewn in, carefully unpick stitches with a seam ripper. If glued, gently warm the area with a hairdryer to soften adhesive before lifting. For magnetic or clip-on types, simply detach.
Express Yourself—one Brooch at a Time
Customizing your bag with DIY brooches merges craftsmanship with self-expression. It turns functional items into wearable galleries, where every pin tells a story—of places visited, passions held, or moments cherished. You don’t need formal training or expensive supplies to begin. Start small: rework an old earring into a floral accent, or arrange buttons into a constellation.
Each brooch you create becomes more than decoration—it becomes a signature. As you refine your technique, you’ll discover new ways to integrate color, texture, and meaning into your wardrobe. And beyond personal satisfaction, these creations often spark conversations, inspire others, or make heartfelt gifts.


 浙公网安备
33010002000092号
浙公网安备
33010002000092号 浙B2-20120091-4
Comments
No comments yet. Why don't you start the discussion?