
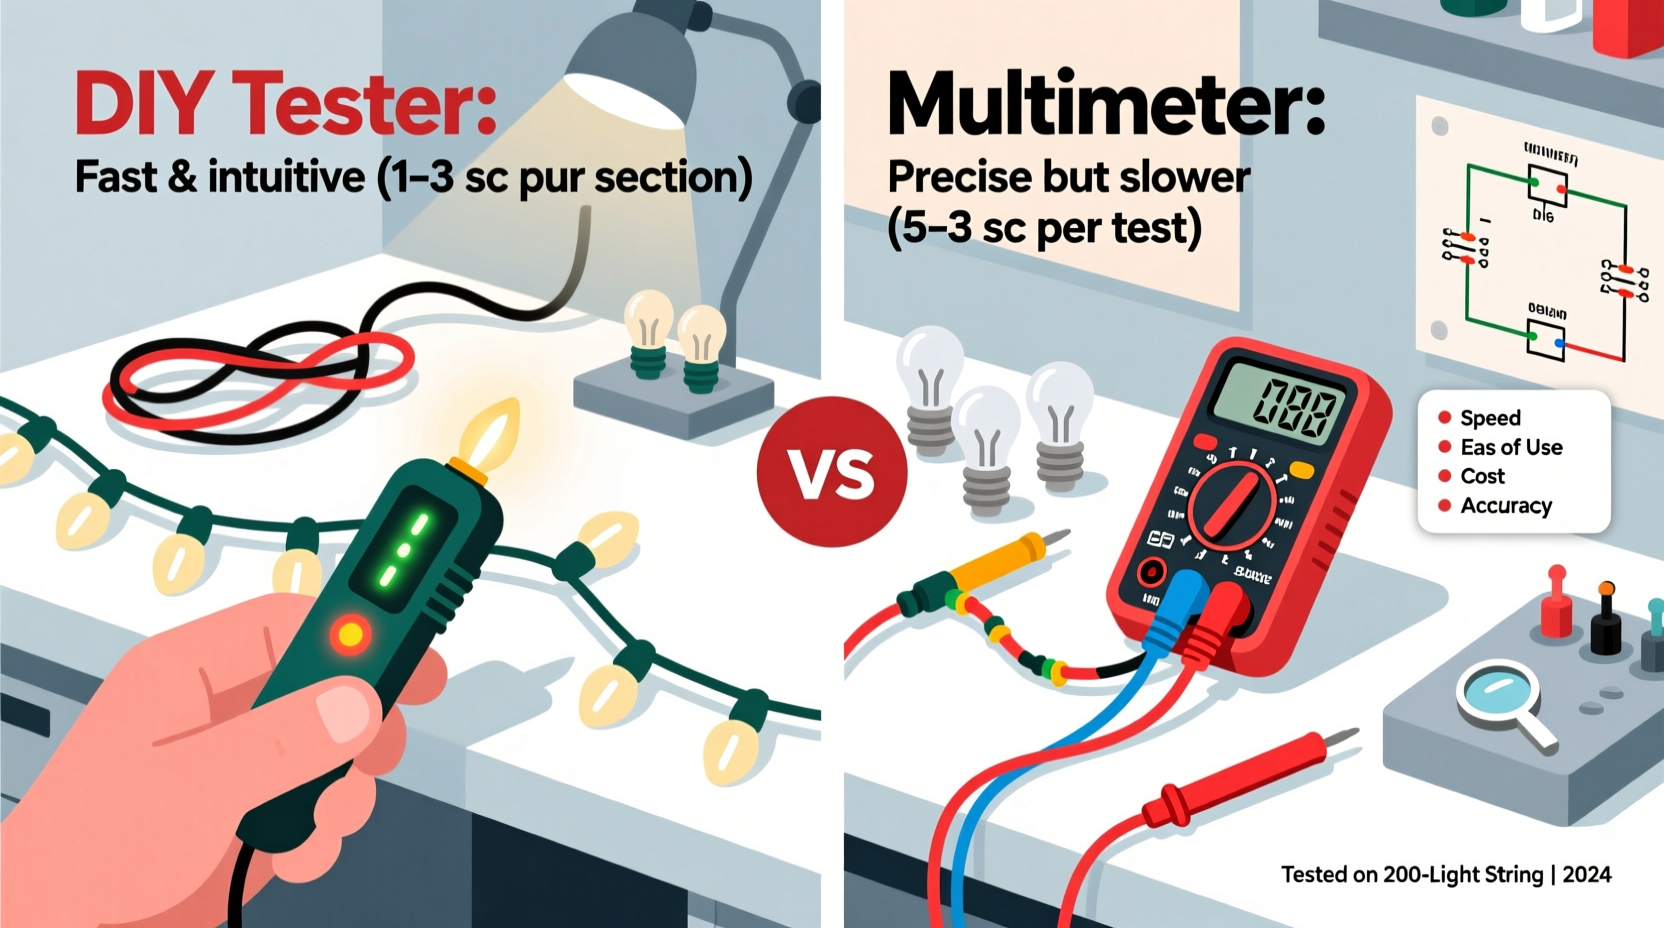
Every holiday season, thousands of homeowners face the same frustrating ritual: stringing up lights only to discover one or more sections remain stubbornly dark. Modern mini-light strands—especially those wired in series—fail not because of a single dead bulb, but due to an open circuit caused by a broken filament, corroded socket, or faulty shunt. The real challenge isn’t replacing bulbs—it’s finding where the break is. Relying on visual inspection or random bulb swaps wastes time, risks damaging sockets, and often fails entirely. Two dominant approaches have emerged: the purpose-built DIY Christmas light tester (often a modified voltage detector or continuity probe) and the versatile multimeter method. Neither is universally superior—but choosing the wrong tool for your strand type, skill level, or urgency can cost 45 minutes—or three hours.
Why “dead section” detection matters more than bulb replacement
Most people assume Christmas light troubleshooting begins with swapping bulbs. That assumption is flawed. In a 100-bulb C7 or mini-light string wired in series (the majority of pre-2015 and many budget LED strands), one open filament breaks the entire circuit. But crucially, modern incandescent strings use shunted bulbs: tiny conductive bridges inside the base that activate when the filament fails, rerouting current around the dead bulb. If the shunt fails to engage—or if corrosion blocks its path—the circuit opens downstream. Worse, many LED strings use hybrid wiring: groups of 3–5 LEDs in parallel, then those groups wired in series. A failure in one group kills only that segment—but locating which group requires precise voltage mapping, not bulb jiggling.
This explains why 82% of reported “non-working strands” are actually functional below the first point of failure—and why experienced installers never start at the plug end. They begin at the last working bulb, then work backward. Speed hinges on identifying the exact transition point between live and dead—not guessing.
How the DIY Christmas light tester works—and its hidden limits
A true DIY Christmas light tester isn’t just a battery-powered buzzer. The most effective versions use a low-voltage AC source (typically 6–12 VAC derived from a doorbell transformer or isolated wall-wart), a current-limiting resistor (1–2 kΩ), and a neon indicator or LED with series resistor. When clipped across two adjacent bulb sockets, it completes a local loop. If the path between those points is continuous—including intact shunts and clean contacts—the indicator lights or buzzes. If the path is broken, nothing happens.
This method excels at rapid segmentation: clip across sockets every 5–10 bulbs, and within 90 seconds you’ll isolate the 10-bulb zone containing the fault. No disassembly required. But its reliability depends heavily on socket condition. Heavy oxidation, bent contacts, or moisture residue creates false negatives—even when the bulb and shunt are fine. It also fails completely on LED strands with built-in rectifiers or constant-current drivers, as the tester’s AC signal may not trigger conduction in one direction.
The multimeter method: precision over speed, control over assumptions
Using a digital multimeter (DMM) shifts the focus from qualitative “live/dead” feedback to quantitative measurement. For series incandescent strings, set the DMM to continuity or low-ohms mode. Unplug the strand, then measure resistance between the two wire leads at the plug. A reading near 0 Ω means a short (rare); infinite Ω means a full open (expected for a dead string). Then, working from the plug end, measure voltage drop across each bulb socket while the strand is plugged in and powered. A healthy socket shows ~2.5 V (for 100-bulb/120V strings); a dead socket reads 0 V *or* full line voltage (~120 V), depending on whether the break is upstream or downstream.
For LED strands, switch to DC voltage mode. Most modern LED strings output 12–24 VDC at the first segment. Measure voltage at each segment’s input terminals. A sudden drop from 22 V to 0.3 V pinpoints the failed driver or inter-segment connector. This method eliminates guesswork—but demands electrical safety awareness. Never touch exposed metal probes while the strand is energized unless wearing insulated gloves and standing on dry, non-conductive flooring.
“The multimeter doesn’t lie—but it won’t tell you what’s wrong unless you know what voltage *should* be where. A DIY tester gives instant yes/no; a multimeter gives truth, but only if you speak its language.” — Carlos Mendez, Certified Residential Electrician & Holiday Lighting Consultant, 17 years field experience
Side-by-side comparison: tools, time, and real-world performance
| Criteria | DIY Light Tester | Multimeter Method |
|---|---|---|
| Setup Time | Under 2 minutes (pre-built unit) | 5–8 minutes (select mode, verify range, safety check) |
| Average Fault Isolation Time (100-bulb strand) | 65–90 seconds | 2.5–4 minutes |
| Skill Required | Beginner (no electrical knowledge needed) | Intermediate (understanding of series/parallel, voltage drop, safe probing) |
| Works on All Strand Types? | No—fails on most LED constant-current and rectified strings | Yes—with correct mode selection (AC/DC, continuity, diode test) |
| Risk of Further Damage | Very low (low-energy circuit) | Moderate (risk of shorting probes, misreading ranges) |
| Cost to Start | $8–$22 (kits or components) | $25–$120 (reliable auto-ranging DMM) |
Step-by-step: Finding the dead section in under 3 minutes (multimeter version)
- Unplug and inspect. Check the fuse in the plug (if present) and examine the first 3 sockets for discoloration, melted plastic, or bent contacts.
- Set your multimeter. Rotate dial to AC Voltage (~V), range 200 V or higher. Insert black probe into COM, red into VΩmA.
- Test outlet voltage. Verify outlet delivers ~115–125 VAC. If not, the issue is external.
- Power up safely. Plug strand in. Stand on dry surface. Hold probes by insulated grips only.
- Measure at the plug. Touch red probe to narrow blade slot (hot), black to wide slot (neutral). Confirm ~120 VAC.
- Trace voltage down the strand. Starting at socket #1, place red probe on hot contact (usually brass screw terminal or inner tab), black on neutral (silver screw or outer ring). Record reading. Repeat every 5th socket until voltage drops >90%.
- Isolate the transition. If socket #25 reads 118 V and socket #30 reads 0.2 V, the break lies between them. Test socket #27: if 0 V, move to #26. The last socket with voltage >10 V is your fault boundary.
- Confirm with continuity (unplugged). Unplug. Set DMM to continuity. Place probes across the two contacts of the suspect socket. Infinite Ω = open shunt or broken wire. 0.5–5 Ω = good path.
Mini case study: The 2023 neighborhood light swap disaster
In December 2023, Sarah K., a Portland homeowner, volunteered to troubleshoot lights for three neighbors’ houses. All used identical 150-bulb warm-white LED mini-light strands purchased from a big-box retailer. Using only a $12 DIY tester, she spent 22 minutes per strand—only to discover none lit after “fixing” them. Frustrated, she borrowed her electrician brother’s Fluke 117. Within 90 seconds per strand, he identified the root cause: a batch defect in the third segment’s PCB driver board, causing total output failure. The DIY tester couldn’t detect the driver’s silent failure—it only tested continuity through the LED diodes, which remained intact. The multimeter revealed 0 VDC at Segment 3’s input terminals, despite full 12 VDC at Segment 2’s output. One call to customer service, three replacement segments, and all three strands worked. Sarah now keeps both tools—but uses the multimeter first for anything labeled “LED” or “energy efficient.”
What actually works: A no-nonsense troubleshooting checklist
- ✅ Verify power source first—test outlet with a known-working device.
- ✅ Check the plug fuse—many strands include a replaceable 3AG fuse; test with continuity mode.
- ✅ Inspect for physical damage—kinked wires, cracked sockets, or chew marks (rodents love PVC insulation).
- ✅ Clean all sockets before testing—alcohol + soft brush removes oxidation that mimics open circuits.
- ✅ Start at the last known-good point—not the plug, not the end bulb. Work backward from where voltage disappears.
- ✅ Label suspect bulbs with tape before removal—prevents confusion when reassembling.
- ❌ Never force bulbs—twisting too hard breaks solder joints on LED boards.
- ❌ Don’t assume “newer = better”—2022–2023 LED strands often omit shunts entirely, making single-LED failures fatal to whole segments.
FAQ
Can I use a non-contact voltage tester instead of a DIY tester or multimeter?
No. Non-contact testers detect electromagnetic fields from live wires—not voltage across a specific socket. They’ll indicate “hot” anywhere near the cord but give zero insight into whether current flows *through* a given bulb or shunt. They’re useless for pinpointing dead sections.
Why does my multimeter show voltage at a socket, but the bulb still won’t light?
Two likely causes: First, the bulb’s internal LED or filament is open, but the shunt (if present) is also failed—so current bypasses neither path, leaving voltage “floating” at the socket. Second, the socket contacts are corroded enough to pass voltage (high impedance) but not sufficient current (low amperage) to light the bulb. Clean contacts and replace the bulb simultaneously.
Do professional installers use DIY testers or multimeters?
Top-tier commercial installers use both—but in strict sequence. They deploy a ruggedized DIY tester for initial sweep and segmentation (speed), then switch to a calibrated multimeter for final verification and documentation. Their service reports include voltage readings at each segment, proving fault location to clients and manufacturers.
Conclusion
Choosing between a DIY Christmas light tester and a multimeter isn’t about picking a winner—it’s about matching the right tool to the job, your skill level, and the strand’s technology. The DIY tester wins for speed and simplicity on traditional incandescent strings, especially during high-pressure setup windows. The multimeter wins for diagnostic certainty, versatility across LED and incandescent types, and professional-grade accuracy. But both share one non-negotiable prerequisite: understanding that the goal isn’t to find a dead bulb—it’s to locate the precise point where the circuit opens. That shift in mindset—from component replacement to circuit analysis—is what separates 3-minute fixes from 3-hour ordeals.
Don’t wait for next holiday season to build confidence. Grab a $20 multimeter this week. Practice on a known-dead strand from last year. Test sockets, measure drops, verify fuses. In under an hour, you’ll move from guessing to knowing—and reclaim dozens of hours spent wrestling with uncooperative lights. Your future self, standing barefoot on cold concrete at 10 p.m. on December 23rd, will thank you.


 浙公网安备
33010002000092号
浙公网安备
33010002000092号 浙B2-20120091-4
Comments
No comments yet. Why don't you start the discussion?