
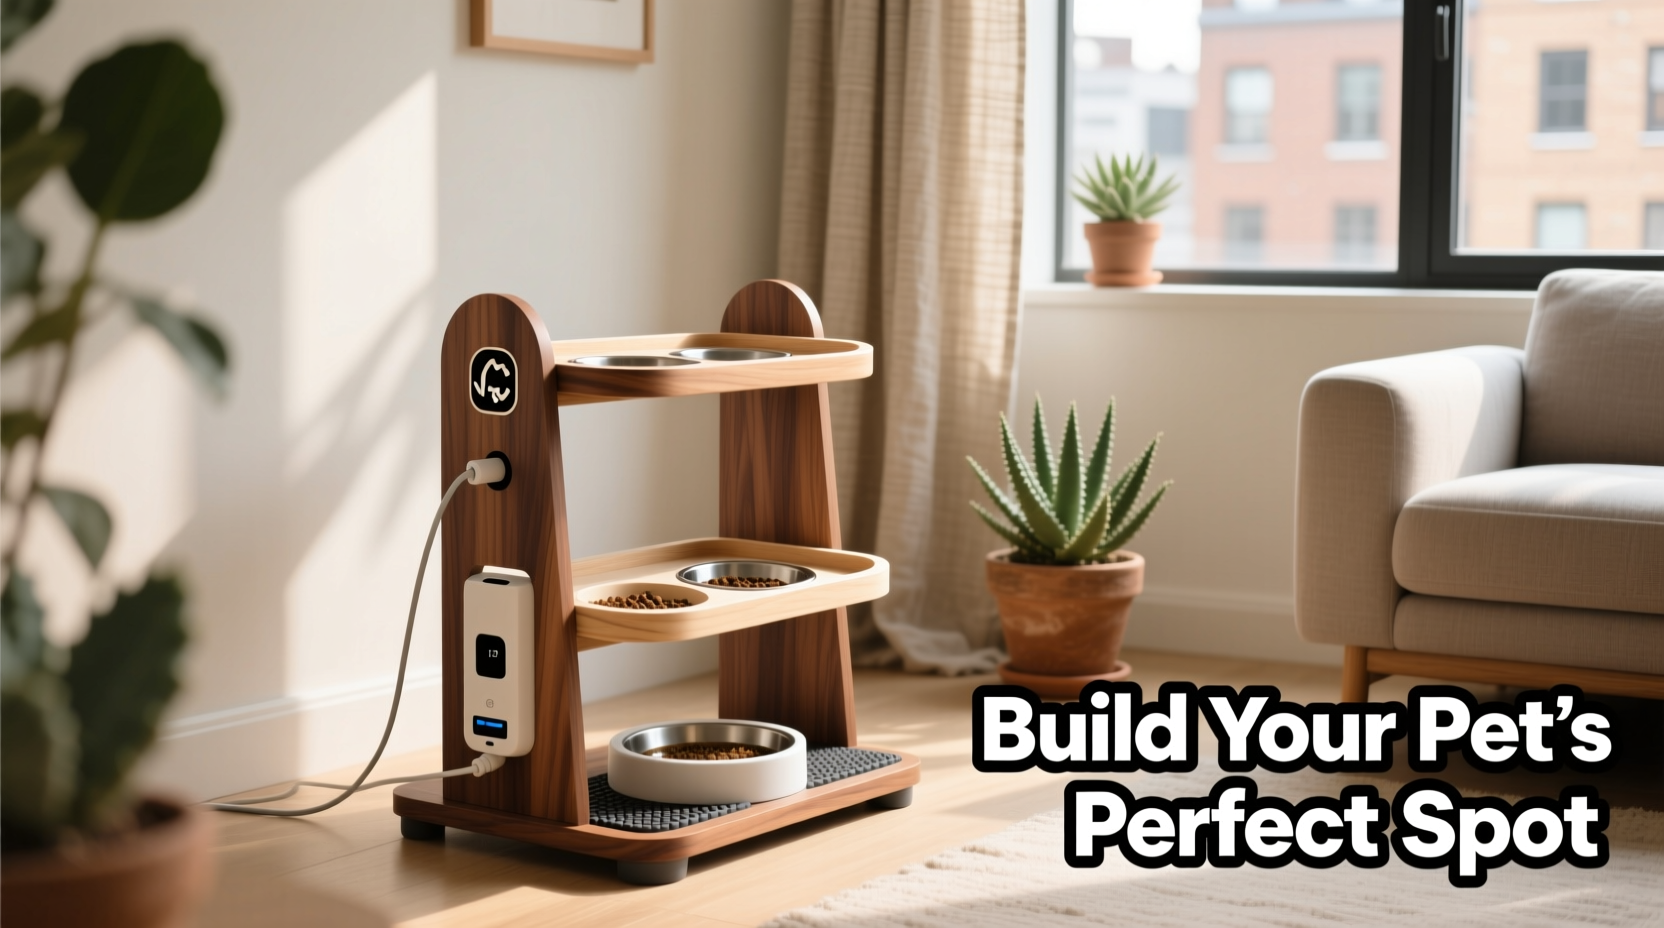
Feeding time shouldn’t be a haphazard affair of bowls on the floor or cluttered kitchen corners. A well-designed dog feeder stand elevates your pet’s dining experience while seamlessly blending into your home aesthetic. Beyond style, raising food and water bowls to an ergonomic height supports better digestion, reduces strain on joints, and encourages proper posture—especially important for large breeds, seniors, or dogs with hip dysplasia. This guide walks you through building a durable, custom feeder stand using accessible materials and tools, tailored to your space and your dog’s needs.
Why Elevation Matters: Health Benefits for Your Dog
Dogs eating from ground-level bowls often hunch or stretch uncomfortably, which over time can contribute to digestive issues like bloat—a life-threatening condition in deep-chested breeds. An elevated feeder aligns the neck and spine during meals, promoting smoother swallowing and reducing air intake. Veterinarians frequently recommend raised feeders for dogs with arthritis, tracheal collapse, or esophageal disorders.
“Elevated feeding can significantly reduce stress on cervical and thoracic vertebrae, especially in larger breeds. It’s a simple change with measurable impact.” — Dr. Lena Torres, DVM, Canine Orthopedic Specialist
The ideal height varies by breed and size. As a rule, the top of the bowl should sit at chest level when your dog is standing naturally. For most medium to large dogs, this ranges between 6 to 12 inches off the ground. Customizing the stand ensures a perfect fit, unlike mass-produced models that offer limited adjustability.
Materials and Tools You’ll Need
This project uses basic woodworking supplies, many of which may already be in your garage. The design focuses on clean lines, durability, and easy cleaning—critical for pet areas prone to spills and messes.
Recommended Materials
- 1x12 pine or poplar board (4 feet long) – for the base and shelves
- 2x2 hardwood posts (8 feet total) – for legs and frame support
- Wood screws (1.5” and 2.5”)
- Sandpaper (120 and 220 grit)
- Water-resistant wood finish (e.g., polyurethane or tung oil)
- Non-slip rubber feet or pads
- Two stainless steel or ceramic pet bowls
Essential Tools
- Circular saw or miter saw
- Drill with screwdriver bit
- Tape measure and square
- Clamps
- Orbital sander or sanding block
Step-by-Step Construction Guide
Follow this sequence to assemble a sturdy, attractive feeder stand in under four hours, including drying time for finish.
- Measure and cut the wood: Cut two 18-inch pieces from the 1x12 for the top shelf (holds bowls) and bottom tray. Cut four 14-inch pieces from the 2x2s for the vertical legs.
- Sand all surfaces: Begin with 120-grit paper to smooth rough edges, then finish with 220-grit for a polished feel. Pay special attention to corners where splinters could form.
- Assemble the frame: Position two leg pieces vertically at each end of the top shelf. Drill pilot holes and secure with 2.5” wood screws. Repeat for the bottom shelf, ensuring both levels are parallel and square.
- Add cross supports (optional): For added stability, attach a 12-inch 2x2 horizontally between the legs just below the top shelf. This prevents lateral wobbling.
- Attach non-slip feet: Glue or screw rubber pads to the bottom of each leg to protect flooring and prevent sliding during enthusiastic meals.
- Apply finish: Coat all surfaces with at least two layers of water-resistant sealant, allowing full drying between coats. Tung oil offers a natural look; polyurethane provides maximum spill resistance.
Once dry, place bowls securely on the top shelf. Use the lower tray to catch drips or store small treats and wipes—keeping feeding zones tidy.
Design Variations for Style and Function
No two homes—or dogs—are alike. Customize your stand to match your interior while addressing practical concerns.
| Style | Best For | Customization Tips |
|---|---|---|
| Modern Minimalist | Contemporary homes, small spaces | Use black-stained legs and white oak top; recess bowls slightly for sleek look |
| Rustic Farmhouse | Kitchens with warm tones, shaker cabinets | Distress edges lightly, use milk paint finish, add engraved name plaque |
| Adjustable Height | Growing puppies or multi-dog households | Build with threaded rods and wing nuts for modular height changes |
| Compact Corner Model | Tight apartments or hallways | Cut triangular base, angle legs to fit 90-degree corners |
Real-Life Example: Transforming a Cluttered Kitchen Nook
Sarah, a graphic designer in Portland, struggled with her Labrador knocking over bowls and tracking water across her tile floor. Her previous plastic feeder cracked within months. She built a walnut-finished stand with a pull-out tray for cleanup and matching her cabinetry. “It looks like furniture now,” she says. “Plus, my dog stopped gulping his food so fast—he actually pauses between bites. I didn’t expect a stand to change his eating habits.”
The new setup also freed up counter space previously used for towel storage, proving that thoughtful pet gear can improve household functionality.
Common Mistakes to Avoid
Even simple builds can go wrong without attention to detail. Here’s what to watch for:
- Incorrect height: Too high strains shoulders; too low defeats the purpose. Measure your dog standing comfortably.
- Wobbly joints: Always drill pilot holes and use clamps during assembly to maintain alignment.
- Unsafe finishes: Avoid paints or varnishes with volatile organic compounds (VOCs). Choose pet-safe, low-odor sealants.
- Narrow base: Ensure the footprint is wide enough to resist tipping. A minimum 16” x 12” base provides stability.
Checklist: Build Your Stand in One Afternoon
- ☐ Measure your dog’s chest height from the floor
- ☐ Purchase materials based on desired dimensions
- ☐ Cut all wood pieces to size
- ☐ Sand thoroughly, starting coarse and finishing fine
- ☐ Assemble frame using clamps and pilot holes
- ☐ Attach non-slip feet to legs
- ☐ Apply two coats of pet-safe finish, drying fully between
- ☐ Place bowls and test stability with your dog present
Frequently Asked Questions
Can I use this design for cats?
Absolutely. Adjust the height to suit your cat’s shoulder level—typically 4 to 6 inches for adult cats. Consider adding a soft pad or fabric liner to the lower shelf for lounging.
How do I clean the stand regularly?
Wipe down with a damp cloth and mild soap weekly. Avoid soaking the wood. Reapply a maintenance coat of finish every 6–12 months to preserve water resistance.
Is wood safe around constant moisture?
Yes, if properly sealed. Use marine-grade spar urethane or multiple coats of tung oil for maximum protection. Elevating the stand slightly off the floor with rubber feet also prevents wicking.
Final Thoughts: Where Pet Care Meets Home Design
A custom dog feeder stand isn’t just a piece of pet equipment—it’s a statement of care. By investing a few hours in craftsmanship, you create a functional item that supports your dog’s health and complements your living space. Unlike generic feeders that clash with décor or break after months, a handmade stand ages gracefully, gaining character with use. Whether you lean toward Scandinavian simplicity or rustic charm, the ability to tailor dimensions, materials, and finish means your pet’s essentials no longer have to hide in plain sight.


 浙公网安备
33010002000092号
浙公网安备
33010002000092号 浙B2-20120091-4
Comments
No comments yet. Why don't you start the discussion?