
There’s something timeless about the ocean’s treasures—delicate shells, intricate starfish, and the soft luster of sea-worn textures. Bringing these elements into wearable art allows you to carry a piece of the shoreline wherever you go. Creating your own starfish and shell earrings is not only a rewarding craft but also an opportunity to design accessories that reflect your personal style. With minimal tools and a bit of patience, you can produce elegant, one-of-a-kind earrings that are perfect for summer outfits, beach weddings, or thoughtful handmade gifts.
Gathering Your Materials
The foundation of any successful DIY jewelry project lies in selecting the right components. For starfish and shell earrings, natural or resin-based materials work best. Real dried starfish and miniature seashells offer authenticity, while high-quality resin replicas provide durability and consistency in size and shape. When sourcing natural items, ensure they are ethically collected and fully cleaned to prevent odors or deterioration over time.
Beyond the focal pieces, you’ll need basic jewelry-making supplies:
- Earring hooks or studs (sterling silver, gold-plated, or hypoallergenic)
- Jewelry glue (E6000 or GS-Hypox is ideal)
- Jump rings (3–5mm, depending on design)
- Chain snippets (optional, for movement and detail)
- Pliers (flat-nose and round-nose for precision)
- Clear sealant spray (for natural shells and starfish)
- Soft cloth or brush for cleaning surfaces
Design Planning: Sketching Your Vision
Before assembling, spend a few minutes visualizing your earring style. Do you prefer minimalist dangles with a single tiny starfish? Or perhaps layered designs combining small cowrie shells with a central starfish motif? Consider symmetry, balance, and weight—especially if the earrings will be worn for extended periods.
A simple sketch on paper helps map out proportions. Decide whether you want both earrings to mirror each other or embrace asymmetry for an artistic flair. Also, think about color coordination. Natural tones work beautifully on their own, but a light wash of iridescent paint or metallic accent can elevate the design without overpowering it.
“Nature provides the form; the artisan gives it context. The most compelling handmade jewelry respects the material while enhancing its story.” — Lila Monroe, Artisan Jewelry Designer
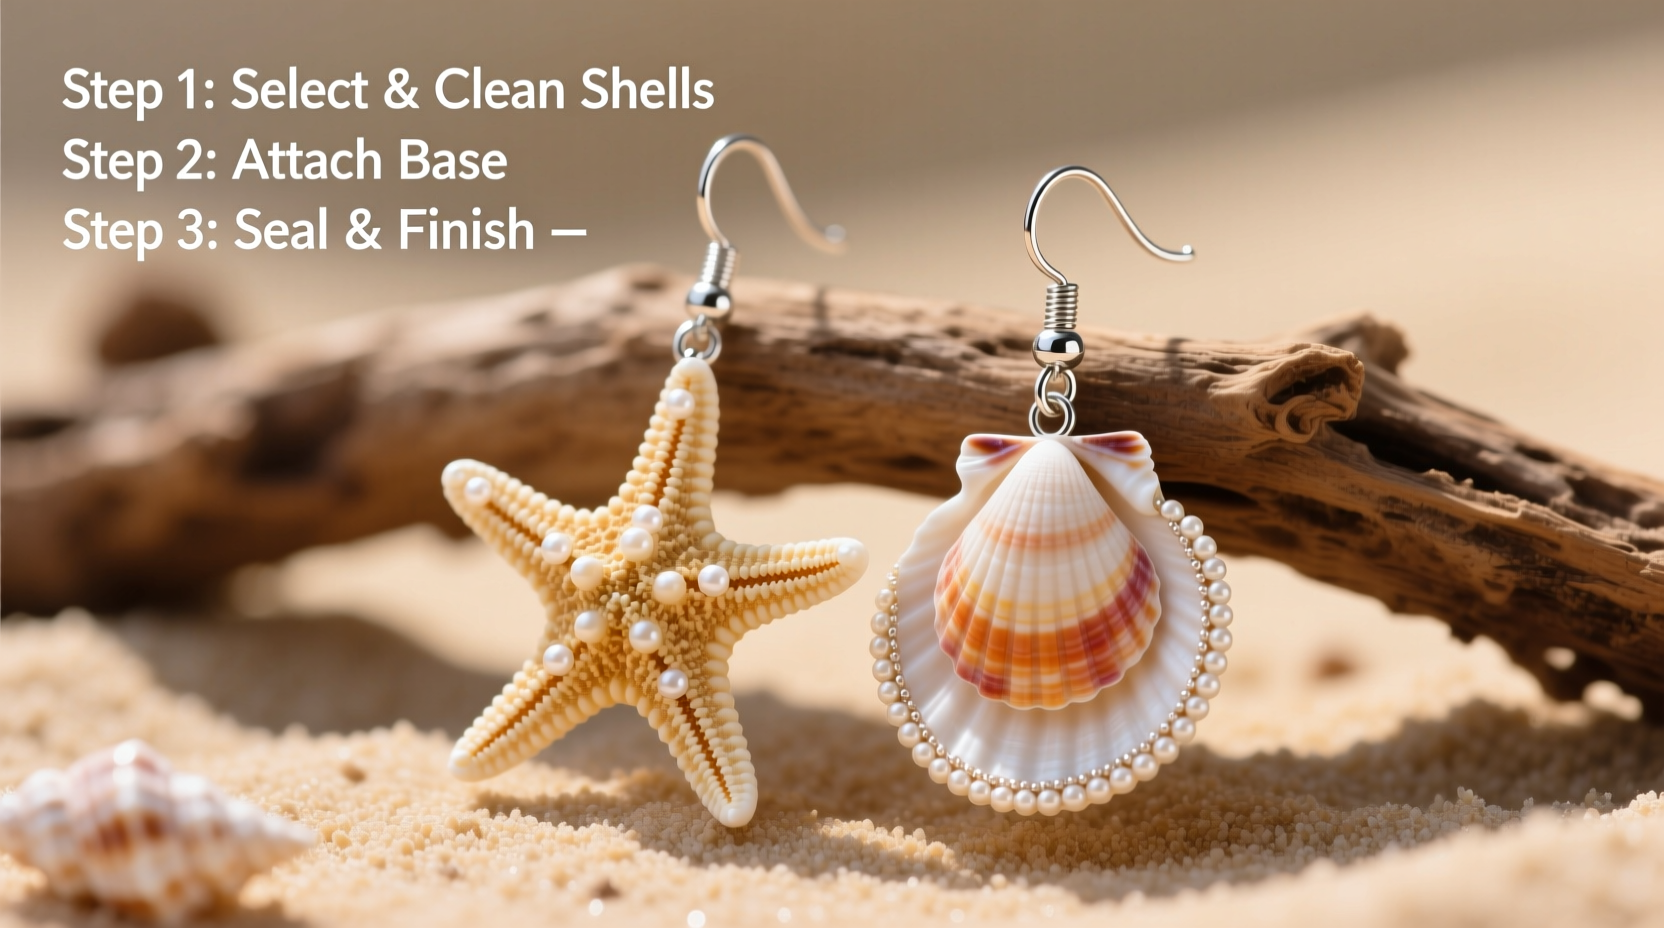
Step-by-Step Assembly Process
Follow this detailed sequence to construct durable, visually appealing earrings:
- Prepare the natural elements: If using real shells or starfish, lightly sand rough edges and apply a clear acrylic sealant. Let dry for at least two hours to protect against moisture and cracking.
- Attach jump rings: Using pliers, open a jump ring by twisting it sideways (do not pull apart). Slide it through a natural hole in the shell or starfish, then connect it to the earring hook. Close the ring securely.
- Layer components (if desired): For multi-tiered designs, link smaller shells below the main starfish using short chain segments. Ensure connections are tight and balanced on both sides.
- Secure with adhesive: Apply a small drop of jewelry-grade glue where components meet metal. This prevents wobbling and enhances longevity. Hold in place for 30 seconds until set.
- Test fit and adjust: Wear the earrings briefly to check comfort and movement. Trim excess chain or reposition elements if they feel unbalanced.
Do’s and Don’ts: Best Practices for Longevity
| Do | Don’t |
|---|---|
| Use UV-resistant sealant on natural materials | Expose earrings to prolonged sunlight or humidity |
| Store in a padded box away from heavy items | Hang earrings loosely where they can tangle or break |
| Inspect jump rings monthly for wear | Wear while swimming or showering |
| Rotate pairs to minimize stress on posts/hooks | Use super glue instead of flexible jewelry adhesive |
Real Example: A Coastal Bridal Accessory Project
Sarah, a bride from Charleston, wanted subtle nautical-themed earrings for her beachside wedding. She selected four miniature preserved starfish (about 0.5 inches wide) and paired them with tiny moonstone beads for a touch of shimmer. After sealing each starfish with matte acrylic spray, she attached them via gold-toned jump rings to lever-back earring findings. To add elegance, she threaded a single bead above each starfish using fine wire. The result was lightweight, cohesive, and perfectly matched her seaside gown. Guests later asked where she’d purchased them, unaware they were handmade just two weeks prior.
Customization Ideas for Different Styles
These earrings don’t have to follow a single aesthetic. Adapt the base technique to suit various tastes:
- Boho Chic: Combine irregularly shaped shells with turquoise beads and oxidized silver hooks.
- Minimalist: Use a single tiny starfish on a delicate French hook for understated elegance.
- Vintage Glamour: Paint shell edges with antique gold leaf and pair with pearl accents.
- Kids’ Accessories: Use larger resin starfish in bright colors with plastic-safe findings for playtime wear.
You can even incorporate memory elements—like attaching a small shell collected from a meaningful beach visit—to turn the earrings into sentimental keepsakes.
Frequently Asked Questions
Can I use real starfish I found on the beach?
Yes, but only if they are fully dried, cleaned, and legally collected. In many coastal regions, removing live or recently deceased starfish is prohibited. Opt for ethically sourced specimens from craft suppliers when in doubt.
How do I prevent the shells from fading?
Apply a UV-protective clear coat before assembly and store the earrings in a dark, dry place when not in use. Avoid leaving them near windows or under direct lighting for long periods.
Are these earrings suitable for sensitive ears?
Absolutely—just choose hypoallergenic earring backs such as surgical steel, titanium, or nickel-free gold. Always label materials clearly if gifting to someone with sensitivities.
Final Checklist Before Wearing
- All components are securely glued and sealed
- Jump rings are fully closed and smooth
- Earrings hang evenly and move freely
- No sharp edges on shells or findings
- Finished pair has been tested for comfort (worn for 10–15 minutes)
Conclusion: Bring the Shore to Your Style
Crafting starfish and shell earrings connects creativity with nature in a tangible, wearable way. Whether you’re making them for yourself, as gifts, or to sell at craft fairs, each pair carries the quiet rhythm of the tides. With attention to detail and respect for materials, your handcrafted jewelry can evoke memories of sunlit shores and salty breezes long after summer ends.


 浙公网安备
33010002000092号
浙公网安备
33010002000092号 浙B2-20120091-4
Comments
No comments yet. Why don't you start the discussion?