
A dryer that once ran quietly now shrieking like a haunted house? Squeaking isn’t just annoying—it’s often a warning sign that something inside your appliance is wearing down or misaligned. Ignoring it can lead to costlier repairs or even premature failure. The good news: most causes of dryer squeaking are relatively simple to diagnose and fix, often without professional help. Understanding what’s behind the noise helps you act quickly and protect both your machine and your peace.
Common Causes of Dryer Squeaking
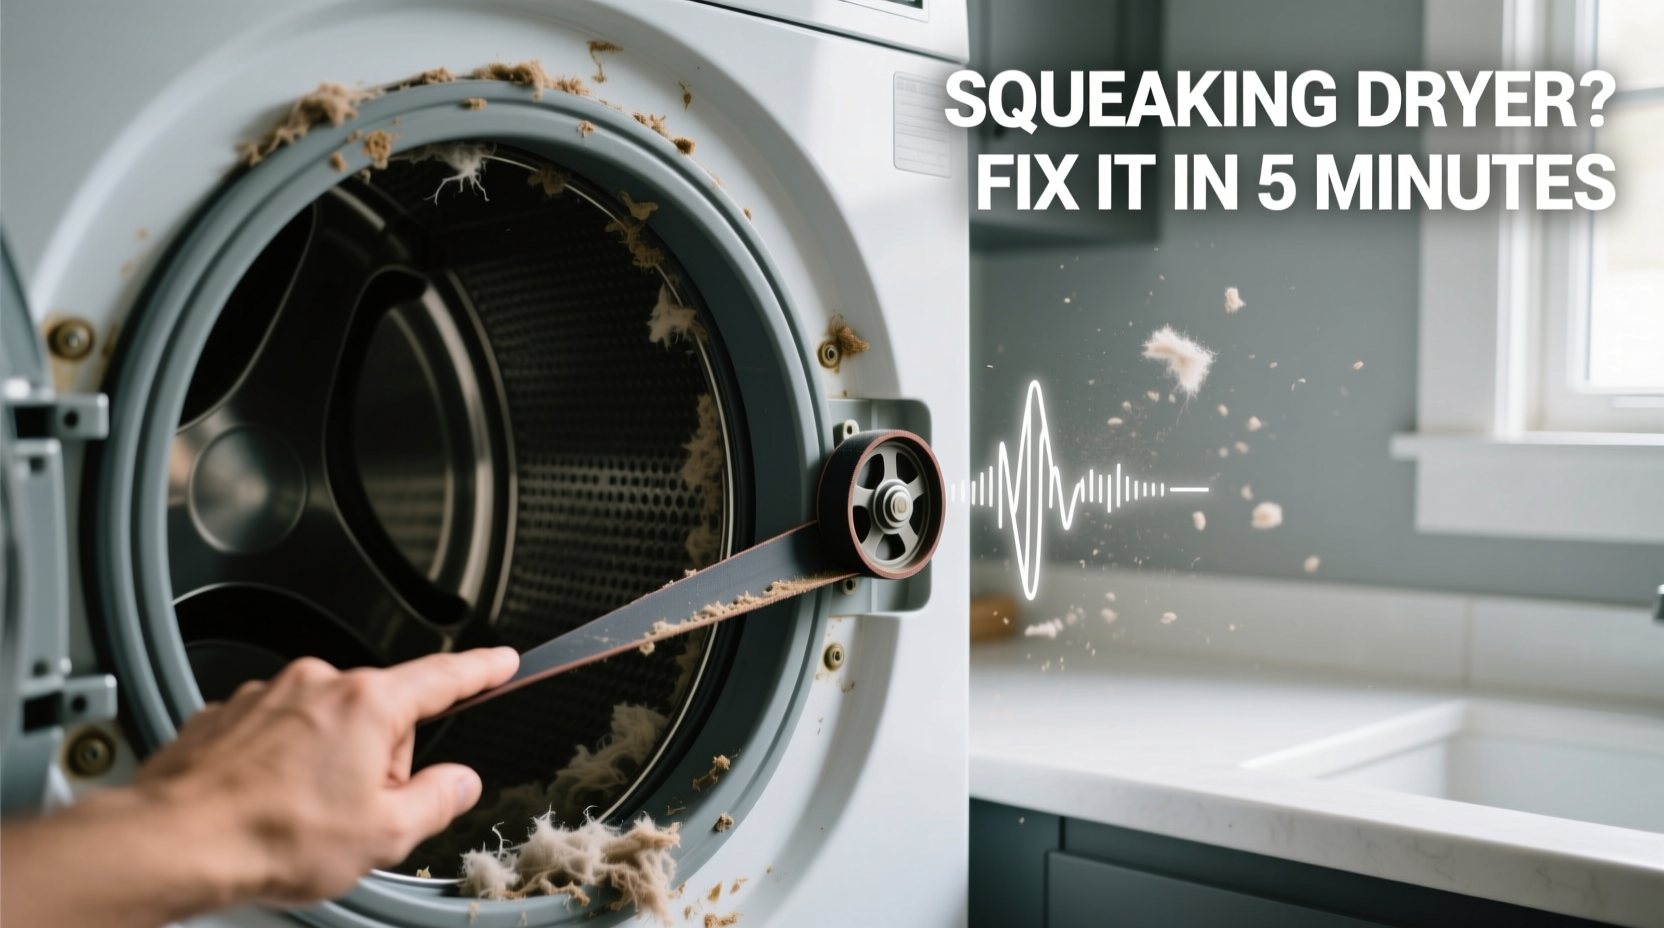
Dryers have multiple moving parts, all of which can degrade over time. When one begins to fail, friction increases, resulting in squeaks, squeals, or grinding sounds. The most frequent culprits include:
- Worn drum rollers: These support the drum as it spins. When they dry out or crack, they create high-pitched noises.
- Failing idler pulley: This small wheel keeps tension on the drive belt. As its bearing wears, it produces a constant squeal during operation.
- Bad front or rear bearings: Located behind the drum, these allow smooth rotation. A failing bearing often makes a rhythmic grinding or rumbling sound.
- Loose or damaged blower wheel: If obstructed or unbalanced, it can vibrate and squeak, especially at high speeds.
- Drive belt issues: A frayed or glazed belt may slip and generate a screeching sound.
- Foreign objects trapped inside: Coins, buttons, or debris caught between the drum and housing can cause intermittent scraping or squeaking.
“Most dryer noises start subtly but escalate quickly. Addressing them early can save hundreds in replacement costs.” — Mark Reynolds, Appliance Repair Technician with 15+ years of field experience
Step-by-Step Guide to Diagnosing the Noise
Before disassembling anything, gather basic tools: a screwdriver set, pliers, flashlight, and work gloves. Then follow this logical process to pinpoint the source:
- Unplug the dryer. Safety first—never work on an energized appliance.
- Empty the drum and run a test cycle empty. Confirm the noise persists without laundry.
- Open the top or front panel (depending on model) to access internal components. Consult your manual for panel removal steps.
- Spin the drum by hand. Listen for grinding, clicking, or resistance. Note where the friction occurs.
- Inspect the drum rollers. Look for flat spots, cracks, or wobbling. Rotate each roller—if they don’t spin smoothly, they’re likely the issue.
- Check the idler pulley. Ensure it moves freely and isn’t cracked. Press on the pulley arm; it should spring back smoothly.
- Examine the drive belt. Look for fraying, glazing (shiny spots), or stretching.
- Inspect the blower wheel. Remove lint buildup and check for loose mounting or imbalance.
Simple Fixes You Can Do at Home
Many squeaking problems stem from wear that develops gradually. The following solutions are practical and often extend your dryer’s life by years:
Replace Worn Drum Rollers
Drum rollers typically last 8–10 years. When they fail, the drum sags slightly, increasing friction. Replacement involves removing the drum, disconnecting the old rollers, and installing new ones (available online for $15–$30 per pair). Use identical replacements or consult your model number for compatibility.
Lubricate or Replace the Idler Pulley
The idler pulley maintains tension on the drive belt. Over time, its internal bearing dries out. While some suggest lubrication, most technicians recommend full replacement since the seal is usually compromised. A new idler pulley costs under $25 and takes 20 minutes to install.
Clean or Replace the Blower Wheel
Lint buildup around the blower wheel forces the motor to work harder and can cause imbalance-related squeaking. Disconnect the duct, remove the wheel, and clean thoroughly. If blades are cracked or warped, replace it immediately to prevent motor strain.
Tighten Loose Components
Vibrations over time can loosen screws, brackets, or mounting hardware. Check all fasteners on the drum supports, motor base, and front panel. Tightening them often eliminates rattling or harmonic squeaks.
Remove Foreign Objects
Sometimes, a forgotten coin or broken zipper gets lodged between the drum and outer casing. Carefully inspect the gap with a flashlight and use needle-nose pliers to extract debris. This fix is quick but frequently overlooked.
| Component | Symptom | DIY Fix? | Replacement Cost |
|---|---|---|---|
| Drum Rollers | High-pitched squeal during spin | Yes (moderate difficulty) | $15–$30 |
| Idler Pulley | Constant squealing, belt slippage | Yes (easy to moderate) | $20–$25 |
| Drive Belt | Screeching, burning smell | Yes (easy) | $10–$18 |
| Rear Bearing | Grinding or rumbling noise | No (requires drum removal) | $30–$50 + labor |
| Blower Wheel | Whining at high speed | Yes (easy) | $15–$25 |
Mini Case Study: Sarah’s Weekend Repair Success
Sarah noticed her dryer making a sharp squeak every few seconds. At first, she ignored it—until the noise became unbearable. She unplugged the unit, removed the front panel, and spun the drum. The squeak occurred twice per rotation. After inspection, she found one drum roller was cracked and wobbling. She ordered a replacement kit online ($22) and installed it the next day using a YouTube tutorial. The repair took 45 minutes, and the squeak vanished. “I saved $150 in service fees,” she said. “And I learned how my dryer actually works.”
Preventive Maintenance Checklist
Regular care reduces wear and prevents sudden breakdowns. Use this checklist monthly or quarterly:
- ✅ Clean the lint filter after every load
- ✅ Vacuum the lint trap housing monthly
- ✅ Inspect the exhaust duct for blockages every 3 months
- ✅ Level the dryer to prevent vibration stress
- ✅ Check door seal for tears or debris
- ✅ Listen for new or changing noises during cycles
- ✅ Wipe down the drum interior with a damp cloth to reduce static and residue
When to Call a Professional
While many fixes are DIY-friendly, certain issues require expert attention:
- Rear drum bearing failure: Replacing this often requires complete drum removal and specialized tools.
- Motor problems: If the squeak comes from the motor itself, internal damage may be present.
- Electrical issues: Any burning smell, sparks, or power failures should not be self-repaired.
- Gas dryers: Due to safety risks, gas line or burner assembly concerns should always be handled by a licensed technician.
If you’re uncomfortable with disassembly or lack the right tools, scheduling a service call is a wise investment. Most repair shops offer diagnostic fees that apply toward labor if you proceed with the fix.
FAQ
Why does my dryer squeak only at the start of the cycle?
This often points to a stiff idler pulley or dried-out drum rollers. As heat builds and parts warm up, the noise may temporarily lessen. However, the underlying wear still needs addressing.
Can a clogged vent cause squeaking?
Not directly, but a blocked exhaust forces the blower wheel and motor to work harder, leading to strain, overheating, and unusual noises over time. Keep vents clear to reduce mechanical stress.
How long should a dryer last with regular maintenance?
With proper care, most dryers operate reliably for 10–15 years. Regular lint cleaning, leveling, and prompt attention to noises significantly extend lifespan.
Conclusion
A squeaking dryer doesn’t mean you need a replacement. In most cases, the cause is a worn roller, faulty pulley, or simple obstruction—all fixable with basic tools and a bit of patience. By diagnosing the noise early and performing routine maintenance, you preserve your appliance’s efficiency and avoid expensive emergency repairs. Don’t wait for the squeak to turn into a scream. Take action today, and restore quiet, smooth drying to your laundry routine.


 浙公网安备
33010002000092号
浙公网安备
33010002000092号 浙B2-20120091-4
Comments
No comments yet. Why don't you start the discussion?