
Working with dates in Excel is a common task across industries—from project planning and financial reporting to inventory tracking and HR scheduling. While Excel handles dates efficiently, many users struggle with input consistency, formatting confusion, or incorrect calculations. The key lies not just in entering a date but in doing so accurately and formatting it appropriately for clarity and functionality. When done right, properly formatted dates enhance readability, support automation, and ensure formulas work as intended.
Understanding How Excel Stores Dates
Before diving into formatting, it's essential to understand how Excel interprets dates internally. Excel stores dates as serial numbers starting from January 1, 1900 (or January 2, 1904 for Mac users in some settings). For example, January 1, 2025, is stored as 45658—the number of days since the base date. This underlying system allows Excel to perform arithmetic operations like calculating durations or due dates effortlessly.
The display format you see—such as \"March 15, 2025\" or \"15/03/2025\"—is purely visual. That means two cells can show different formats but still contain the same date value, which is crucial when sorting, filtering, or using functions like =TODAY() or =DATEDIF().
Adding Dates Accurately: Best Practices
Entering dates correctly ensures downstream accuracy in reports and dashboards. Here are reliable methods to insert dates into Excel cells without errors.
- Use Standard Date Formats: Enter dates using unambiguous formats like
MM/DD/YYYYorDD-MM-YYYY, depending on regional settings. Avoid formats like “Mar 15” unless you're certain context prevents misinterpretation. - Leverage Keyboard Shortcuts: Press Ctrl + ; to insert today’s date as a static value. Press Ctrl + Shift + ; for the current time. These shortcuts enter fixed timestamps that won’t change upon recalculation.
- Use the TODAY() Function: Type
=TODAY()to dynamically display the current date. It updates each time the workbook recalculates, ideal for logs or aging reports. - Data Validation for Consistency: Apply data validation rules under the Data tab to restrict entries to valid dates only, preventing typos or invalid inputs like “Feb 30.”
- Avoid Typing Dates as Text: Never type “March 15th, 2025” if you plan to calculate with it. While readable, such entries are treated as text and break formula logic.
Formatting Dates for Clarity and Professionalism
Once a date is entered correctly, formatting controls how it appears to users. Proper formatting improves report aesthetics and user comprehension without altering the actual value.
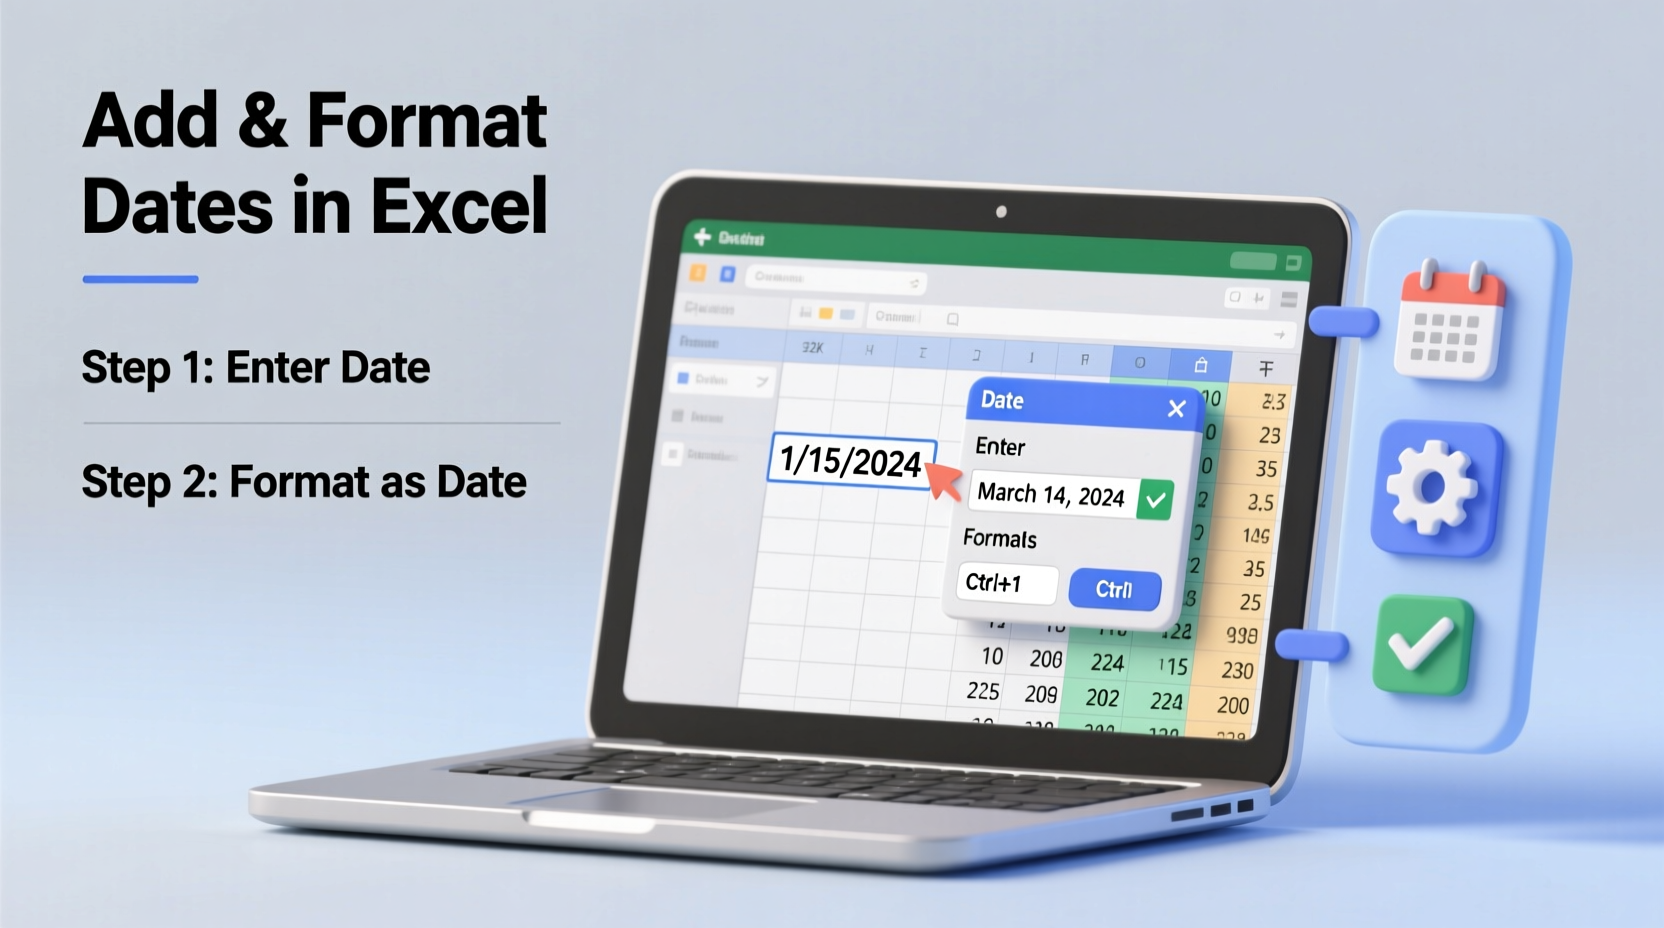
To format a date:
- Select the cell(s) containing the date.
- Right-click and choose “Format Cells,” or press Ctrl + 1.
- Navigate to the “Number” tab and select “Date.”
- Pick a built-in format or create a custom one under the “Custom” category.
| Format Code | Displays As | Use Case |
|---|---|---|
| MM/DD/YYYY | 03/15/2025 | Standard U.S. reports |
| DD-MM-YY | 15-03-25 | Compact internal tracking |
| MMMM DD, YYYY | March 15, 2025 | Formal documents |
| DD/MMM/YYYY | 15/Mar/2025 | International spreadsheets |
| dddd, MMMM DD | Saturday, March 15 | Event calendars |
“Consistent date formatting reduces ambiguity and prevents costly errors in collaborative environments.” — Laura Bennett, Senior Data Analyst at FinTrack Solutions
Advanced Tips: Custom Formatting and Conditional Logic
For greater control, use custom number formats. In the Format Cells dialog, go to “Custom” and type codes like:
[$-en-US]dddd, mmmm dd, yyyy→ Saturday, March 15, 2025 (explicit language setting)dd-mmm-yyyy;@→ Ensures all dates follow this style even if blankmm/dd/yyyy \"as of today\"→ Displays: 03/15/2025 as of today
You can also combine date formatting with conditional logic. For instance, highlight overdue tasks using conditional formatting based on a due date column:
- Select the range of dates.
- Go to Home → Conditional Formatting → New Rule.
- Choose “Use a formula to determine which cells to format.”
- Enter:
=A2 - Set formatting (e.g., red fill) and apply.
=TEXT(A1, \"mmmm\") to extract month names for labels or charts while preserving original date values elsewhere.
Mini Case Study: Streamlining Monthly Reporting
Jessica, a marketing coordinator at a mid-sized firm, used to spend hours reformatting dates in her campaign performance sheets. Her team pulled data from multiple platforms, resulting in inconsistent date entries—some as text, others in European format. This caused pivot tables to sort incorrectly and delayed monthly reviews.
She implemented a standardized workflow:
- Used Power Query to clean incoming data, converting all date strings into proper Excel dates.
- Applied uniform custom formatting (
MMM DD, YYYY) across dashboards. - Added dynamic headers using
=TEXT(TODAY(), \"MMMM YYYY\")for real-time labeling.
Result: Report preparation time dropped from 4 hours to under 30 minutes per month, and leadership praised the improved clarity during presentations.
Frequently Asked Questions
Why does my date show up as a number like 45658?
This happens when the cell is formatted as General or Number instead of Date. Reformat the cell using Ctrl+1 → Date category to restore the correct appearance.
Can I display only the day of the week from a date?
Yes. Use the TEXT function: =TEXT(A1, \"dddd\") returns “Saturday,” or \"ddd\" for “Sat.” Alternatively, apply a custom format like dddd directly to the cell.
How do I prevent Excel from auto-correcting my dates?
If Excel changes “Jan 1” to “January 1,” disable AutoCorrect options under File → Options → Proofing. However, be cautious—disabling features may lead to manual entry errors.
Checklist: Date Entry & Formatting Success
- ✅ Verify regional date settings in Windows/Excel to avoid format mismatches
- ✅ Enter dates using standard separators (/, -)
- ✅ Confirm alignment: true dates align right by default
- ✅ Use
=TODAY()for live dates, Ctrl+; for static ones - ✅ Apply consistent formatting via cell styles or templates
- ✅ Test formulas involving dates with sample calculations
- ✅ Validate imported data using DATEVALUE() for text-to-date conversion
Maintain Accuracy and Efficiency
Mastering date handling in Excel isn't about memorizing shortcuts—it's about building habits that promote precision and consistency. Whether you're managing a simple to-do list or analyzing multi-year financial trends, well-formatted dates serve as the backbone of reliable data analysis. By combining correct input practices with thoughtful formatting, you eliminate guesswork and reduce errors across teams and systems.


 浙公网安备
33010002000092号
浙公网安备
33010002000092号 浙B2-20120091-4
Comments
No comments yet. Why don't you start the discussion?