
Adding a heart-shaped silicone backcase to your iPhone is more than just a fashion statement—it's a way to express personality while protecting your device. These cases are especially popular during romantic seasons, gift exchanges, or as personalized accessories. However, slipping one on without causing damage can be tricky due to the snug fit and flexible yet resilient nature of silicone. When done incorrectly, you risk scratching your phone, tearing the case, or misaligning ports and buttons.
The good news is that with the right approach, installing a heart-shaped silicone backcase can be quick, safe, and frustration-free. This guide walks through best practices, tools, and techniques to ensure a smooth installation every time—preserving both your iPhone’s finish and the integrity of the decorative case.
Why Proper Installation Matters
Silicone cases, particularly those with unique shapes like hearts, often have tighter tolerances than standard rectangular cases. The curved edges and sculpted cutouts require precise alignment. Forcing the case onto your phone can lead to:
- Micro-scratches from trapped dust or grit
- Tearing at stress points (especially around camera cutouts)
- Warping the case material, reducing its protective qualities
- Accidental drops during a struggle to snap it in place
Apple devices are precision-engineered, and their surfaces—especially glossy finishes—are prone to fine abrasions. A careful installation protects your investment and ensures long-term usability of both phone and case.
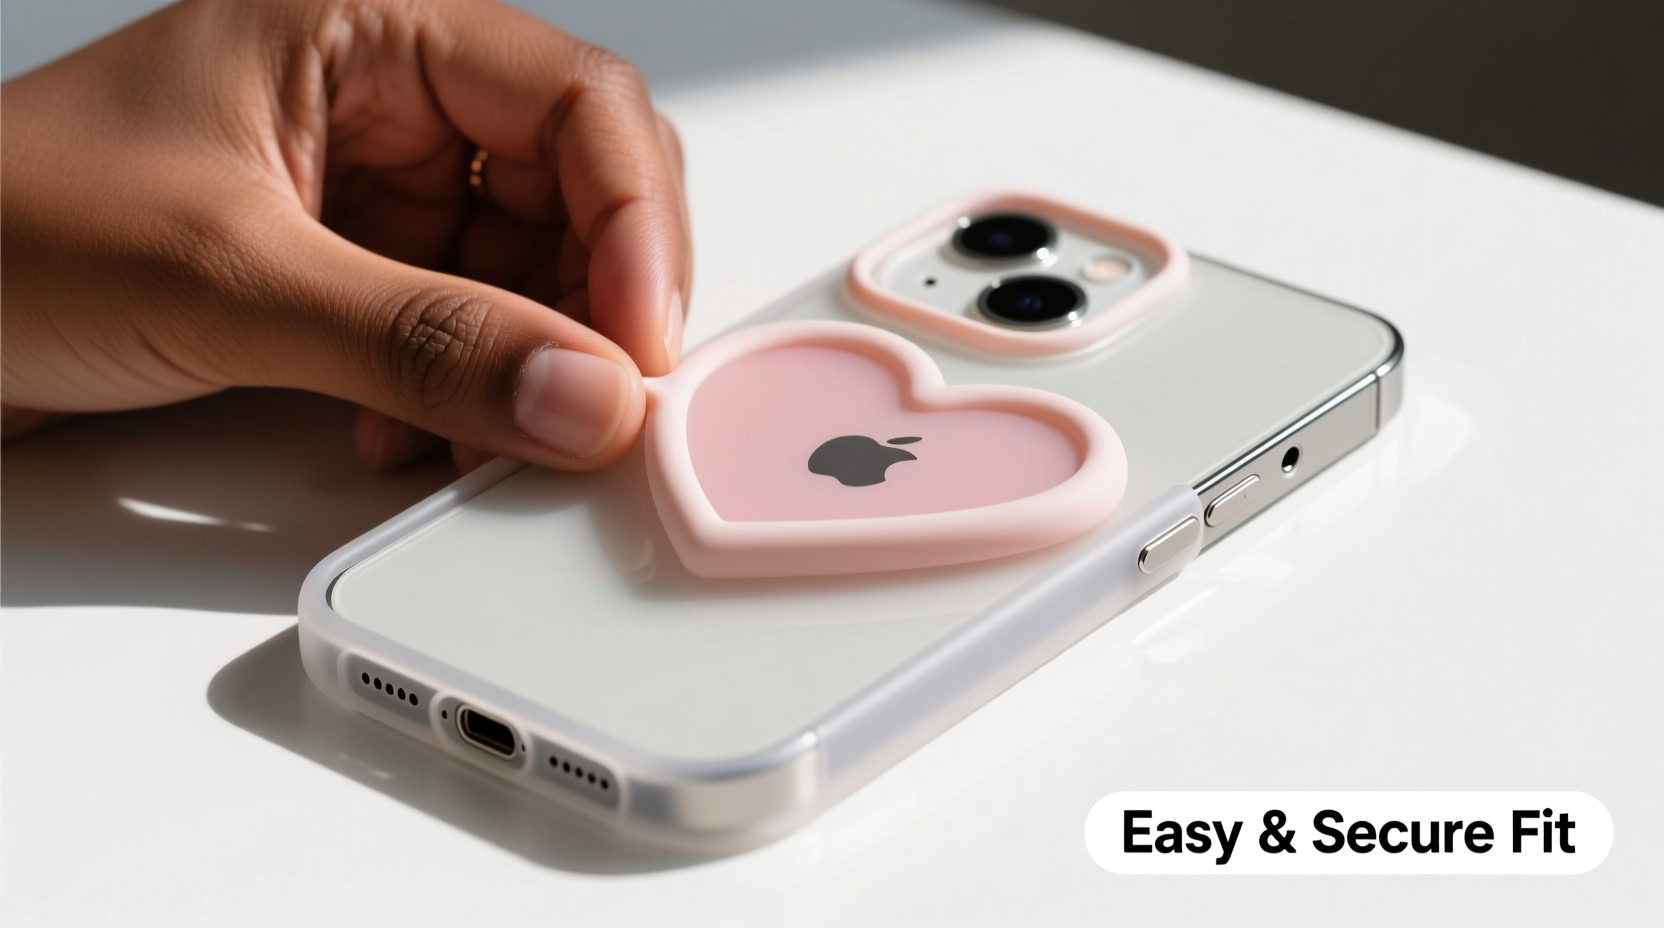
Step-by-Step Guide to Installing Your Heart-Shaped Silicone Backcase
- Power Off Your iPhone
While not always necessary, turning off your device reduces the risk of accidental input during installation. It also allows you to focus on alignment without notifications interrupting your process. - Clean Both Phone and Case
Use a microfiber cloth to wipe down your iPhone, paying attention to the edges and corners. Inspect the interior of the silicone case for lint or debris. A quick pass with a dry cotton swab inside the case helps remove hidden particles. - Align the Bottom First
Hold the case with the heart shape oriented correctly. Position the charging port end of your iPhone into the corresponding opening in the case. Gently push the bottom edge all the way in until it clicks or seats fully. - Flex and Guide the Sides
Silicone is flexible but resists sudden stretching. Use your thumbs along the sides to gently stretch the case upward, guiding it over the curved edges of your iPhone. Apply even pressure—don’t yank or twist. - Seat the Top Edge Carefully
Once the sides and bottom are secured, press the top edge down slowly. Ensure the speaker and front-facing camera cutouts align properly. If resistance occurs, don’t force it—recheck alignment and adjust. - Double-Check Button and Port Access
Test volume buttons, side switch, and charging port. The case should allow full functionality without muffled sound or obstructed access.
Pro Technique: The “Roll-In” Method
For extra-tight cases, try the roll-in method:
- Start by inserting one corner of the iPhone’s bottom edge into the case.
- Gradually \"roll\" the case up along the edge, working diagonally across the phone.
- This distributes tension evenly and prevents localized strain.
This technique is commonly used by professionals in retail stores and repair shops when handling premium silicone cases.
Essential Tools and Materials Checklist
You don’t need specialized gear, but having a few simple items makes the job easier and safer:
- Microfiber cleaning cloth
- Dry cotton swabs
- Compressed air (optional, for deep cleaning)
- Soft surface (like a fabric-covered table) to prevent slips
- Nail file or plastic card (to help release trapped air bubbles)
Do’s and Don’ts When Installing Silicone Cases
| Do’s | Don’ts |
|---|---|
| Wipe down both phone and case before installation | Install the case over a dirty or dusty surface |
| Use slow, even pressure when snapping the case on | Use sharp tools or metal objects to pry or stretch |
| Check alignment of camera, speaker, and buttons | Force the case if something feels stuck |
| Store the case flat when not in use to prevent warping | Leave the case in direct sunlight for extended periods |
Real Example: Sarah’s Close Call
Sarah bought a vibrant pink heart-shaped silicone case as a Valentine’s gift for her sister. Excited to surprise her, she tried to install it quickly while watching TV. She didn’t clean the phone first and missed a speck of sand near the charging port. As she pressed the case on, she heard a faint scraping noise. After installation, a small scratch was visible along the iPhone’s aluminum frame.
She later learned that taking just 30 seconds to clean the surfaces could have prevented the damage. Now, Sarah keeps a microfiber cloth in her bag specifically for case changes—and always inspects the case interior before use.
“Taking an extra minute to prepare saves hours of regret. Most cosmetic damage from cases happens during installation, not daily use.” — Marcus Tran, Mobile Device Technician with 8 years of experience at Urban Fix Repair Labs
Frequently Asked Questions
Can I use water or soap to help slide the case on?
No. While moisture might seem like a lubricant, water can get trapped between the case and phone, leading to mold or discoloration over time. Silicone is designed to stretch without additives. If needed, use a tiny amount of cornstarch (food-safe and non-abrasive) on the inner surface to reduce friction—but wipe it off thoroughly afterward.
My case keeps popping off at the top—what am I doing wrong?
This usually means the case wasn’t fully seated. Remove it and repeat the installation, focusing on pressing the top edge down firmly after the sides are aligned. Also, verify that the case is designed for your exact iPhone model. A mismatch—even between iPhone 14 and 15—can cause poor fit due to slight dimensional differences.
How do I remove air bubbles under the case?
If small air pockets form, gently massage them toward the edges using your fingertip. For persistent bubbles, use a soft plastic card (like an old gift card) to nudge them out, starting from the center and moving outward. Never use metal objects, as they can puncture the silicone.
Long-Term Care Tips for Your Heart-Shaped Case
Once installed, maintain both appearance and function with these habits:
- Remove the case weekly to clean both surfaces—prevents buildup of oils and pocket lint.
- Avoid placing your phone face-down on rough surfaces; the protruding heart design may catch and tear.
- Wash the case occasionally with mild soap and water, then air-dry completely before reapplying.
- Rotate between cases if possible—this reduces prolonged stress on one material.
Conclusion
Installing a heart-shaped silicone backcase doesn’t have to be stressful. With patience, preparation, and the right technique, you can protect your iPhone in style—without compromising safety or longevity. Whether you're personalizing your own device or gifting a lovingly chosen accessory, a flawless installation enhances both aesthetics and confidence in protection.


 浙公网安备
33010002000092号
浙公网安备
33010002000092号 浙B2-20120091-4
Comments
No comments yet. Why don't you start the discussion?