
Drawing doesn’t require years of training or natural talent. With the right approach, even complete beginners can create satisfying artwork in minutes. One of the most accessible and rewarding subjects to start with is the humble pumpkin—its rounded shape, defined ridges, and iconic stem make it both recognizable and easy to break down into basic forms. Whether you're preparing for Halloween, teaching children, or simply practicing foundational drawing skills, this guide walks you through every stage using only simple shapes and lines. No prior experience needed—just a pencil, paper, and a few minutes.
Why Drawing a Pumpkin Is Perfect for Beginners
The pumpkin is an ideal subject for first-time artists because it combines symmetry, repetition, and organic structure in a way that’s forgiving and intuitive. Unlike complex portraits or perspective-heavy scenes, a pumpkin allows you to focus on form, proportion, and shading without getting overwhelmed. Its segmented surface provides natural guidelines for practicing curved lines, while its overall roundness teaches volume and light direction.
Art educators often use pumpkins in introductory classes because they help students grasp three key concepts: contour (outline), form (3D illusion), and texture (surface detail). By mastering these elements on a single object, beginners build confidence and develop transferable skills for future drawings.
“Starting with familiar objects like pumpkins gives new artists immediate feedback and a sense of accomplishment.” — Maria Lin, Art Instructor at Creative Path Studio
What You’ll Need to Get Started
Before beginning, gather a few basic supplies. The beauty of this exercise lies in its simplicity—no special tools are required.
- A standard #2 pencil (HB) for sketching
- An eraser (preferably a kneaded eraser for gentle corrections)
- A sheet of printer paper or sketchpad
- A sharpener (optional, but helps maintain clean lines)
- A reference photo (optional, for visual guidance)
Step-by-Step Guide to Drawing a Realistic-Looking Pumpkin
Follow these seven steps to create a well-proportioned, shaded pumpkin from scratch. Each stage builds on the last, focusing on one skill at a time.
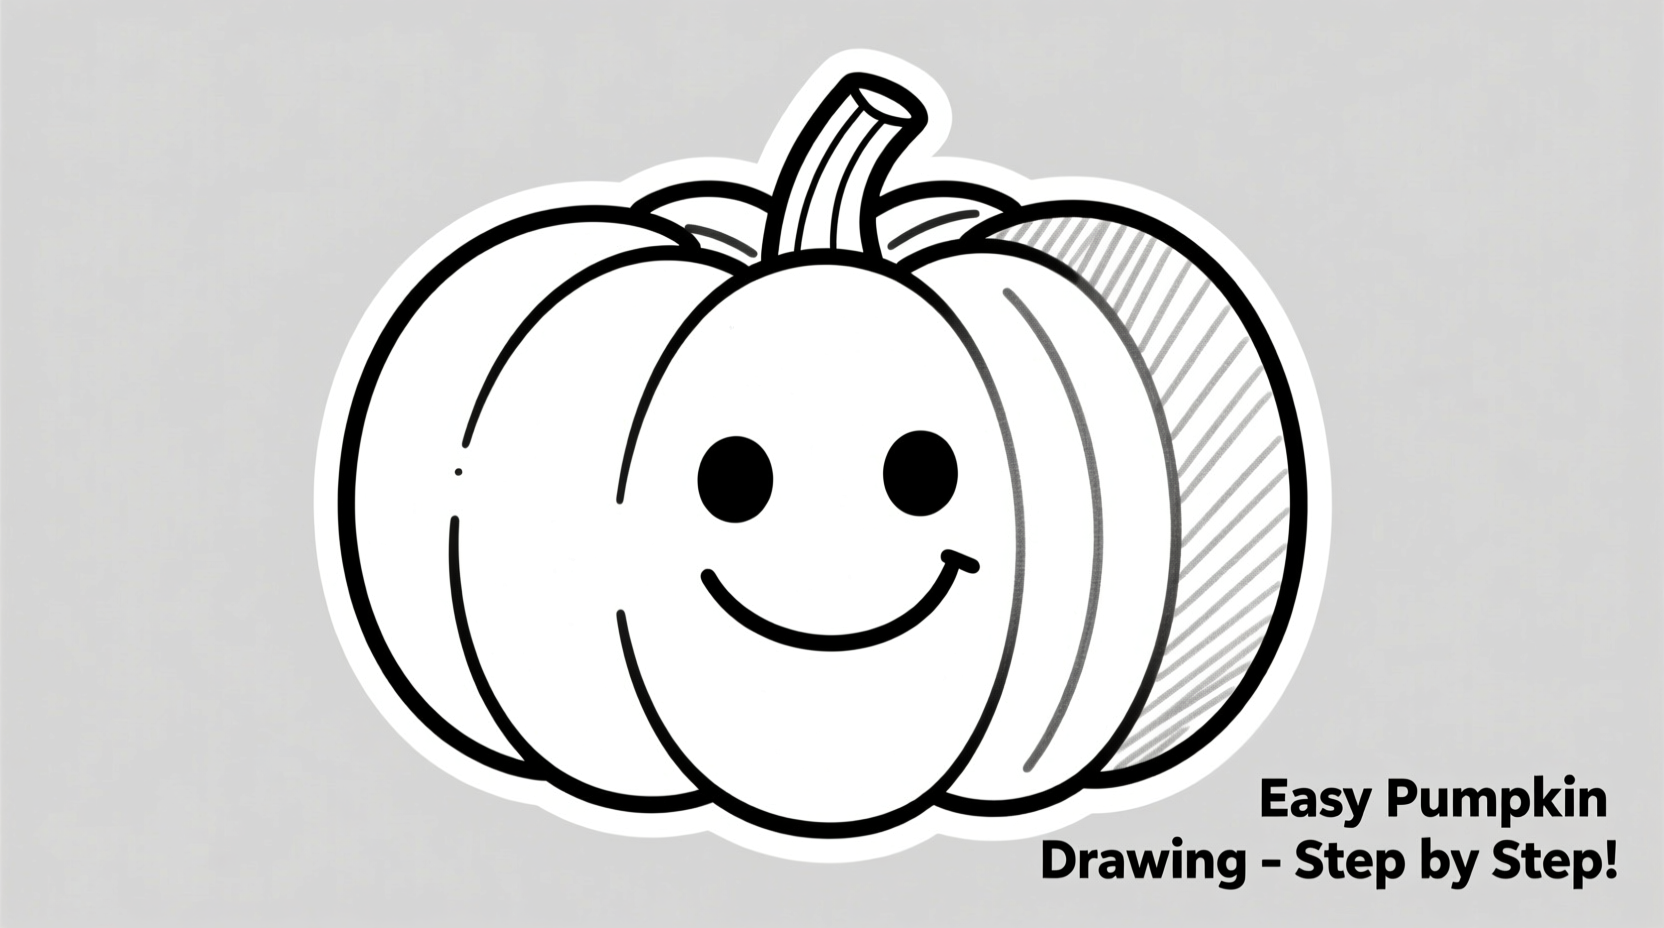
- Draw a Light Circle as Your Base Shape
Start with a loose circle in the center of your page. This doesn’t need to be perfect—a slightly wobbly outline is fine. Think of it as a guide, not the final outline. The circle represents the main body of the pumpkin. - Add Vertical Guidelines to Define Segments
Lightly sketch three evenly spaced vertical lines from top to bottom through the circle. These will help divide the pumpkin into symmetrical sections, mimicking its natural grooves. Don’t press too hard—you’ll erase these later. - Shape the Outer Contour Using the Guidelines
Now, refine the circle into a more organic pumpkin shape. Gently push the sides outward between the guidelines to create bulging segments. A real pumpkin isn’t perfectly round—it has soft indentations where the ridges run down. Follow the vertical lines to pinch inward slightly, then curve outward between them. - Draw the Stem
At the top center, sketch a small trapezoid or flattened cone shape for the stem. It should be wider at the base (where it attaches to the pumpkin) and narrower at the top. Add a few short, jagged lines around the edge to suggest rough bark texture. - Outline the Ridge Lines
Using your vertical guides, draw smooth, flowing lines from the top to the bottom of the pumpkin, following the indented areas. These ridges should arc slightly to maintain the 3D effect. Typically, three primary ridges are enough for a simple drawing. - Refine the Final Outline
Go over your best lines with slightly firmer pressure to define the pumpkin’s outer edge and ridges. Erase any unnecessary construction lines, especially the original circle and extra guidelines. At this point, your pumpkin should look solid and balanced. - Add Shading for Depth and Volume
Decide where your light source is coming from (e.g., upper left). Shade the opposite side of each segment more heavily. Use soft back-and-forth strokes to build tone gradually. Darken near the indentations and under the stem, leaving highlights on the raised parts. Blend lightly with a tissue or fingertip for a smoother finish.
Shading Tips for Realism
Shading transforms a flat sketch into a lifelike object. For pumpkins, focus on contrast between the ridges and valleys. The deepest shadows fall along the inner curves of the grooves, while the highest points catch the most light. Avoid uniform shading—vary your pressure to mimic natural light distribution.
Common Mistakes and How to Avoid Them
Even simple drawings can go off track if proportions or technique aren’t considered. Here’s a quick comparison of common errors and their fixes.
| Common Mistake | Why It Happens | How to Fix It |
|---|---|---|
| Pumpkin looks flat or two-dimensional | Lack of shading or uneven tonal values | Add gradual gradients and emphasize shadow zones along ridges |
| Ridges are uneven or misaligned | Guidelines were skipped or poorly spaced | Use light vertical dividers before drawing final lines |
| Stem looks too small or disconnected | Not integrated with the pumpkin’s surface | Darken the base where the stem meets the body to create attachment depth |
| Overworked paper due to heavy erasing | Pressing too hard during early stages | Sketch lightly until the final outline is confirmed |
Mini Case Study: Teaching Kids to Draw Pumpkins
In a community art workshop for children ages 6–10, instructor Laura Mendez used this exact method to teach seasonal drawing. She noticed that kids struggled most with proportion until she introduced the “circle + lines” framework. After breaking the process into numbered steps, 90% of participants completed a recognizable pumpkin within 20 minutes. One student, 7-year-old Noah, said, “I thought I couldn’t draw anything, but when we made the lines first, it just clicked.” The structured yet flexible approach allowed each child to personalize their pumpkin while staying within a supportive framework.
Frequently Asked Questions
Can I draw a pumpkin without using a reference image?
Absolutely. The pumpkin’s shape is simple enough to visualize from memory. However, using a photo or real pumpkin can improve accuracy, especially when learning shading patterns and ridge placement.
What if my lines are shaky or uneven?
Shaky lines are normal, especially for beginners. Focus on slow, deliberate movements. If needed, draw each line in segments and connect them smoothly. Confidence improves with repetition.
How long does it take to learn to draw a pumpkin well?
Most people can produce a decent pumpkin in one 15–30 minute session. With practice over a week, your lines become cleaner, and your shading more consistent. Mastery comes from repetition, not speed.
Checklist: Your Pumpkin Drawing Success Plan
Keep this checklist handy when starting your drawing:
- ☐ Gather pencil, paper, and eraser
- ☐ Sketch a light circle as the base
- ☐ Add 3 vertical guide lines for symmetry
- ☐ Modify the circle into a segmented pumpkin shape
- ☐ Draw a sturdy stem at the top
- ☐ Trace the ridge lines along the guides
- ☐ Clean up construction lines
- ☐ Apply shading based on a single light source
- ☐ Step back and assess balance and contrast
- ☐ Sign your artwork!
Conclusion: Start Simple, Build Confidence
Drawing a pumpkin is more than just a seasonal craft—it’s a gateway to understanding fundamental artistic principles. With basic shapes, clear structure, and mindful shading, anyone can create a piece they’re proud of. The techniques learned here—guidelines, symmetry, contouring, and tonal variation—form the foundation for drawing countless other objects. Don’t wait for perfection. Pick up your pencil today, follow the steps, and let your creativity grow one stroke at a time.


 浙公网安备
33010002000092号
浙公网安备
33010002000092号 浙B2-20120091-4
Comments
No comments yet. Why don't you start the discussion?