
Knowing the exact square footage of a room is essential whether you're planning to install new flooring, list your home for sale, or simply organize furniture efficiently. While it may seem like a basic task, inaccurate measurements can lead to wasted materials, incorrect pricing, or poorly fitting furnishings. The good news? Measuring a room’s square footage doesn’t require advanced tools or expertise—just a few simple steps and a bit of attention to detail.
This guide walks you through the entire process, from gathering tools to handling oddly shaped spaces. Whether the room is rectangular, L-shaped, or has built-in nooks, you’ll learn how to calculate its area with confidence and precision.
Why Accurate Room Measurements Matter
Square footage impacts more than just aesthetics. In real estate, even a small miscalculation can affect a home’s market value. Contractors rely on precise dimensions to estimate material costs and labor. For DIYers, correct measurements prevent costly over-ordering or mid-project shortages.
“Accurate room measurements are the foundation of any successful renovation or design project.” — Daniel Reeves, Certified Interior Designer and Measurement Consultant
Mismeasured rooms often result in mismatched tiles, gaps in flooring, or furniture that doesn’t fit. Taking the time to get it right saves money, reduces waste, and ensures professional-quality results.
Tools You’ll Need
Before beginning, gather the following tools:
- Tape measure (preferably 25 feet or longer)
- Laser measure (optional but helpful for large or hard-to-reach areas)
- Notebook and pen or digital notepad
- Calculator
- Graph paper or sketchpad (for complex layouts)
- Helper (optional, but useful for holding the tape measure)
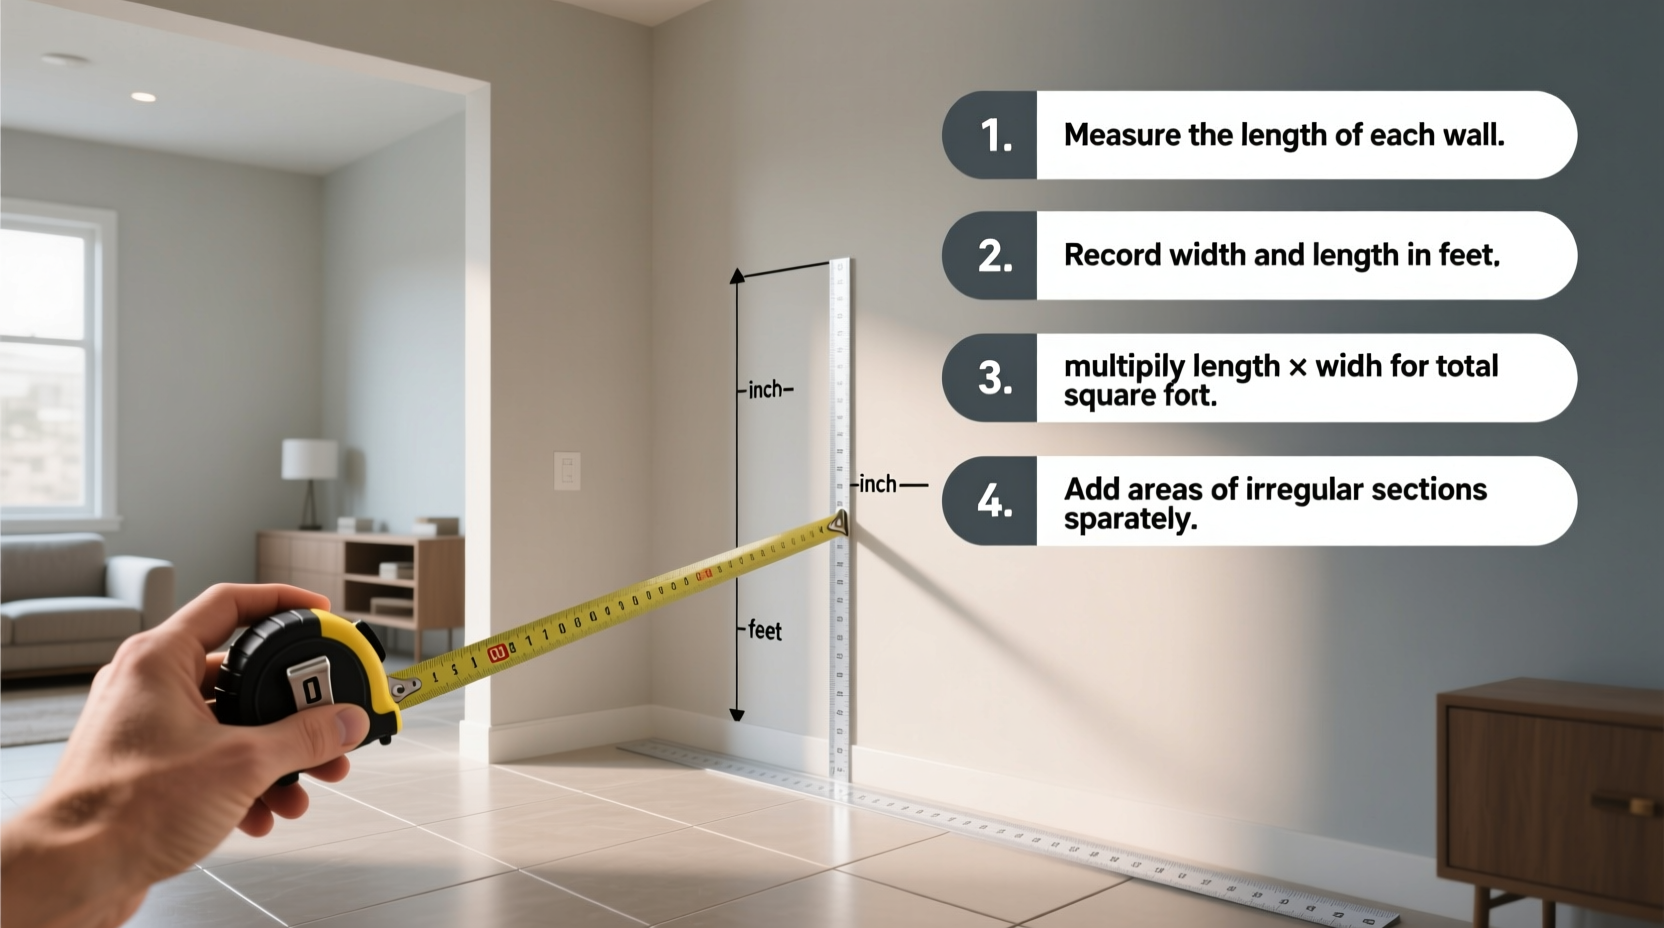
Step-by-Step Guide to Measuring Square Footage
- Clear the Space: Move furniture away from walls if possible. This allows unobstructed access and prevents measurement errors caused by obstacles.
- Sketch the Room Layout: Draw a rough outline of the room on paper. Include doors, windows, closets, and any irregular features. Label each wall (A, B, C, etc.) for reference.
- Measure Wall Lengths: Starting at one corner, extend the tape measure along the baseboard to the next corner. Record each dimension. Measure both length and width, even if the room appears symmetrical—walls are rarely perfectly straight.
- Measure Height (Optional): While not needed for square footage, ceiling height is useful for paint estimates or HVAC calculations.
- Handle Outlets and Protrusions: If there are columns, bay windows, or recessed areas, measure them separately and note their dimensions.
- Calculate Area: Multiply the length by the width for rectangular rooms. For example, a room 12 feet long by 10 feet wide equals 120 square feet (12 × 10 = 120).
- Break Down Complex Rooms: For L-shaped or multi-section rooms, divide the space into smaller rectangles. Measure each section, calculate individual square footages, then add them together.
- Double-Check All Measurements: Re-measure each wall to confirm accuracy. It’s common to misread a number or forget a decimal point.
- Label and Save Your Notes: Keep a clear record of all measurements, sketches, and calculations for future use.
Example: Measuring an L-Shaped Living Room
A real-world scenario illustrates this process well. Consider a living room that extends into a dining nook, forming an “L” shape. Instead of treating it as one unit, break it into two rectangles:
- Main area: 14 ft × 12 ft = 168 sq ft
- Dining extension: 8 ft × 10 ft = 80 sq ft
Add both: 168 + 80 = 248 square feet total. This method ensures accuracy and helps contractors order the correct amount of flooring.
Common Mistakes to Avoid
Even experienced homeowners make avoidable errors when measuring rooms. Here’s a comparison of best practices versus common pitfalls:
| Do’s | Don’ts |
|---|---|
| Measure from wall to wall at floor level | Don’t measure along baseboards if they protrude significantly |
| Round up slightly when ordering materials | Don’t round down and risk coming short |
| Use consistent units (all feet or all inches) | Don’t mix feet and inches without converting |
| Account for closets and alcoves | Don’t exclude usable space from total calculation |
| Verify diagonal measurements for squareness | Don’t assume corners are perfect 90-degree angles |
Handling Non-Rectangular Spaces
Not all rooms are perfect rectangles. Circular alcoves, triangular extensions, or sloped ceilings require special consideration.
- Triangular Areas: Multiply the base by the height and divide by 2. Example: A triangular nook with a 6-foot base and 5-foot height = (6 × 5) ÷ 2 = 15 sq ft.
- Circular Segments: For a half-circle bay window, use the formula πr² ÷ 2. If the radius is 4 feet: (3.14 × 4²) ÷ 2 = 25.12 sq ft.
- Sloped Ceilings (Attics): Only include floor area where ceiling height is 5 feet or more, as per standard real estate guidelines.
When in doubt, sketch the room on graph paper using a scale (e.g., 1 square = 1 square foot). This visual aid simplifies complex layouts and improves accuracy.
Checklist: Measuring Room Square Footage Like a Pro
Follow this checklist to ensure no step is missed:
- ☐ Clear furniture from walls
- ☐ Gather tape measure, notebook, and calculator
- ☐ Sketch the room layout
- ☐ Measure all wall lengths at floor level
- ☐ Record dimensions immediately
- ☐ Break complex shapes into rectangles
- ☐ Calculate each section’s area
- ☐ Sum all areas for total square footage
- ☐ Double-check measurements
- ☐ Add 5–10% extra when ordering materials
Frequently Asked Questions
Do I include closets when measuring square footage?
Yes, if the closet is within the room and accessible without entering another space (like a hallway), include it in the total. Walk-in closets attached to bedrooms are typically counted in the room’s square footage.
Should I measure to the edge of baseboards or inside trim?
Measure from interior wall to interior wall at floor level, excluding baseboard thickness unless it significantly reduces usable space. Most professionals measure inside the finished wall surface.
How precise do my measurements need to be?
Aim for accuracy within 1/4 inch, especially for flooring or cabinetry. Small errors compound over large areas and can result in noticeable gaps or overlaps.
Final Tips for Consistent Accuracy
Consistency is key. Always measure twice, record clearly, and use the same unit system throughout. When working with multiple rooms, label each sketch with the room name and date. Digital tools like room planner apps can store measurements and generate diagrams, but manual verification remains essential.
“The most expensive mistakes in remodeling start with a single incorrect measurement.” — Maria Tran, General Contractor with 18 Years of Field Experience
Conclusion
Measuring a room’s square footage is a straightforward process when approached methodically. With the right tools, a clear plan, and attention to detail, anyone can achieve accurate results. Whether you’re updating your home, preparing for sale, or managing a renovation, precise measurements empower better decisions and smoother outcomes.


 浙公网安备
33010002000092号
浙公网安备
33010002000092号 浙B2-20120091-4
Comments
No comments yet. Why don't you start the discussion?