
In a world where personalization meets practicality, creating your own phone lanyard isn’t just a craft project—it’s a functional fashion statement. Whether you're tired of misplacing your phone, want added security in crowded spaces, or simply love expressing yourself through accessories, a handmade lanyard offers both utility and style. The best part? You don’t need advanced skills or expensive supplies. With everyday household items and a bit of creativity, you can design a durable, attractive lanyard tailored to your taste—all from the comfort of your home.
Why Make Your Own Phone Lanyard?
Store-bought lanyards often lack uniqueness and may not suit your preferred length, strength, or aesthetic. By making your own, you control every detail: color combinations, material durability, attachment style, and even added features like charm accents or quick-release clasps. Homemade lanyards are also eco-friendly—especially when repurposing fabric scraps, old shoelaces, or paracord from broken gear. Plus, they make thoughtful, personalized gifts for friends and family.
Materials and Tools You’ll Need
The beauty of this project lies in its simplicity. Most required items can be found around the house or purchased inexpensively at craft stores. Below is a checklist of essentials based on a standard braided cord design using paracord or fabric strips.
Basic Materials:
- Paracord (550 type), ribbon, shoelaces, or fabric strips (approx. 4–5 feet)
- S-hook, carabiner, or swivel clasp (for attaching to phone case)
- Key ring or split ring (to connect clasp to lanyard end)
- Lighter or fray check (to seal synthetic ends)
- Scissors
- Ruler or measuring tape
- Alligator clip or safety pin (optional, for holding braid in place)
Optional Add-Ons:
- Beading wire and small beads for decoration
- Charm or pendant
- Sewing needle and thread (for fabric-based designs)
- Heat-shrink tubing (for reinforced connection points)
“Handmade accessories foster mindfulness and creativity while solving real-world problems.” — Lena Patel, Craft Educator & Sustainable Design Advocate
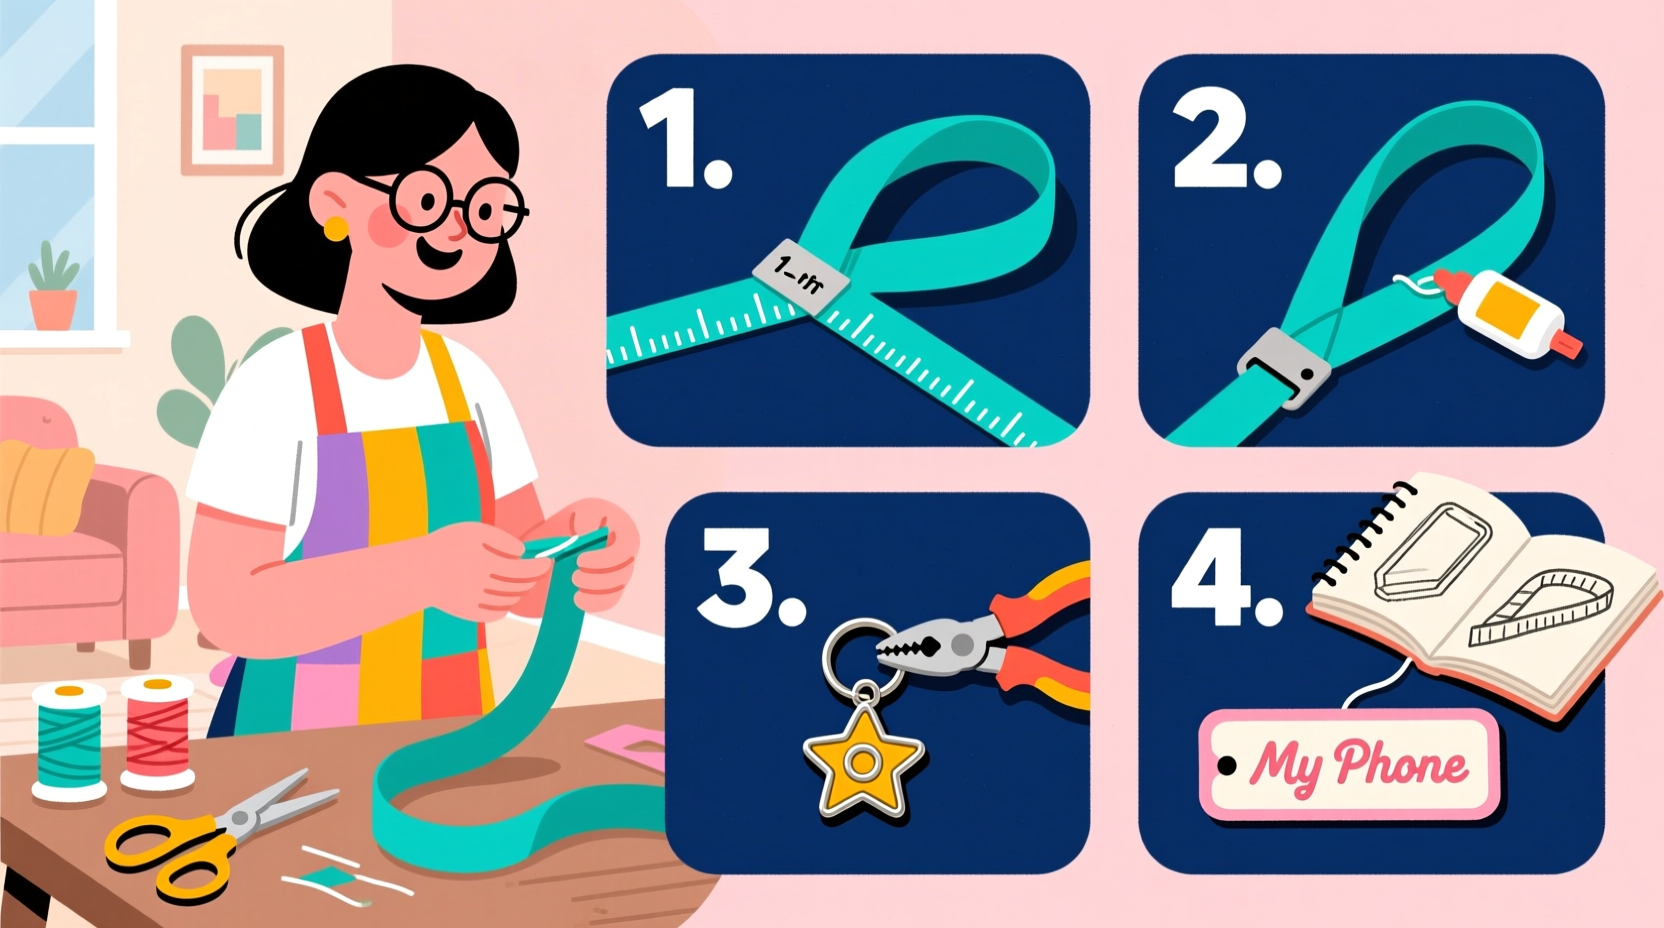
Step-by-Step Guide to Building Your Lanyard
This method uses a classic three-strand braid, ideal for beginners. It creates a sleek, strong cord that resists tangling and stretches minimally. Follow these steps carefully for consistent results.
- Cut three equal lengths of your chosen material—each about 4 feet long. Longer cuts allow for trimming and knotting later. If using paracord, remember it shortens slightly when braided.
- Bundle and secure one end by tying a simple overhand knot. Clip this knot into a fixed surface (like a drawer handle) using an alligator clip or pin it to a cushion so it doesn’t slip during braiding.
- Arrange strands side by side, ensuring no twists. Hold the free ends taut in your non-dominant hand.
- Begin the braid: Take the right strand and cross it over the center. Then take the left strand and cross it over the new center. Repeat this alternating motion—right over, left over—keeping tension even throughout.
- Braid continuously until you reach the desired length. A typical wearable lanyard measures between 20–24 inches from clasp to knot, depending on neck size and draping preference.
- Finish with a secure knot at the bottom (double or triple overhand). Trim excess, leaving about ½ inch of tail.
- Seal cut ends with a lighter (for synthetic cords like paracord) by briefly melting the tip and pressing flat with pliers. For fabric, apply fray check or fold and stitch.
- Attach hardware: Thread the top knotted end through the key ring, then fasten the S-hook or carabiner. Ensure the ring is closed securely with pliers if needed.
Design Variations and Customization Ideas
Once you master the basic braid, experiment with textures, patterns, and functions. Here are several ways to elevate your lanyard:
- Kumihimo braid: Use a foam disc or handheld loom to create intricate round cords with multiple threads.
- Flat fishtail braid: Offers a woven look and lies smoothly against clothing.
- Add beads: Slide beads onto strands before braiding or string them after as spacers.
- Color blocking: Combine two contrasting colors in a spiral twist or sectioned braid.
- Functional upgrades: Include a small pocket loop for a sanitizer bottle or integrate a magnetic breakaway clasp for safety.
Mini Case Study: Sarah’s Commute Upgrade
Sarah, a graphic designer in Portland, frequently rides public transit and was frustrated by constantly setting her phone down and forgetting it. She made a navy-and-gold braided lanyard using leftover paracord from a camping trip, adding a minimalist gold charm shaped like a paintbrush. Not only does she now keep her phone secure, but coworkers regularly compliment her accessory. “It feels good knowing I made something useful and stylish,” she says. “And I haven’t lost my phone once since wearing it.”
Do’s and Don’ts: Best Practices Table
| Do’s | Don’ts |
|---|---|
| Use high-tensile cord like paracord for durability | Use thin yarn or thread that may snap under weight |
| Test fit before finalizing knots | Assume all phones have compatible case loops—check yours first |
| Include a breakaway clasp for child-safe designs | Leave long, unsealed synthetic ends that snag easily |
| Match lanyard color to your everyday outfits | Overload with heavy charms that strain connections |
| Wash periodically if worn daily | Ignore fraying—repair minor wear immediately |
Frequently Asked Questions
Can I use this lanyard with any phone?
Most modern smartphones require a case with a lanyard loop or attachment point. Some rugged cases include built-in slots for cords. If your phone lacks this feature, consider purchasing a case designed for lanyards or using a specially designed adapter ring that fits around your phone or case.
How long should my phone lanyard be?
A standard adult-sized lanyard ranges from 20 to 26 inches in total length. This allows the phone to rest comfortably near waist level when worn around the neck. For shorter wear (e.g., across the chest), aim for 16–18 inches. Always measure and test drape before finalizing knots.
Is it safe to hang my phone on a lanyard?
Yes, provided the lanyard is well-constructed and attached securely. Use strong cordage and double-check knots and clasps regularly. Avoid swinging the phone aggressively. For peace of mind, opt for a breakaway clasp that releases under sudden force, reducing risk of injury or damage.
Conclusion: Create, Wear, and Share Your Design
Making your own phone lanyard blends craftsmanship with daily convenience. What starts as a simple braiding exercise evolves into a personalized tool that protects your device and reflects your individuality. From selecting colors to choosing hardware, each decision adds meaning to the final piece. Once completed, you might find yourself inspired to make more—perhaps one for the gym, another in seasonal colors, or even matching sets for loved ones.
The satisfaction of carrying something you built by hand is unmatched. So gather your materials, follow the steps, and wear your creation with pride. And when someone asks where you got such a cool lanyard, smile and say, “I made it myself.”


 浙公网安备
33010002000092号
浙公网安备
33010002000092号 浙B2-20120091-4
Comments
No comments yet. Why don't you start the discussion?