
Removing or replacing a photo’s background with pure white is essential for product images, professional portraits, or clean social media visuals. While advanced editors like Photoshop dominate this space, most people don’t need complex software to achieve great results. With everyday tools and smart techniques, you can transform any image background into crisp white—no downloads, no subscriptions, and no design experience required.
Why a White Background Matters
A clean white background enhances clarity, removes distractions, and aligns with standards used by major retailers and online marketplaces. Whether you're listing items on eBay, creating Instagram posts, or preparing headshots for LinkedIn, a neutral backdrop ensures your subject stands out. The key is simplicity: focus on the subject, eliminate clutter, and maintain consistency across visuals.
“Even amateur photos gain instant professionalism when placed against a uniform white background.” — Dana Reyes, Digital Content Strategist
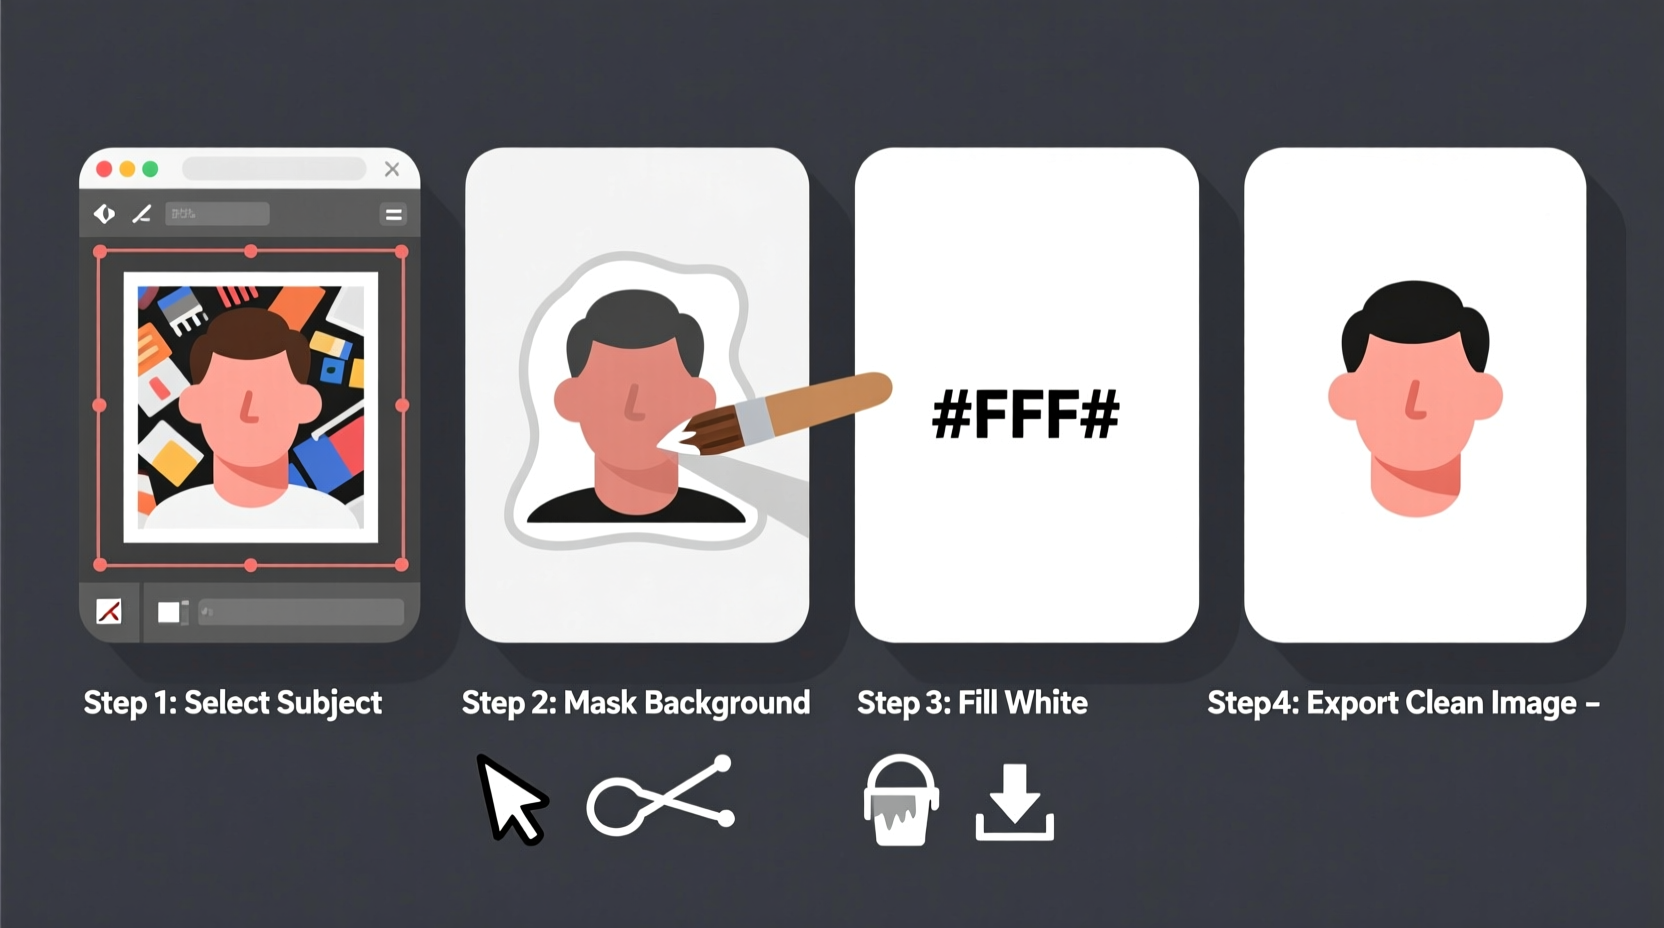
Step-by-Step Guide to Creating a White Background
Follow this straightforward process using only free, accessible tools. These steps work whether you’re on a smartphone, tablet, or computer.
- Capture or choose a well-lit image: Natural light from a window or soft indoor lighting reduces harsh shadows. Position your subject a few feet in front of the background to minimize blur and edge blending.
- Use built-in editing tools: Most devices come with basic photo editors that include cropping and background adjustment features.
- Leverage free web-based editors: Tools like Pixlr, Canva, or Photopea offer powerful yet intuitive interfaces accessible through any browser.
- Apply background removal features: Many free platforms now use AI to detect subjects and erase backgrounds automatically.
- Replace with solid white: Once the background is removed, fill the empty space with white using a color fill tool.
- Refine edges and save: Zoom in to check for stray pixels or halos around hair or fine details. Export as PNG for transparency support or JPEG for solid white fills.
Free Tools That Work Without Installation
You don't need to install anything to change a background. Here are reliable, no-download options available directly in your browser:
- Pixlr E (pixlr.com/e): Offers automatic background removal with one click and a solid color layer option to set background to white.
- Canva (canva.com): Upload your image, use “Background Remover” under “Edit Image,” then add a white rectangle behind your subject.
- Photopea (photopea.com): A full-featured online editor similar to Photoshop. Use the Magic Wand or Select Subject tool, delete the background, and fill with white.
- Fotor (fotor.com): Includes AI-powered cutout tools and a simple interface ideal for quick edits.
- Remove.bg (remove.bg): Fully automated—upload an image and it instantly strips the background. Download the transparent version and paste it onto a white canvas elsewhere.
Comparison of Free Online Tools
| Tool | Best For | Auto Background Removal | White Fill Option | Mobile-Friendly |
|---|---|---|---|---|
| Pixlr E | Quick edits with precision | Yes | Yes (via layers) | Yes |
| Canva | Social media creators | Yes (Pro feature free trial) | Yes (shape layer) | Yes |
| Photopea | Advanced control without software | Limited (manual selection) | Yes | Yes |
| Fotor | Beginners needing speed | Yes | Yes | Yes |
| Remove.bg | Fully automatic results | Yes (excellent accuracy) | No (but export to Canva/Pixlr to add white) | Yes |
Real Example: Turning a Home Snapshot into a Professional Profile Photo
Sarah, a freelance graphic designer, needed a polished profile picture for her portfolio site but had only taken a casual selfie at home with a busy bookshelf behind her. She visited remove.bg, uploaded the image, and within seconds received a version with a transparent background. She then opened Canva, created a new design with a white background, uploaded her transparent image, and centered it. After adjusting size and contrast, she downloaded the result as a high-quality JPEG. The final image looked studio-shot and was perfect for her website header—all done in under five minutes without installing anything.
Essential Checklist for Success
To ensure your edited photo looks natural and professional, follow this checklist before saving:
- ✅ Ensure good lighting to avoid dark edges or uneven tones
- ✅ Confirm the subject is clearly separated from the background
- ✅ Check for leftover background fragments, especially around hair or intricate details
- ✅ Use zoom to inspect edges and refine manually if possible
- ✅ Save in appropriate format: PNG for transparency, JPEG for solid white
- ✅ Test the image on different screens to verify true white balance
Common Mistakes to Avoid
Even simple edits can go wrong if small errors are overlooked. Watch out for these pitfalls:
- Using low-resolution images: Blurry photos make edge detection difficult, leading to jagged or incomplete cutouts.
- Ignoring shadows: Shadows often remain attached to the subject and may appear unnatural against pure white.
- Overlooking file formats: Saving a transparent image as JPEG will add a gray checkerboard instead of white.
- Not checking color temperature: Some whites appear yellowish or blue-tinted depending on screen calibration. Aim for neutral white (#FFFFFF).
Frequently Asked Questions
Can I do this on my phone?
Yes. Apps like Canva, Fotor, and Remove.bg have mobile versions that work seamlessly on iOS and Android. Simply open the website in your browser or download the free app, upload your photo, and follow the prompts to remove the background and apply white.
Do I need to pay for these tools?
Most core functions—including background removal and basic editing—are free. Some platforms offer premium upgrades for higher resolution or batch processing, but for single-image tasks, the free tier is more than sufficient.
Why does my image look pixelated after editing?
This usually happens when the original image has low resolution or is stretched beyond its natural size. Always start with the highest quality version available and avoid enlarging during editing.
Final Tips for Consistent Results
For best outcomes, treat each edit as part of a repeatable process. Standardize your workflow: take photos in consistent lighting, use the same tool each time, and save files with clear naming conventions (e.g., “product_name_whitebg.jpg”). Over time, this builds a cohesive visual library suitable for websites, presentations, or e-commerce catalogs.
“Consistency in presentation signals professionalism—even when working with minimal resources.” — Marcus Lin, Visual Brand Consultant
Take Action Today
You don’t need expensive software or technical skills to give your photos a clean, white background. With just a few minutes and the right free tools, any image can be transformed into a polished, professional visual. Start with one photo today—apply these steps, test the output, and build confidence with each edit. Your audience will notice the difference.


 浙公网安备
33010002000092号
浙公网安备
33010002000092号 浙B2-20120091-4
Comments
No comments yet. Why don't you start the discussion?