
Mechanical keyboards are built to last, but years of typing, snacking, and daily use take a toll. Crumbs, dust, oils from fingertips, and pet hair accumulate beneath keycaps and around switches, affecting performance and hygiene. While many users avoid deep cleaning out of fear of damaging delicate components, a thorough yet gentle approach can restore both function and appearance—without voiding warranties or harming switches.
The good news? You don’t need specialized tools or technical expertise. With the right techniques and a little patience, you can deep clean your mechanical keyboard safely at home. This guide walks you through every step, from preparation to reassembly, while highlighting what to avoid and how to maintain long-term cleanliness.
Why Deep Cleaning Matters for Mechanical Keyboards
Unlike membrane keyboards, mechanical models have individual switches under each keycap, making them more durable—but also more vulnerable to debris buildup. Over time, accumulated grime can cause keys to stick, register inconsistently, or fail entirely. Dust and oils also create an environment conducive to bacteria growth, especially if you eat near your desk.
Regular maintenance improves tactile response, extends switch lifespan, and keeps your workspace hygienic. According to Dr. Lena Torres, an ergonomic design researcher at TechWell Labs:
“Keyboards can harbor more bacteria than a toilet seat. A clean keyboard isn’t just about aesthetics—it’s part of digital wellness.” — Dr. Lena Torres, Ergonomic Design Researcher
Yet many users delay cleaning because they assume it requires soldering knowledge or risks permanent damage. That misconception leads to avoidable wear. The truth is: most mechanical keyboards are designed with user maintenance in mind—especially those using hot-swappable switches or standard keycap layouts.
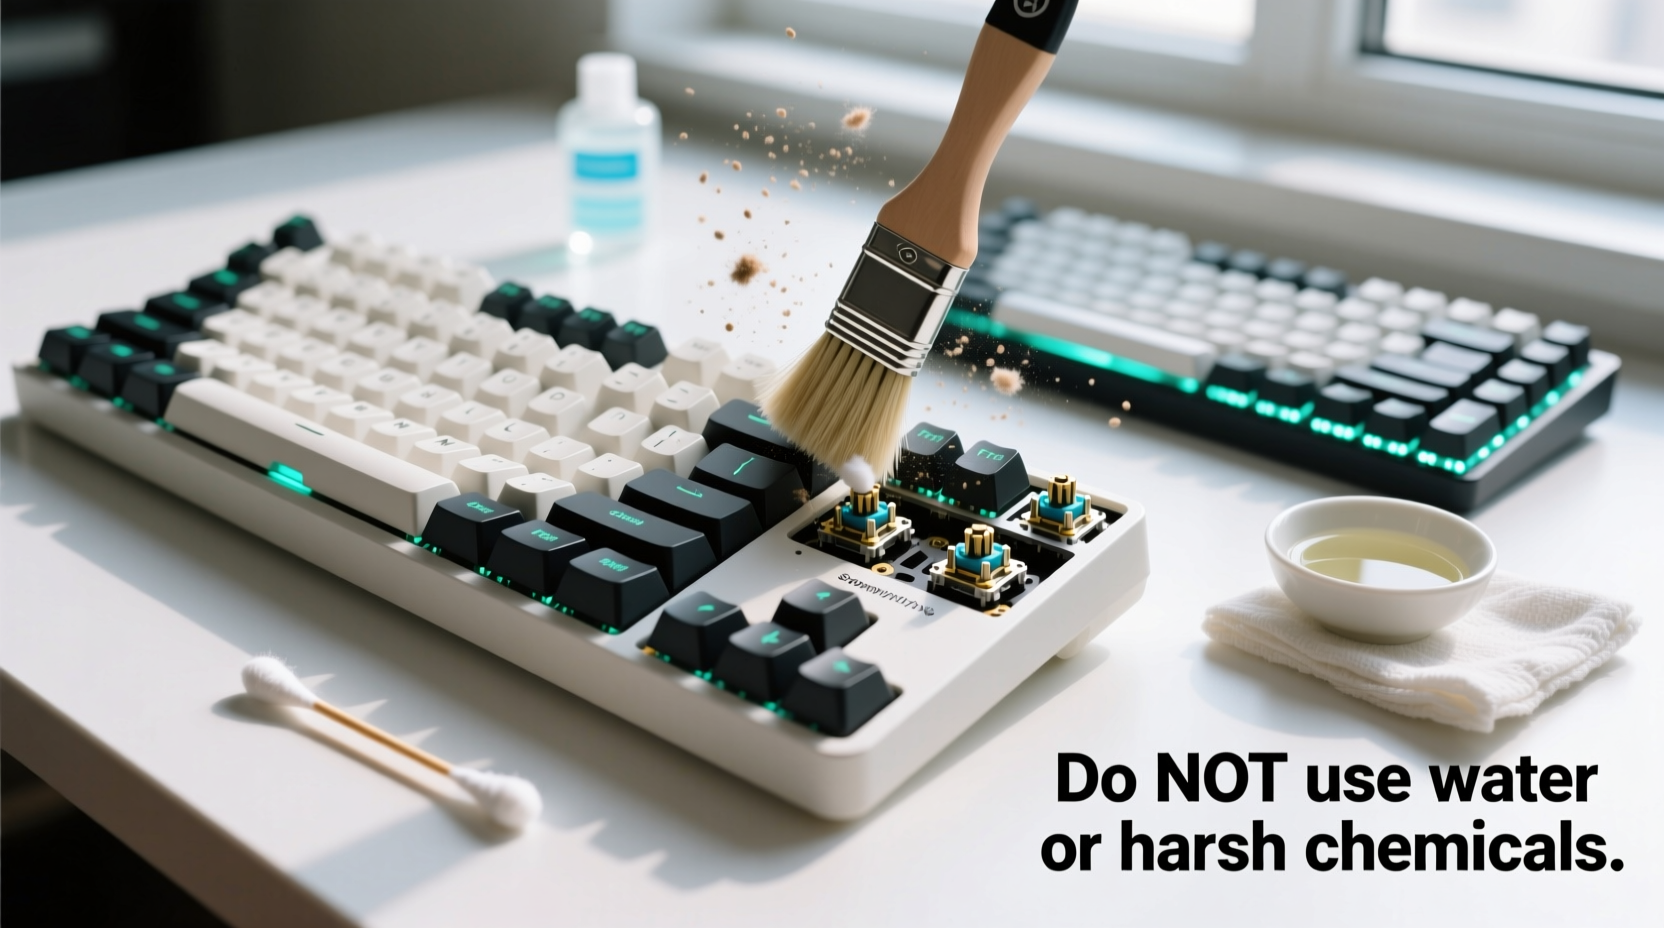
Essential Tools and Supplies
Before starting, gather the right tools. Using improper materials (like wet cloths or compressed air cans held too close) can push moisture into circuits or break plastic housings. Here’s what you’ll need:
- Keycap puller – Prevents scratching during removal
- Compressed air canister – Removes loose debris without contact
- Soft-bristle brush – Ideal for dislodging fine dust around switches
- Isopropyl alcohol (70% minimum) – Effective cleaner that evaporates quickly
- Cotton swabs or microfiber cloth – For precision wiping
- Bowl of warm soapy water – Only for keycaps; never submerge the board
- Plastic container or tray – To organize parts during cleaning
What Not to Use
Avoid these common pitfalls:
| Item | Risk | Better Alternative |
|---|---|---|
| Vacuum cleaner | Static electricity may damage PCB | Compressed air |
| Dishwasher | Water intrusion destroys electronics | Hand-wash keycaps only |
| Wet paper towels | Lint and moisture residue | Microfiber + alcohol |
| Sharp objects (pins, knives) | Scratches housing or prongs | Soft brush or toothbrush |
Step-by-Step: How to Deep Clean Your Keyboard Safely
Follow this timeline-based process to ensure a complete, non-damaging clean. Allow 1–2 hours depending on drying time.
- Power down and unplug – Disconnect USB cable or turn off wireless mode. Never clean a powered device.
- Remove keycaps – Use a keycap puller to gently lift caps starting from the top row. Work outward to prevent accidental pressure on exposed switches.
- Shake and blow debris loose – Hold the keyboard upside down over a trash can and tap lightly. Then use short bursts of compressed air across switch stems and gaps.
- Clean keycaps – Soak in lukewarm, soapy water for 15–20 minutes. Scrub gently with a soft brush, rinse, and lay flat on a towel to dry completely (minimum 2 hours).
- Spot-clean the plate and switches – Dampen a cotton swab with isopropyl alcohol and wipe around each switch base. Do not pour liquid directly onto the board.
- Tackle stubborn grime – For caked-on dirt near spacebar or Enter key, use a slightly moistened foam swab (not dripping) and rotate carefully.
- Final dusting – Pass a dry microfiber cloth over the surface and use one last round of compressed air.
- Reattach keycaps – Once fully dry, replace caps in correct positions. Test each major key to confirm proper seating.
When to Skip Switch Removal
You do not need to desolder or remove switches unless you’re replacing them. Most modern MX-style switches are sealed enough to resist dust ingress. Attempting removal without experience risks bending PCB pins or cracking solder joints. If a switch feels gritty after cleaning, try actuating it repeatedly—sometimes debris works itself free through use.
Real Example: Recovering a Three-Year-Old Gaming Keyboard
Jamal, a freelance writer and avid gamer, noticed his favorite mechanical keyboard had become increasingly unresponsive. The 'W' and 'A' keys often double-tapped, and a faint crunch sound accompanied every press. He considered buying a replacement but decided to try deep cleaning first.
After unplugging the board, he removed all keycaps using a nylon-coated puller. Underneath, he found a thick layer of cat hair (he has two cats), crumbs from late-night snacks, and oily residue from sweaty fingers. He used compressed air to clear loose debris, then soaked the keycaps overnight in mild dish soap solution. The next day, he wiped each switch base with alcohol-dipped swabs and let the board sit for three hours.
Upon reassembly, the keyboard felt like new. No more sticking, no ghost inputs. “I saved $120,” Jamal said later. “And now I clean it every six months.”
Preventative Maintenance Checklist
To reduce the need for intensive cleaning, follow this monthly routine:
- ✅ Wipe surface with dry microfiber cloth weekly
- ✅ Use compressed air every 2–4 weeks
- ✅ Wash hands before extended typing sessions
- ✅ Avoid eating directly over the keyboard
- ✅ Cover with a silicone skin or dust cover when not in use
- ✅ Rotate keycap sets every few months to allow even wear
For heavy-use environments (shared offices, gaming setups, or homes with pets), consider scheduling a full deep clean every 6–8 months.
Frequently Asked Questions
Can I wash my entire keyboard?
No. Submerging any part of the PCB or switch assembly will likely destroy the circuitry. Only removable keycaps should be washed, and only by hand. Never put your keyboard in a dishwasher or ultrasonic cleaner unless explicitly rated for it (rare).
How do I know if my switches are damaged during cleaning?
If a key fails to register, feels mushy, or clicks abnormally after reassembly, check whether the keycap is seated correctly. If the issue persists, inspect the switch stem for misalignment. In rare cases, moisture may have seeped in—let the board dry for 24 hours before testing again. Persistent problems suggest prior wear, not cleaning error.
Are optical switches easier to clean than mechanical ones?
Optical switches use infrared beams instead of metal contacts, making them slightly more resistant to dust-related failures. However, physical debris around the stem still affects performance. Cleaning methods remain nearly identical—focus on keeping the housing clear and avoiding liquid exposure.
Final Tips for Long-Term Keyboard Health
Deep cleaning is effective, but consistency beats intensity. A keyboard maintained regularly rarely needs aggressive intervention. Choose keycaps made from PBT plastic—they resist shine and oil absorption better than ABS. Consider investing in a magnetic dust cover if you work in a high-dust environment.
If you're using a custom-built or high-end board, consult the manufacturer’s guidelines before cleaning. Some boutique brands recommend specific care protocols. And always remember: patience pays off. Rushing reassembly or skipping drying time invites mistakes.
“The best keyboard maintenance habit? Treat it like precision equipment, not disposable tech.” — Mark Renaldi, Custom Keyboard Builder & Streamer
Take Action Today
Your mechanical keyboard is more than a tool—it's an extension of your workflow, creativity, and comfort. A simple deep clean can revive its responsiveness and make typing enjoyable again. Whether you’ve ignored it for months or just moved into a dusty apartment, now is the perfect time to give it the attention it deserves.


 浙公网安备
33010002000092号
浙公网安备
33010002000092号 浙B2-20120091-4
Comments
No comments yet. Why don't you start the discussion?