
Water trapped in the ear is a common issue, especially after swimming, showering, or water-based activities. While it may seem minor, prolonged moisture can lead to discomfort, muffled hearing, and even infections like swimmer’s ear (otitis externa). The key is not only removing the water effectively but doing so safely—without damaging the delicate structures of the ear canal. Understanding the anatomy and using proven techniques can make all the difference.
Why Water Gets Stuck in the Ear
The human ear canal is curved and narrow, making it easy for water to become trapped, particularly if there's excess wax, narrow passages, or anatomical variations. When water remains, it creates a moist environment ideal for bacterial growth. Symptoms include a feeling of fullness, popping sensations, mild pain, or dulled hearing. Children are especially prone due to smaller ear canals, but adults who swim frequently or use hearing aids are also at risk.
It's important to avoid inserting objects like cotton swabs into the ear, as this can push water deeper or damage the eardrum. Instead, focus on gentle, non-invasive methods that encourage natural drainage.
Safe and Effective Methods to Remove Water from the Ear
Several techniques can help dislodge trapped water without risking injury. These rely on gravity, pressure changes, or motion to encourage water to exit the ear canal naturally.
1. Gravity-Based Tilt and Shake
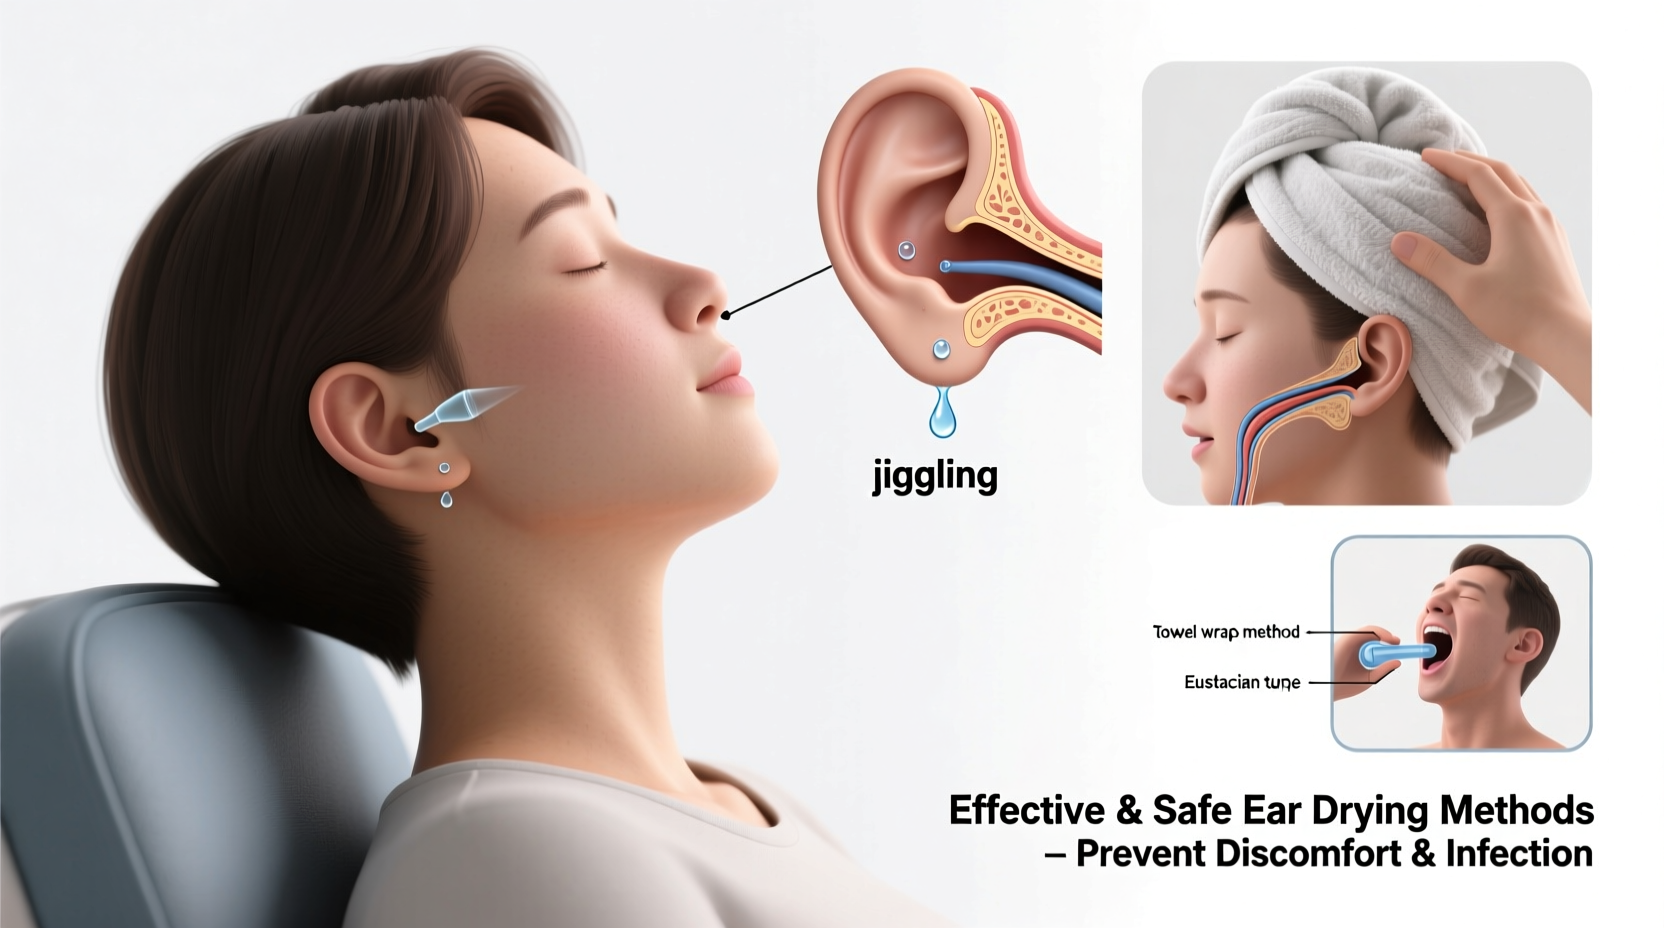
Tilting the head to the side is the simplest first step. Gently pull the earlobe backward and downward (upward for children) to straighten the ear canal, then hop on one foot or shake the head slightly to help water drain.
2. Create a Vacuum with the Palm Method
Place your palm firmly over the affected ear, creating an airtight seal. Push and release your hand rapidly several times, mimicking a pump. This generates suction that may draw out the water. Follow up by tilting your head to allow drainage.
3. Use Steam to Loosen Trapped Moisture
Inhaling steam from a bowl of hot water or taking a warm shower can help open the Eustachian tube and loosen fluid. The warmth softens wax and reduces surface tension of trapped water, aiding its release.
4. Chew or Yawn to Activate Jaw Movement
Moving the jaw helps shift the bones around the ear canal, which can dislodge water. Chewing gum, yawning widely, or talking animatedly can create subtle shifts that promote drainage.
5. Hairdryer Technique (Low Heat, Low Speed)
Hold a hairdryer 30 cm (about a foot) from the ear on the lowest heat and speed setting. Move it in a circular motion to gently evaporate moisture. Never use high heat or hold it close—this can burn the skin or eardrum.
“Moisture in the ear canal is a breeding ground for bacteria. Prompt, gentle removal is essential for preventing infection.” — Dr. Alan Kim, Otolaryngologist
When to Avoid Home Remedies
While most cases resolve within a few hours, some situations require medical attention. Do not attempt home removal if you have:
- Pain, discharge, or bleeding from the ear
- A history of eardrum perforation or ear surgery
- Ear tubes (tympanostomy tubes)
- Suspected foreign object in the ear
In these cases, consult a healthcare provider. Attempting DIY methods could worsen the condition.
Prevention Strategies for Swimmers and Frequent Exposure
Preventing water from entering the ear in the first place is more effective than treating it afterward. Consider these proactive steps:
| Method | How It Helps | Best For |
|---|---|---|
| Swim plugs or silicone earbands | Create a waterproof seal during swimming | Recreational and competitive swimmers |
| Custom-fitted ear molds | Offer superior comfort and protection | People with chronic ear issues |
| Drying drops (alcohol-vinegar solution) | Disrupt moisture and inhibit bacterial growth | Post-swim use (if no eardrum issues) |
| Towel dry outer ear thoroughly | Reduces initial water entry | Daily showers or pool use |
Mini Case Study: Preventing Recurring Swimmer’s Ear
Mark, a 28-year-old triathlete, experienced recurring ear pain and temporary hearing loss after training sessions. He initially tried cotton swabs, which worsened irritation. After visiting an ENT specialist, he was diagnosed with chronic swimmer’s ear due to frequent water exposure and improper drying.
The doctor advised him to stop using cotton swabs, start using custom swim molds, and apply vinegar-alcohol drops post-swim. Within three weeks, his symptoms resolved. Over the next six months, he reported zero ear infections—demonstrating how proper prevention and safe removal techniques can significantly improve quality of life.
Step-by-Step Guide: Removing Water Safely at Home
- Stop further water exposure – Exit the pool or shower and dry the outer ear with a towel.
- Tilt your head – Lean to the side with the affected ear facing down. Pull the earlobe gently to straighten the canal.
- Apply the palm vacuum method – Press your palm over the ear and pump quickly 5–10 times.
- Chew or yawn – Activate jaw muscles to help shift trapped water.
- Use a hairdryer on low – Hold it at arm’s length, blowing warm air around the ear opening for 30 seconds.
- Apply drying drops (optional) – If approved by a doctor, use a few drops of alcohol-vinegar solution.
- Wait and repeat if needed – Most water clears within 30 minutes. If not, try again later or seek medical advice.
Common Myths and What Not to Do
Misinformation can lead to harmful practices. Here are common misconceptions and why they should be avoided:
- Myth: Cotton swabs help dry the ear. Truth: They push water deeper and risk eardrum injury or wax impaction.
- Myth: Rubbing alcohol alone is always safe. Truth: Pure alcohol can irritate the skin; dilute it with vinegar or water unless advised otherwise.
- Myth: Jumping on one foot is ineffective. Truth: Combined with head tilting, it uses gravity and vibration—often successful when done correctly.
- Myth: All ear drops are safe. Truth: Some contain ingredients unsuitable for damaged skin or perforated eardrums.
FAQ
How long can water stay in your ear?
Most water drains within minutes to a few hours. If it persists beyond 24 hours, especially with pain or hearing changes, see a doctor. Prolonged moisture increases infection risk.
Can trapped water cause an ear infection?
Yes. Moist environments promote bacterial and fungal growth, leading to otitis externa. Symptoms include itching, pain, swelling, and pus-like discharge. Early drying reduces this risk significantly.
Are ear candles safe for removing water?
No. The FDA warns against ear candling due to risks of burns, ear canal blockage, and eardrum perforation. There is no scientific evidence supporting its effectiveness.
Conclusion
Removing water from the ear doesn’t require drastic measures—just smart, safe habits grounded in physiology and expert guidance. Whether you're a swimmer, parent, or someone who enjoys long showers, understanding how to manage trapped moisture protects your hearing and comfort. Combine immediate removal techniques with preventive strategies like drying drops and protective gear for lasting results.


 浙公网安备
33010002000092号
浙公网安备
33010002000092号 浙B2-20120091-4
Comments
No comments yet. Why don't you start the discussion?