
Removing a watch back is often necessary for battery replacement, cleaning, or servicing the movement. However, doing it incorrectly can lead to scratches, stripped edges, or even irreversible damage to the case or internal components. With the right knowledge, tools, and approach, this task can be completed safely at home—without compromising the integrity of your timepiece. Whether you own a vintage heirloom or a modern automatic, understanding how to open the case properly preserves both function and value.
Understanding Watch Back Types
Not all watches are created equal when it comes to case design. The method used to remove the back depends entirely on the type of closure. There are three primary types of watch backs:
- Press-Fit (Snap-Off) Backs: Held in place by friction, these are common in older or budget-friendly watches. They require gentle prying with a specialized tool.
- Screw-Down Backs: These have notched edges or small indentations that engage with a spanner tool. Turning counterclockwise releases them securely.
- Screw-Through (or Threaded Case Backs): Found on many dive and professional-grade watches, these screw directly into the mid-case and require precise handling to avoid cross-threading.
Mistaking one type for another is a common cause of damage. Always inspect the edge of the case carefully before applying force.
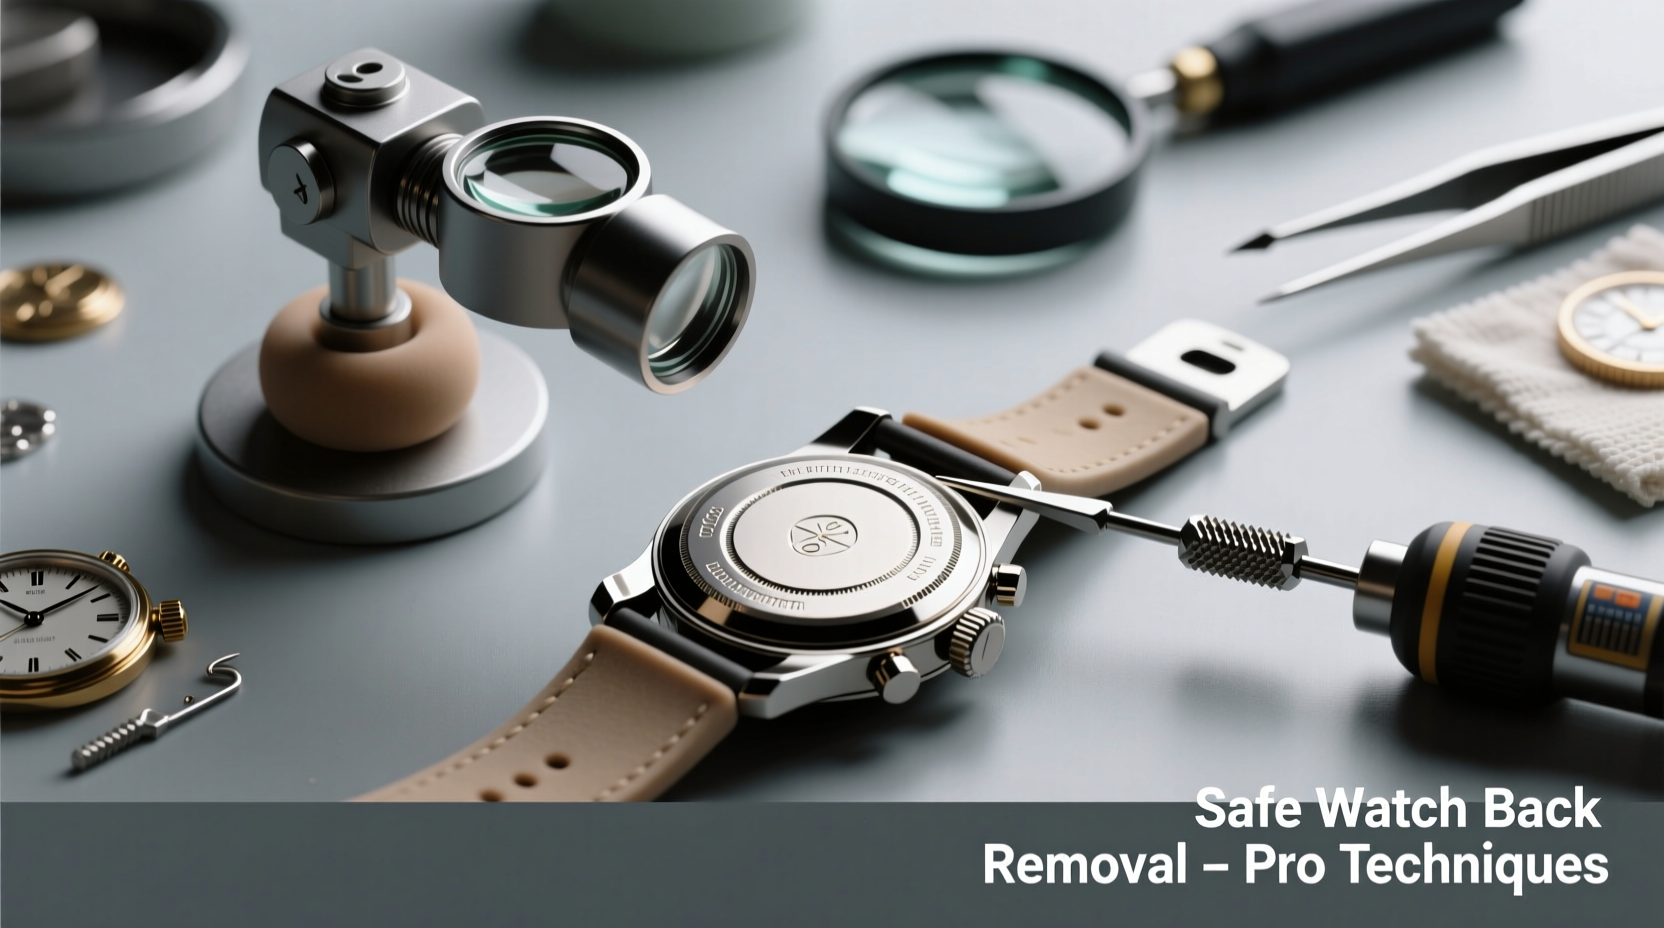
Essential Tools for Safe Removal
Using improper tools like knives or pliers drastically increases the risk of marring the finish or injuring yourself. Invest in a basic toolkit designed specifically for watch work:
- Case Opener Tool (Lancet or Knife-Type): For press-fit backs with a small gap.
- Watch Back Remover (Spanner Wrench): Comes in various pin configurations to match notched screw-down backs.
- Padded Vise or Watch Holder: Secures the watch firmly without damaging the crystal or crown.
- Plastic Tweezers and Soft Cloth: For handling delicate parts post-opening.
- Rubber Mat or Microfiber Pad: Prevents slipping during operation.
A high-quality set costs under $30 and pays for itself in avoided repair bills. Professionals emphasize precision over power—never apply brute force.
“Less than 5% of damaged cases result from faulty tools; most stem from impatience and incorrect technique.” — Daniel Reeves, Master Watchmaker, Geneva Institute of Horology
Step-by-Step Guide to Removing a Watch Back Safely
Follow this sequence regardless of the back type. Patience and preparation reduce risks significantly.
- Prepare Your Workspace: Choose a clean, well-lit surface. Lay down a non-slip mat. Keep children and pets away to avoid distractions.
- Identify the Case Type: Examine the perimeter under magnification. Determine whether it's snap-on, screw-down, or threaded.
- Secure the Watch: Place it in a padded holder or grip gently with a soft-jaw vise. Never clamp the crystal or crown.
- Select the Correct Tool: Match the spanner pins to the notches or insert the lancet into the groove if present.
- Apply Even Pressure: Rotate slowly and steadily. If resistance occurs, stop immediately—forcing may strip threads.
- Inspect After Removal: Check for gasket wear, corrosion, or debris inside the case. Replace seals if needed before reassembly.
For press-fit backs, position the knife tip at the seam and twist slightly like a lever. You should hear a faint pop as the seal breaks. Repeat around the circumference until fully detached.
Do’s and Don’ts: Quick Reference Table
| Action | Do | Don't |
|---|---|---|
| Tool Selection | Use a proper spanner or case knife | Use a screwdriver or kitchen knife |
| Force Application | Turn slowly with steady pressure | Hammer or jerk the tool violently |
| Work Environment | Clean, dry, and clutter-free | Damp or dusty areas |
| Post-Removal Care | Store screws and gaskets safely | Leave parts exposed on an open table |
| Reassembly | Replace worn gaskets; tighten evenly | Over-tighten or reuse cracked seals |
Real Example: A Vintage Citizen Rescue
A collector once attempted to replace the battery in a 1970s Citizen dress watch using a butter knife. The blade slipped, gouging the stainless steel case near the 6 o’clock position. By the time he brought it to a technician, the damage required polishing that reduced the case thickness below manufacturer specs—diminishing its resale value by nearly 40%.
The correct method would have involved identifying the notched screw-back, selecting a four-pin spanner, and turning counterclockwise with moderate hand pressure. The entire process takes less than two minutes when done correctly—and leaves no trace.
Frequently Asked Questions
Can I remove a watch back without special tools?
It’s strongly discouraged. While some YouTube hacks suggest using rubber pads or coin slots, these lack control and increase the chance of slipping. A $15 tool kit eliminates guesswork and protects your investment.
My watch won’t open—what should I do?
If there’s no visible seam or notches, your model may have a sealed case requiring factory service. Some brands like certain Casios or smartwatches are intentionally non-serviceable by consumers. Consult the manual or manufacturer first.
How tight should I make the back when reassembling?
Tighten just until snug. Over-torquing can warp gaskets or stretch threads. If water resistance matters, have the seal tested professionally after reassembly.
Final Checklist Before You Begin
- ☑ Identified the exact case back type
- ☑ Selected the correct removal tool
- ☑ Prepared a stable, clean workspace
- ☑ Secured the watch without stressing the crown
- ☑ Have replacement gaskets ready (if applicable)
- ☑ Double-checked rotation direction (counterclockwise to open)
This checklist ensures nothing is overlooked. Rushing past these steps is the most common reason for preventable damage.
Conclusion
Opening a watch back doesn’t need to be intimidating, but it does demand respect for precision engineering. Every scratch, dent, or misaligned thread affects not only appearance but also longevity and functionality. By using the right tools, following a careful process, and knowing when to step back and consult a professional, you protect your timepiece’s performance and heritage.


 浙公网安备
33010002000092号
浙公网安备
33010002000092号 浙B2-20120091-4
Comments
No comments yet. Why don't you start the discussion?