
A cracked phone screen is one of the most common frustrations for smartphone users. While a shattered display might seem like a trip-to-the-repair-shop moment, not every crack requires professional intervention. Small chips, hairline fractures, or minor surface damage can often be managed safely and effectively at home. With the right tools, materials, and caution, you can stabilize the damage, improve usability, and even extend the life of your device until a full replacement becomes necessary.
This guide focuses exclusively on minor glass damage—superficial cracks that don’t impair touch response or visibility. The solutions presented are temporary, practical, and designed to prevent further spreading while maintaining functionality. Always assess the severity before proceeding; if the touchscreen is unresponsive or the crack is deep, seek professional help.
Assessing the Damage: Is a DIY Fix Appropriate?
Before attempting any repair, determine whether the damage falls within the scope of safe home treatment. A DIY approach is suitable only when:
- The crack is small (less than 1 inch) and doesn’t spread across corners or edges.
- Touch sensitivity remains fully functional.
- No glass shards are loose or protruding.
- There’s no discoloration, black spots, or backlight bleeding (indicative of LCD damage).
If the screen is spider-webbing rapidly or the display shows visual artifacts, stop immediately. Internal layer damage means a DIY patch won’t suffice. However, if it’s just the outer glass with minimal structural compromise, proceed carefully.
“Surface-level cracks in tempered glass can often be stabilized temporarily using adhesive resins. It won’t restore optical clarity perfectly, but it prevents further propagation.” — Dr. Alan Zhou, Materials Scientist specializing in consumer electronics durability
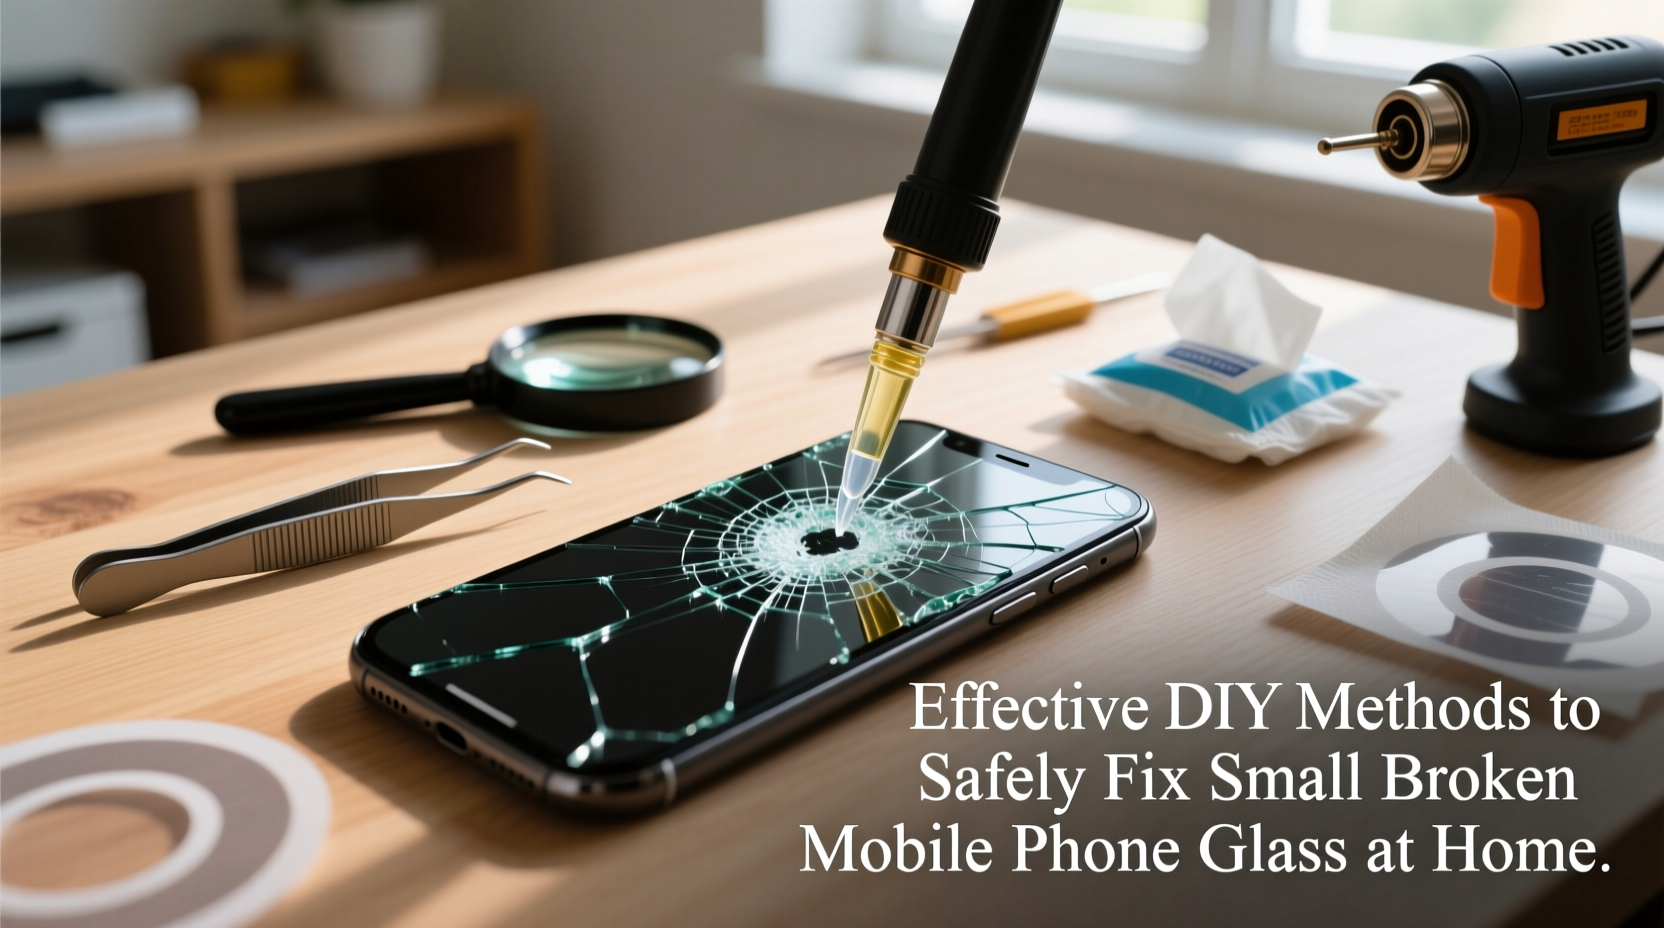
Step-by-Step Guide: Repairing Minor Glass Cracks at Home
Follow this detailed process to safely address small glass damage using accessible materials. This method uses UV-curing resin, which fills micro-fractures and hardens under light to create a protective seal.
- Clean the Screen Thoroughly: Use a microfiber cloth and isopropyl alcohol (90% or higher) to remove dust, oil, and debris from the cracked area. Avoid getting liquid into speaker grills or ports.
- Apply Clear Tape (Optional): For added stability during repair, place a piece of clear packing tape over the crack. This prevents dust from entering and holds tiny fragments in place.
- Inject UV Repair Resin: Using a precision applicator, gently fill the crack with a drop of optical-grade UV resin. Do not overapply—let capillary action draw the liquid into the fissure.
- Spread Evenly: Use a plastic card (like an old credit card) to lightly smooth the resin across the crack, ensuring complete coverage without pushing glass deeper.
- Cure with UV Light: Expose the treated area to a UV lamp (included in most repair kits) for 2–3 minutes. Natural sunlight can work but takes longer and is less consistent.
- Remove Excess and Polish: Once hardened, gently peel off tape (if used). Buff the surface with a microfiber cloth. Some kits include a polishing compound to reduce residue shine.
Alternative Methods and Their Effectiveness
While UV resin offers the best results for visible cracks, other household techniques may provide temporary relief or cosmetic improvement. Below is a comparison of popular DIY approaches:
| Method | Effectiveness | Pros | Cons |
|---|---|---|---|
| UV Resin Kit | High | Fills cracks, prevents spreading, improves clarity | Requires purchase, needs careful application |
| Clear Nail Polish | Moderate | Easily available, cheap | Yellowing over time, less durable, messy finish |
| Screen Protector Application | Low (cosmetic) | Smooths feel, protects from cuts | Doesn't fix glass, may bubble over cracks |
| Nothing (Wait for Replacement) | None | No risk of error | Crack may spread, sharp edges possible |
Nail polish can act as a quick substitute for resin in emergencies, but its long-term performance is poor. It lacks optical clarity and tends to degrade under heat and UV exposure. Still, in a pinch, a thin layer can seal a tiny chip and prevent moisture ingress.
Essential Safety and Best Practice Checklist
To ensure your DIY repair is both effective and safe, follow this checklist before, during, and after the process:
- ✅ Power off the device completely before starting.
- ✅ Work on a clean, flat surface with good lighting.
- ✅ Use gloves to avoid fingerprints and skin oils on the screen.
- ✅ Keep children and pets away—small tools and chemicals pose risks.
- ✅ Test resin on an inconspicuous area first if concerned about adhesion.
- ✅ Avoid pressing down on the screen during application.
- ✅ After repair, wait 15 minutes before turning the phone back on.
- ✅ Apply a high-quality tempered glass screen protector post-repair to reinforce the surface.
Real-World Example: Preventing Escalation in a Daily Commute Phone
Sarah, a freelance photographer in Chicago, dropped her phone on tile flooring after a morning shoot. She noticed a half-inch diagonal crack near the bottom corner. The screen responded normally, but she worried about the damage worsening during her daily subway commute.
Instead of booking a $180 repair, she purchased a $12 UV repair kit online. That evening, she followed the step-by-step instructions, cleaning the screen meticulously and applying a single drop of resin. After curing under a UV flashlight for three minutes, the crack appeared significantly less noticeable. Though not invisible, the repair prevented further spread over the next six weeks while she saved for a new device. The fix also eliminated the slight snag she felt when swiping upward.
Sarah’s experience reflects a growing trend: users opting for smart, temporary fixes that preserve functionality without overspending.
Frequently Asked Questions
Can I use super glue instead of UV resin?
No. Super glue (cyanoacrylate) yellows quickly, bonds too aggressively, and can seep under the screen bezel, causing permanent damage. It’s not optically clear and cannot be polished smoothly. UV resin is specifically formulated for glass clarity and flexibility.
Will this repair make my phone waterproof again?
Not necessarily. Even minor cracks can compromise the factory seal, especially around edges. While resin fills surface gaps, it doesn’t restore original IP ratings. Avoid exposing the device to moisture post-repair.
How long does a DIY glass fix last?
With proper care, a well-executed resin repair can last 4–8 weeks. Longevity depends on usage, temperature exposure, and whether a screen protector is applied afterward. It’s not a permanent solution but a practical bridge to professional service or replacement.
Final Thoughts and Next Steps
Fixing a small crack in your phone’s glass at home is entirely feasible—if approached with patience and precision. The goal isn’t perfection but stabilization: halting crack progression, restoring smooth touch interaction, and protecting against cuts or dust infiltration. These DIY methods empower users to take control without immediate financial strain.
However, always recognize the limits. If structural integrity is compromised or internal components are affected, professional assessment is non-negotiable. For now, with a few basic tools and informed technique, you can extend your device’s usability and maintain confidence in its daily performance.


 浙公网安备
33010002000092号
浙公网安备
33010002000092号 浙B2-20120091-4
Comments
No comments yet. Why don't you start the discussion?