
Dog-chewed door frames are a common household issue, especially in homes with puppies or anxious dogs. While the damage may seem minor at first, repeated gnawing can compromise the structural integrity of the frame and diminish your home’s appearance. The good news is that most chew damage can be repaired effectively with basic tools and materials. This guide provides practical, step-by-step solutions to restore your door frames, deter future chewing, and maintain a polished look throughout your home—all without hiring a professional.
Assessing the Damage: What You’re Working With
Before starting any repair, evaluate the extent of the chewing. Minor surface scratches require different treatment than deep gouges or missing chunks of wood. Walk through each affected doorway and categorize the damage:
- Surface Scratches: Light marks where only the finish has been removed.
- Shallow Gouges: Small indentations in the wood, less than 1/8 inch deep.
- Deep Chewing: Missing pieces, splintered edges, or exposed underlying material.
- Structural Compromise: Areas where the frame no longer supports the door jamb or trim securely.
Most dog-chewed frames fall into the first three categories and can be fully restored with DIY methods. Only severe structural issues may require partial replacement—a more advanced project best approached after mastering basic repairs.
Essential Tools and Materials for Repair
Gathering the right supplies ensures a smooth process and professional-looking results. Here’s what you’ll need based on the severity of damage:
| Tool/Material | Use Case | Recommended Product Type |
|---|---|---|
| Sanding block (120–220 grit) | Smoothing rough areas and preparing surface | Foldable sandpaper sheets or orbital sander |
| Wood filler (water-based or epoxy) | Filling gouges and holes | Epoxy for deep damage; water-based for shallow |
| Putty knife or scraper | Applying and shaping filler | Flexible metal blade, 1–2 inches wide |
| Mineral spirits or denatured alcohol | Cleaning residue before finishing | Non-abrasive solvent |
| Paint or stain + sealant | Restoring color and protecting repair | Match existing finish; use polyurethane topcoat |
| Painter’s tape | Protecting adjacent surfaces | FrogTape or similar low-residue brand |
Keep all materials in a well-ventilated workspace. If working near carpet or flooring, lay down a drop cloth or cardboard to catch debris and spills.
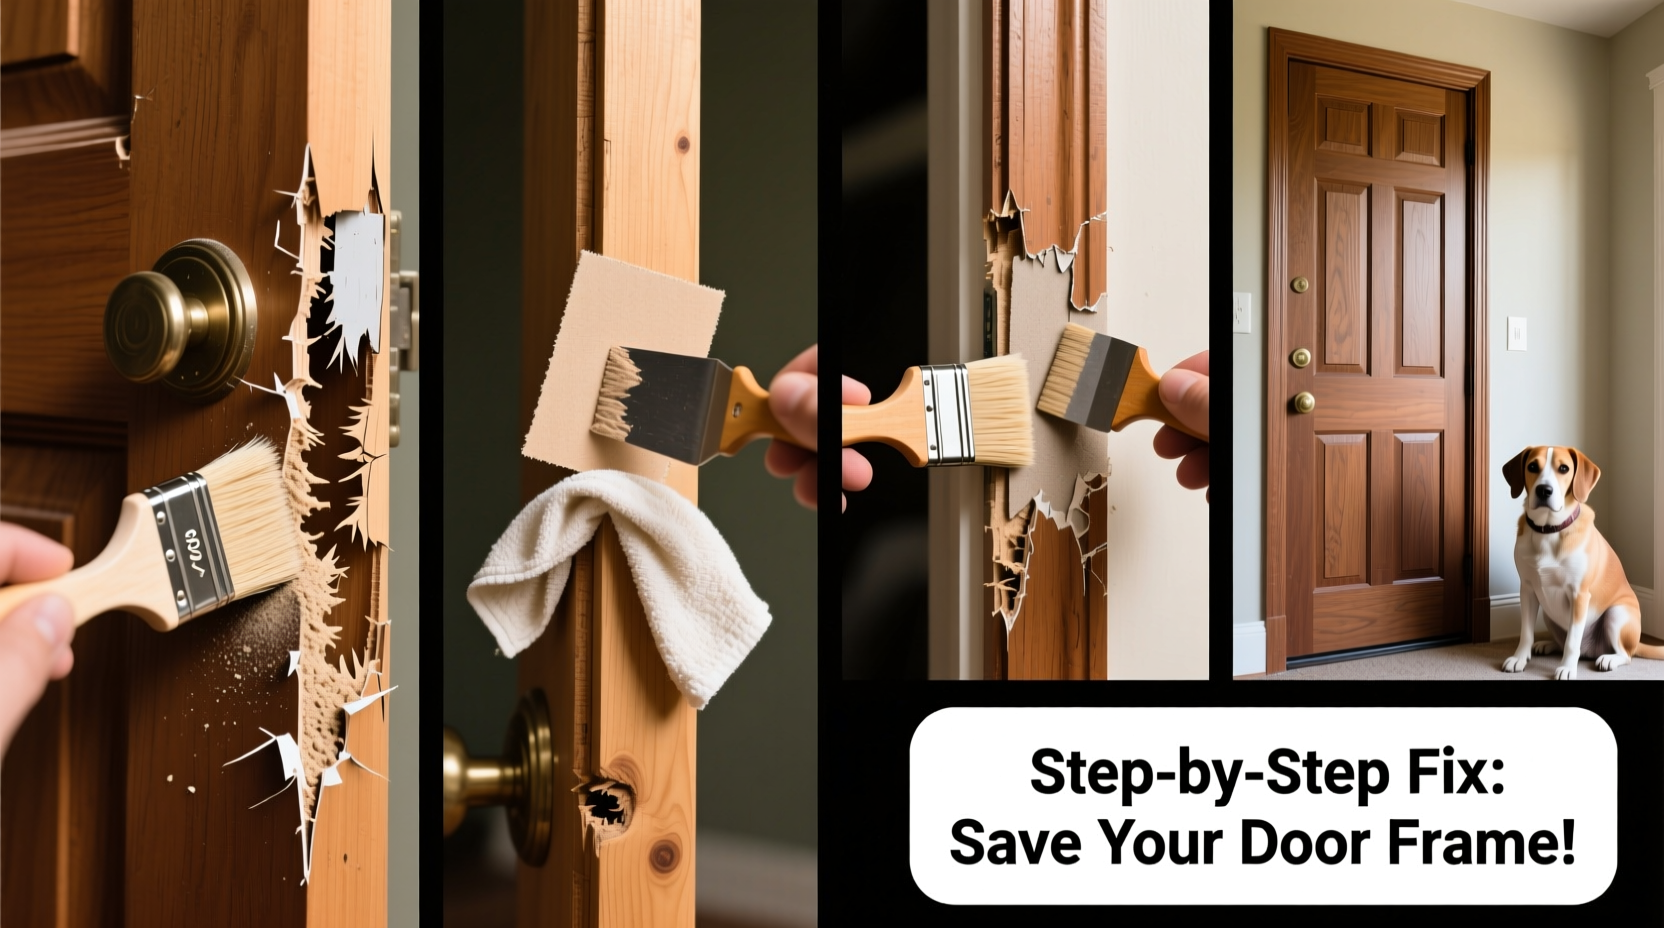
Step-by-Step Repair Process
Follow this sequence to restore chewed door frames efficiently and durably:
- Clean the Area: Wipe the chewed section with a damp cloth and mild detergent. Remove saliva, dirt, and loose fibers. Let dry completely.
- Sand Light Damage: For surface scratches, gently sand with 220-grit paper until smooth. Feather the edges into surrounding wood.
- Hollow Out Deep Gouges: Use a utility knife to remove splintered wood and create clean walls. This gives the filler better adhesion.
- Apply Wood Filler: Press filler into the cavity with a putty knife. Overfill slightly to allow for shrinkage. Smooth flush with the surface.
- Let Cure Completely: Follow manufacturer’s drying time—typically 2–6 hours. Epoxy fillers may take longer but offer superior strength.
- Sand the Patch: Once dry, sand with 150-grit, then 220-grit paper until seamless. Wipe away dust with a tack cloth.
- Stain or Paint: Apply matching finish. Test on scrap wood first. Multiple thin coats yield better results than one thick layer.
- Seal with Polyurethane: A clear protective coat resists future moisture and wear. Use satin or semi-gloss for durability.
For large or multiple repairs, work on one frame at a time to maintain consistency in technique and finish.
“Properly filled and sealed wood repairs can last decades—even in high-traffic areas like door frames.” — Marcus Lin, Residential Carpenter & Restoration Specialist
Preventing Future Chewing: Behavior Meets Protection
Repairing the damage is only half the solution. Without addressing the cause, your dog will likely return to the same spot. Dogs chew due to teething, anxiety, boredom, or lack of training. Combine behavioral strategies with physical deterrents:
Implement these preventive measures:
- Provide durable, safe chew toys designed for aggressive chewers.
- Use bitter-tasting sprays (pet-safe) on repaired areas to discourage licking and biting.
- Install corner guards or plastic edge protectors on vulnerable spots.
- Train with positive reinforcement when the dog ignores the frame.
- Address separation anxiety with crate training or calming aids if needed.
Mini Case Study: Restoring a Front Entry Frame
Jenna from Portland noticed her two-year-old Labrador had chewed the bottom third of her front door frame. The damage was deep—over half an inch in places—and paint was peeling. She cleaned the area with vinegar water, applied an epoxy wood filler, and let it cure overnight. After sanding, she stained the patch to match the oak trim and finished with two coats of water-based polyurethane. To prevent recurrence, she applied a citrus-scented deterrent spray and installed a clear PVC corner guard. Six months later, the repair remains intact, and the dog shows no further interest in the frame.
Do’s and Don’ts of Door Frame Repair
| Do’s | Don’ts |
|---|---|
| Test stain on an inconspicuous area first | Use household glue as wood filler—it won’t hold |
| Allow full curing time before sanding or finishing | Paint over uncured filler—it may crack or bubble |
| Seal repaired areas to resist moisture and wear | Ignore signs of ongoing chewing behavior |
| Use pet-safe products near living spaces | Leave sharp splinters—risk injury to pets and people |
FAQ
Can I use caulk instead of wood filler?
Caulk is flexible and meant for gaps, not solid wood repair. It won’t sand well or accept stain evenly. Use wood-specific filler for best results.
How long does a wood filler repair last?
With proper application and sealing, most repairs last 5–10 years or longer, even in high-touch areas. Epoxy-based fillers are the most durable.
What if my dog keeps chewing after the repair?
Reevaluate the cause. Consider consulting a trainer or veterinarian, especially if chewing is compulsive or linked to anxiety. Physical barriers like guards can also help break the habit.
Final Checklist Before You Begin
- Assessment Complete:
- Identified all chewed areas and categorized severity.
- Supplies Ready:
- Filler, sandpaper, cleaner, finish, tools on hand.
- Dog Deterrence Plan:
- Toys, sprays, or guards in place.
- Ventilation & Safety:
- Workspace prepared, mask and gloves available.
- Finish Match Confirmed:
- Tested stain or paint on scrap or hidden area.
Conclusion
Repairing dog-chewed door frames doesn’t require expensive contractors or full replacements. With careful preparation, the right materials, and attention to detail, you can restore your home’s appearance and durability in a weekend. More importantly, combining these fixes with behavioral solutions protects your investment long-term. Every repaired frame is a step toward a more peaceful, pet-friendly home—where both your dog and your décor can thrive.


 浙公网安备
33010002000092号
浙公网安备
33010002000092号 浙B2-20120091-4
Comments
No comments yet. Why don't you start the discussion?