
Cloth microwave gloves are essential kitchen tools designed to protect hands from scalding heat when handling hot dishes. Over time, they accumulate food splatters, grease, sweat, and lingering odors—especially if used frequently. While cleaning seems straightforward, improper techniques can compromise their insulation, shrink the fabric, or weaken stitching. Many people toss them in the washer without a second thought, only to find them stiff, misshapen, or less effective at shielding heat. The key is deep cleaning with care: removing grime while preserving integrity. This guide outlines proven, gentle methods to refresh your gloves, extend their lifespan, and maintain safety in the kitchen.
Why Proper Cleaning Matters for Microwave Gloves
Microwave gloves aren’t just accessories—they’re protective gear. Most are constructed with multiple layers: an outer decorative fabric, a middle insulating layer (often cotton batting or thermal padding), and sometimes a soft inner lining. Aggressive washing can compress or displace these layers, reducing heat resistance. Additionally, synthetic blends may degrade under high heat or harsh detergents, leading to premature wear. Deep cleaning isn’t just about appearance; it’s about hygiene and function. A grimy glove can harbor bacteria, especially if dampness lingers after use. Regular maintenance ensures that your gloves remain both sanitary and effective.
Step-by-Step Guide to Hand Washing Cloth Microwave Gloves
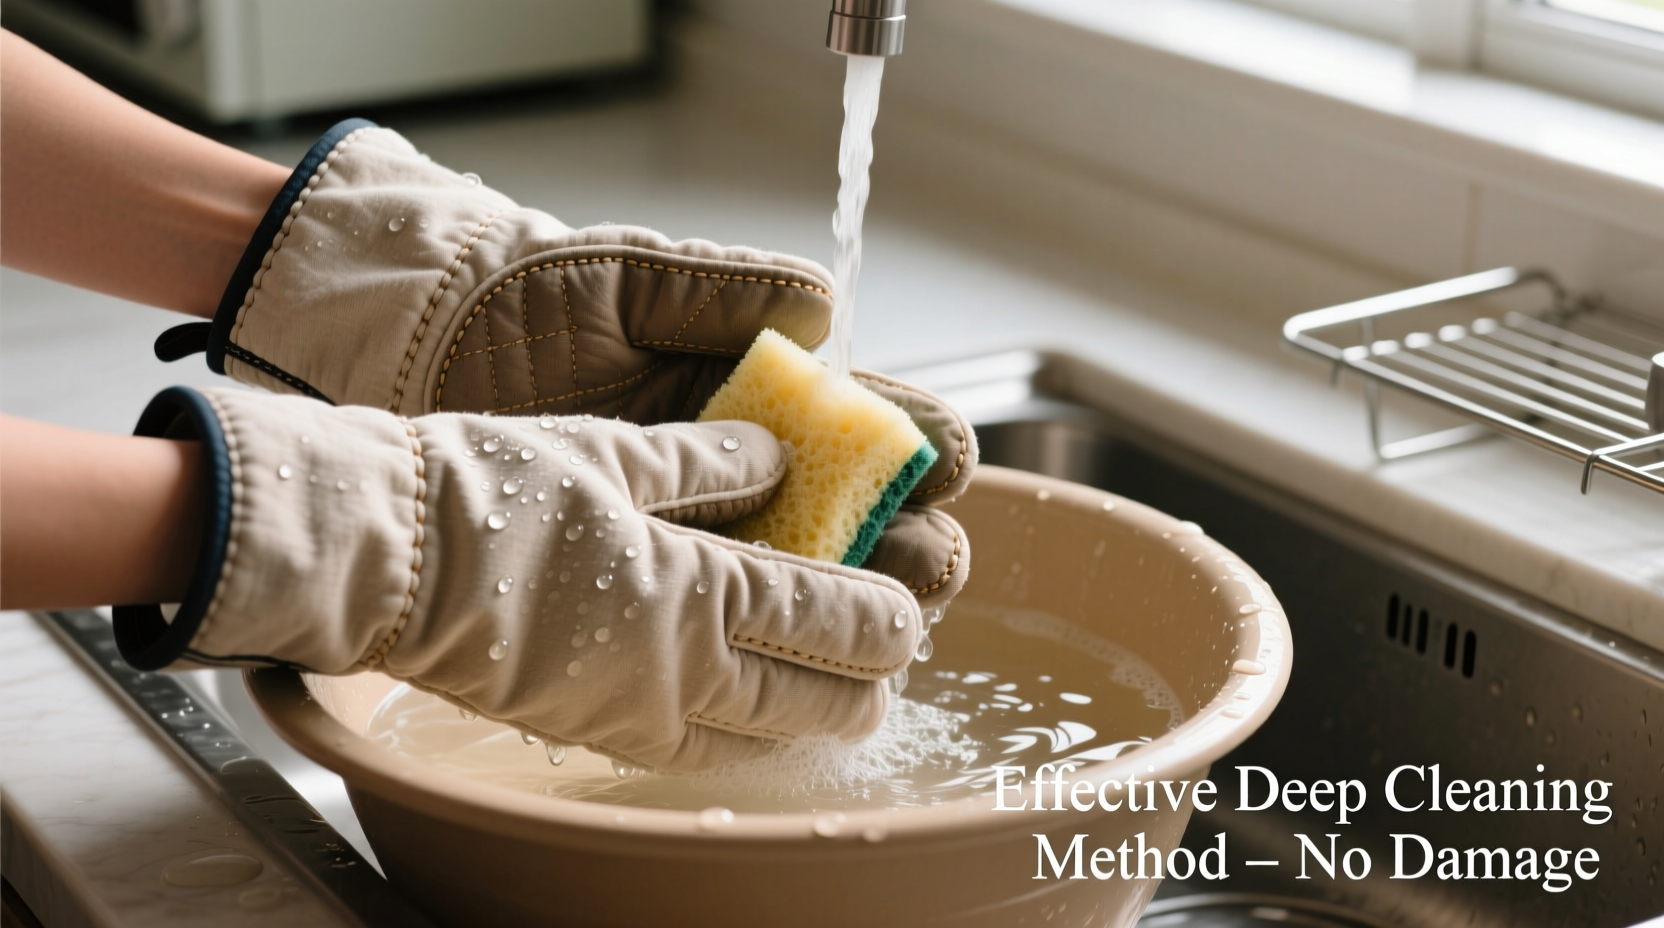
Hand washing is the safest method for most cloth microwave gloves, particularly those with padding or mixed fabrics. It allows precise control over water temperature, agitation, and drying. Follow this sequence for a thorough yet gentle clean:
- Fill a basin with lukewarm water – Use just enough to submerge the gloves. Avoid hot water, which can set stains and damage fibers.
- Add mild detergent – Choose a gentle formula like Woolite or a castile soap. Avoid bleach or strong degreasers.
- Soak for 10–15 minutes – Let the gloves sit to loosen oils and residues. Gently agitate every few minutes by squeezing the fabric.
- Spot-treat stubborn stains – Use a soft-bristled toothbrush dipped in soapy water to gently scrub stained areas, especially around thumb and palm zones.
- Rinse thoroughly – Hold under cool running water until no suds remain. Residual soap can attract dirt and irritate skin.
- Press out excess water – Do not wring or twist. Instead, press between clean towels to absorb moisture.
- Air dry flat – Lay on a drying rack or towel away from direct sunlight or heat sources to prevent warping or fading.
This process typically takes under an hour, including drying prep, and preserves the glove’s shape and thermal properties far better than machine alternatives.
When Machine Washing Is Acceptable (and How to Do It Safely)
Some microwave gloves, particularly those made of 100% cotton or labeled as machine-washable, can tolerate a gentle cycle. However, precautions are critical to avoid damage. Never wash gloves with heavy items like pans or towels that could cause abrasion. Use a mesh laundry bag to contain them and reduce friction.
| Setting | Recommended | Avoid |
|---|---|---|
| Wash Cycle | Gentle or delicate | Heavy-duty or regular |
| Water Temperature | Cold or lukewarm | Hot |
| Detergent Type | Mild, fragrance-free | Bleach or enzyme-heavy formulas |
| Drying Method | Air dry flat | Dryer (even low heat) |
Even if the label permits machine washing, air drying remains non-negotiable. Tumble drying—even on low—can melt synthetic fibers, shrink cotton, and ruin insulation. One study by the Textile Research Institute found that repeated dryer use reduced thermal efficiency in padded gloves by up to 37% after just ten cycles.
“Microwave gloves rely on trapped air within their layers for insulation. High heat collapses these pockets, making them far less protective.” — Dr. Lena Patel, Textile Safety Consultant
Dealing with Odors and Persistent Stains
Odors often develop from repeated exposure to steam, cooking oils, and hand sweat. If your gloves smell sour or musty after washing, deeper deodorizing is needed. For organic smells, soak the gloves in a solution of one part white vinegar to three parts water for 20 minutes before rewashing. Vinegar neutralizes odor-causing bacteria without harming fabric. For greasy stains, apply a paste of baking soda and water directly to the spot, let sit for 15 minutes, then gently scrub and rinse.
For protein-based stains (like egg or dairy splatter), avoid hot water—it sets the stain. Instead, pre-soak in cold enzymatic cleaner before washing. For colored dyes or tomato-based splashes, a small amount of oxygen bleach (sodium percarbonate) can be effective when diluted in cold water—but test on a hidden area first.
Mini Case Study: Reviving a Heavily Soiled Pair
Sarah, a home cook in Portland, used the same pair of quilted microwave gloves daily for over a year. After frequent use near stovetop splatters and microwave spills, they developed a greasy film and a persistent onion-like odor. She initially tried tossing them in the washer with her dishcloths, but afterward, the gloves felt lumpy and lost their shape. Following expert advice, she switched to hand washing: soaking in warm soapy water with a tablespoon of vinegar, using a toothbrush for spot cleaning, and air-drying flat. After two treatments, the gloves looked and smelled fresh. More importantly, they still provided reliable heat protection—a result she hadn’t expected after their deteriorated state.
Checklist: Safe Deep Cleaning Routine for Cloth Microwave Gloves
- ✅ Check for care instructions or material labels
- ✅ Pre-treat visible stains with baking soda or vinegar paste
- ✅ Wash by hand using mild detergent and lukewarm water
- ✅ Gently scrub high-contact areas (thumb, palm) with a soft brush
- ✅ Rinse completely until water runs clear
- ✅ Press between towels to remove moisture—do not wring
- ✅ Dry flat in a well-ventilated area, away from sunlight
- ✅ Inspect before reuse: ensure no dampness or lingering odor
Frequently Asked Questions
Can I use dish soap to clean microwave gloves?
Yes, but sparingly. Mild dish soap can cut grease effectively, but excessive use may strip natural fibers or leave residue. Rinse extremely well to prevent skin irritation during future use.
How often should I deep clean my microwave gloves?
Every 4 to 6 weeks with regular use. If you notice stains, smells, or visible grime, clean immediately. Light surface wiping with a damp cloth can be done weekly to prolong deep cleaning intervals.
Are there any materials I should never wash?
Avoid submerging gloves with rubberized interiors or silicone grips unless explicitly labeled as washable. These materials may delaminate or trap moisture, creating mold risks.
Conclusion: Clean Gloves, Safer Kitchen
Maintaining cloth microwave gloves goes beyond aesthetics—it’s a matter of hygiene and safety. With proper deep cleaning techniques, you preserve their insulating power, eliminate bacteria, and extend usability for years. Whether you choose hand washing for maximum control or a cautious machine cycle for durable models, the principles remain the same: gentle products, cool water, and air drying. By integrating these practices into your kitchen routine, you ensure that every time you reach for a hot dish, your protection is as reliable as it is clean.


 浙公网安备
33010002000092号
浙公网安备
33010002000092号 浙B2-20120091-4
Comments
No comments yet. Why don't you start the discussion?