
Your washing machine works hard to keep clothes clean, but over time, the internal components—especially the agitator—can accumulate detergent residue, mildew, lint, and hard water deposits. These buildups not only reduce cleaning efficiency but can also lead to foul odors and mechanical strain. A neglected agitator may even cause uneven wash cycles or damage fabrics. Regular maintenance is essential, and a deep clean every few months ensures your machine operates at peak performance. This guide outlines proven techniques to thoroughly clean your washing machine’s agitator, extend its lifespan, and maintain hygiene with minimal effort.
Why Agitator Cleaning Matters
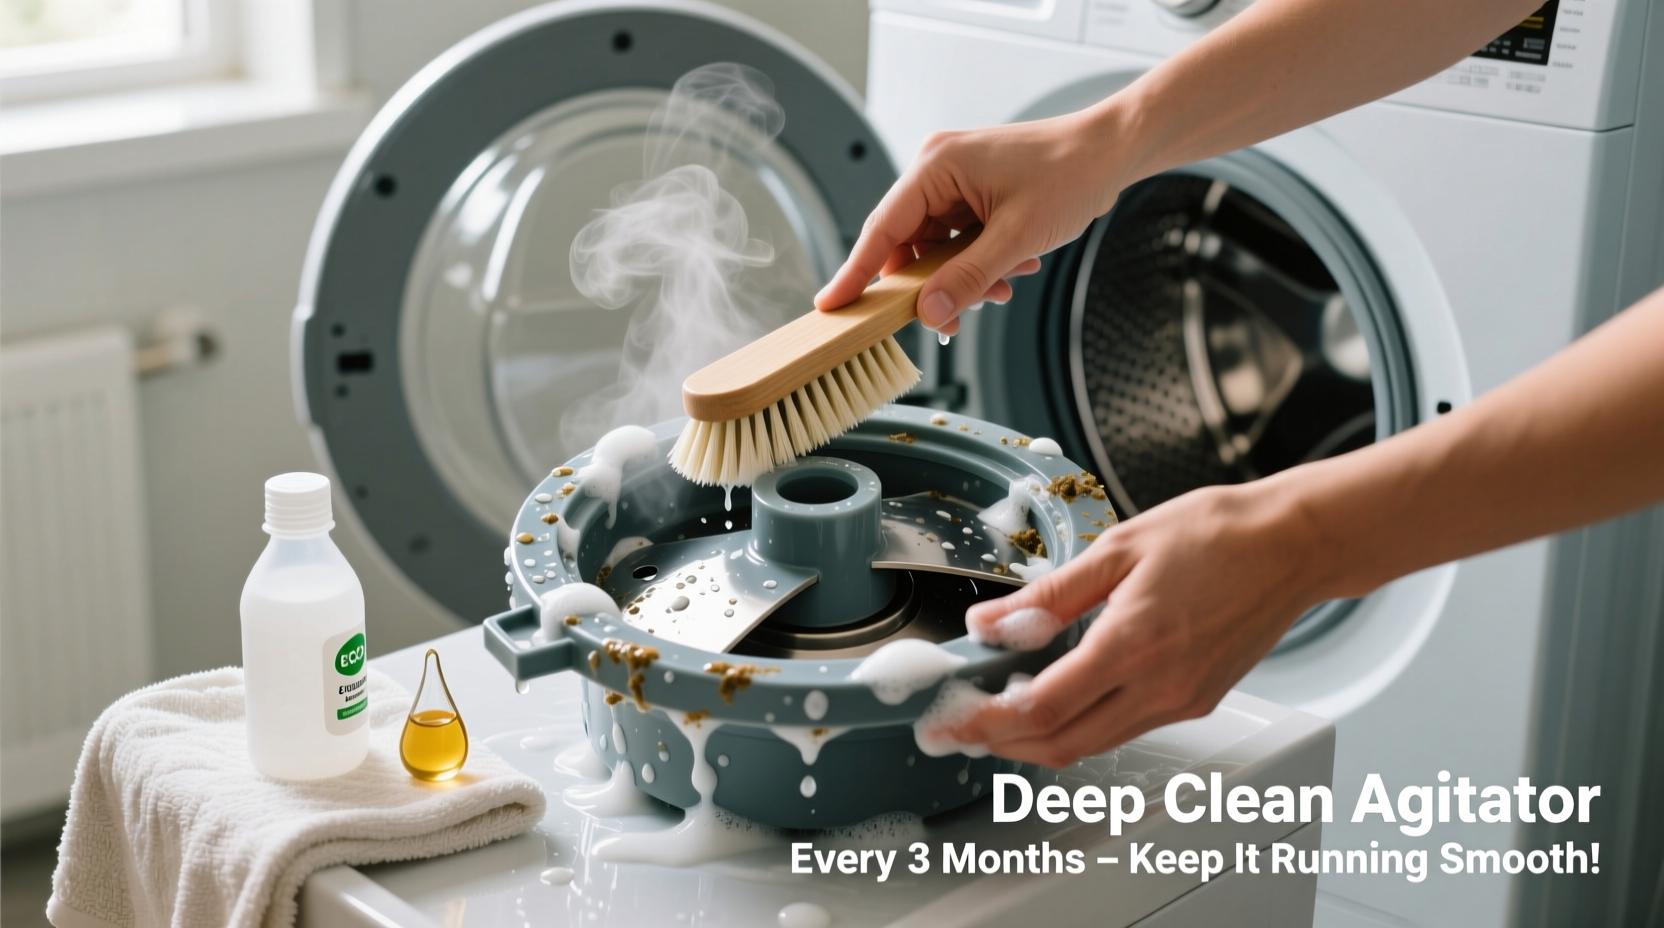
The agitator is the central post in top-loading washing machines responsible for moving clothes through water and detergent. As it rotates or oscillates during cycles, it comes into direct contact with every load. Over time, soap scum, fabric softener residue, and minerals from hard water coat its surface and crevices. Moisture trapped beneath or around the agitator creates an ideal environment for mold and bacteria growth. Left unchecked, this grime can:
- Reduce washing efficiency
- Transfer odors to clean laundry
- Increase wear on internal components
- Cause strange noises during operation
- Promote clogs that affect drainage
“Most service calls for inefficient washing could be prevented with routine agitator and drum cleaning.” — Carlos Mendez, Appliance Repair Technician with 15 years of field experience
Step-by-Step Guide to Deep Clean Your Agitator
Cleaning the agitator doesn’t require disassembly in most cases, but attention to detail is crucial. Follow this comprehensive process to restore cleanliness and function.
- Unplug the Machine: For safety, disconnect the washer from power before beginning any maintenance.
- Remove Loose Debris: Use a flashlight to inspect under and around the agitator. Pull out visible lint, hair, or foreign objects with tweezers or needle-nose pliers.
- Prepare a Cleaning Solution: Mix 1 cup of white vinegar with 1 cup of baking soda, then dilute in 2 gallons of warm water. Alternatively, use a commercial washing machine cleaner if preferred.
- Lift the Cap (if applicable): Most agitators have a removable cap at the top. Pry it gently with a flathead screwdriver or butter knife. Underneath, you may find a bolt securing the agitator to the drive shaft—do not remove unless instructed by your manual.
- Scrub Internal Fins and Grooves: Dip a long-handled brush (an old toothbrush works well) into the cleaning solution. Scrub all accessible surfaces, especially the fins and lower skirts where grime accumulates.
- Flush with Vinegar Solution: Pour 2 cups of undiluted white vinegar directly into the center of the agitator shaft. Let it sit for 20–30 minutes to dissolve mineral deposits and kill bacteria.
- Run a Hot Water Cycle: Reassemble the cap, plug in the machine, and run the longest hot water cycle available without clothes. Add ½ cup of baking soda to the drum for extra deodorizing power.
- Dry and Inspect: After the cycle completes, wipe down the exterior of the agitator and surrounding tub with a microfiber cloth. Check for lingering smells or residue.
Do’s and Don’ts When Cleaning Your Agitator
| Do’s | Don’ts |
|---|---|
| Use non-abrasive brushes to avoid scratching plastic parts | Use bleach excessively—it can degrade rubber seals |
| Check your user manual for model-specific instructions | Force off stuck caps or bolts without proper guidance |
| Vacuum debris from around the base before cleaning | Ignore musty odors—they signal microbial growth |
| Combine vinegar and baking soda for natural cleaning action | Mix vinegar with chlorine-based cleaners (creates toxic fumes) |
| Leave the lid open after use to air out moisture | Overload detergent—residue builds up faster |
Real Example: Reviving a Stubbornly Smelly Washer
Sarah from Portland noticed her towels were coming out smelling damp despite using high-quality detergent. Her 7-year-old top-loader had started making grinding noises during agitation. After ruling out pump issues, she decided to inspect the agitator. Upon removing the cap, she found thick black slime coating the lower fins—a mix of mold and fabric softener gunk. She applied a paste of baking soda and vinegar, scrubbed meticulously with a bottle brush, then ran two consecutive hot cycles with vinegar and baking soda. The odor disappeared, the noise reduced significantly, and her next load came out fresher than it had in months. Sarah now schedules agitator cleaning quarterly and keeps a log on her fridge as a reminder.
Alternative Methods Based on Agitator Type
Not all agitators are created equal. Some models feature dual-action or impeller designs instead of traditional posts. Tailor your approach accordingly:
- Top-Load With Central Agitator: Most common. Follow the standard deep clean procedure above.
- Impeller Models (Low-profile cone or disc): These lack a tall agitator but still trap debris. Remove any visible items from the center, pour cleaning solution around the base, and run a self-clean cycle.
- Front-Load Machines (No agitator): Though they don’t have agitators, their drums and gaskets need similar care. Focus on cleaning the door seal and drain filter.
Preventative Maintenance Checklist
To minimize buildup and avoid intensive cleaning sessions, adopt these habits:
- ✅ Leave the washer lid or door open between uses to dry out moisture
- ✅ Use high-efficiency (HE) detergent in correct amounts
- ✅ Wipe the agitator and tub rim monthly with a vinegar-dampened cloth
- ✅ Run a maintenance cycle with vinegar or dedicated cleaner monthly
- ✅ Avoid overloading—this reduces friction and residue trapping
- ✅ Install a water softener if you have hard water
Frequently Asked Questions
Can I remove the agitator completely for cleaning?
In many models, yes—but only if your user manual permits it. Typically, a central bolt holds it in place. Removing it improperly can damage the drive mechanism. For most homeowners, thorough cleaning without removal is sufficient and safer.
Is bleach safe for cleaning the agitator?
Bleach can sanitize effectively but should be used sparingly. It may corrode rubber components and leave behind fumes. Never mix bleach with vinegar or ammonia. For routine cleaning, stick to vinegar, baking soda, or manufacturer-approved cleaners.
Why does my agitator smell even after cleaning?
If odors persist, the issue may extend beyond the agitator. Check the drain pump filter, outer tub, and detergent drawer. Mold may be growing in hidden areas. Run multiple hot cycles with enzymatic cleaner or oxygen bleach to eliminate deep-seated bacteria.
Conclusion: Keep Your Machine Running Like New
A clean agitator is more than just cosmetic—it's fundamental to your washing machine’s efficiency, longevity, and hygiene. By incorporating regular inspections and seasonal deep cleans, you prevent costly repairs and ensure every load comes out truly fresh. The methods outlined here are practical, cost-effective, and suitable for most households. Whether you’re troubleshooting an existing problem or maintaining peak performance, taking a proactive approach pays off in cleaner clothes and a quieter, more reliable appliance.


 浙公网安备
33010002000092号
浙公网安备
33010002000092号 浙B2-20120091-4
Comments
No comments yet. Why don't you start the discussion?