
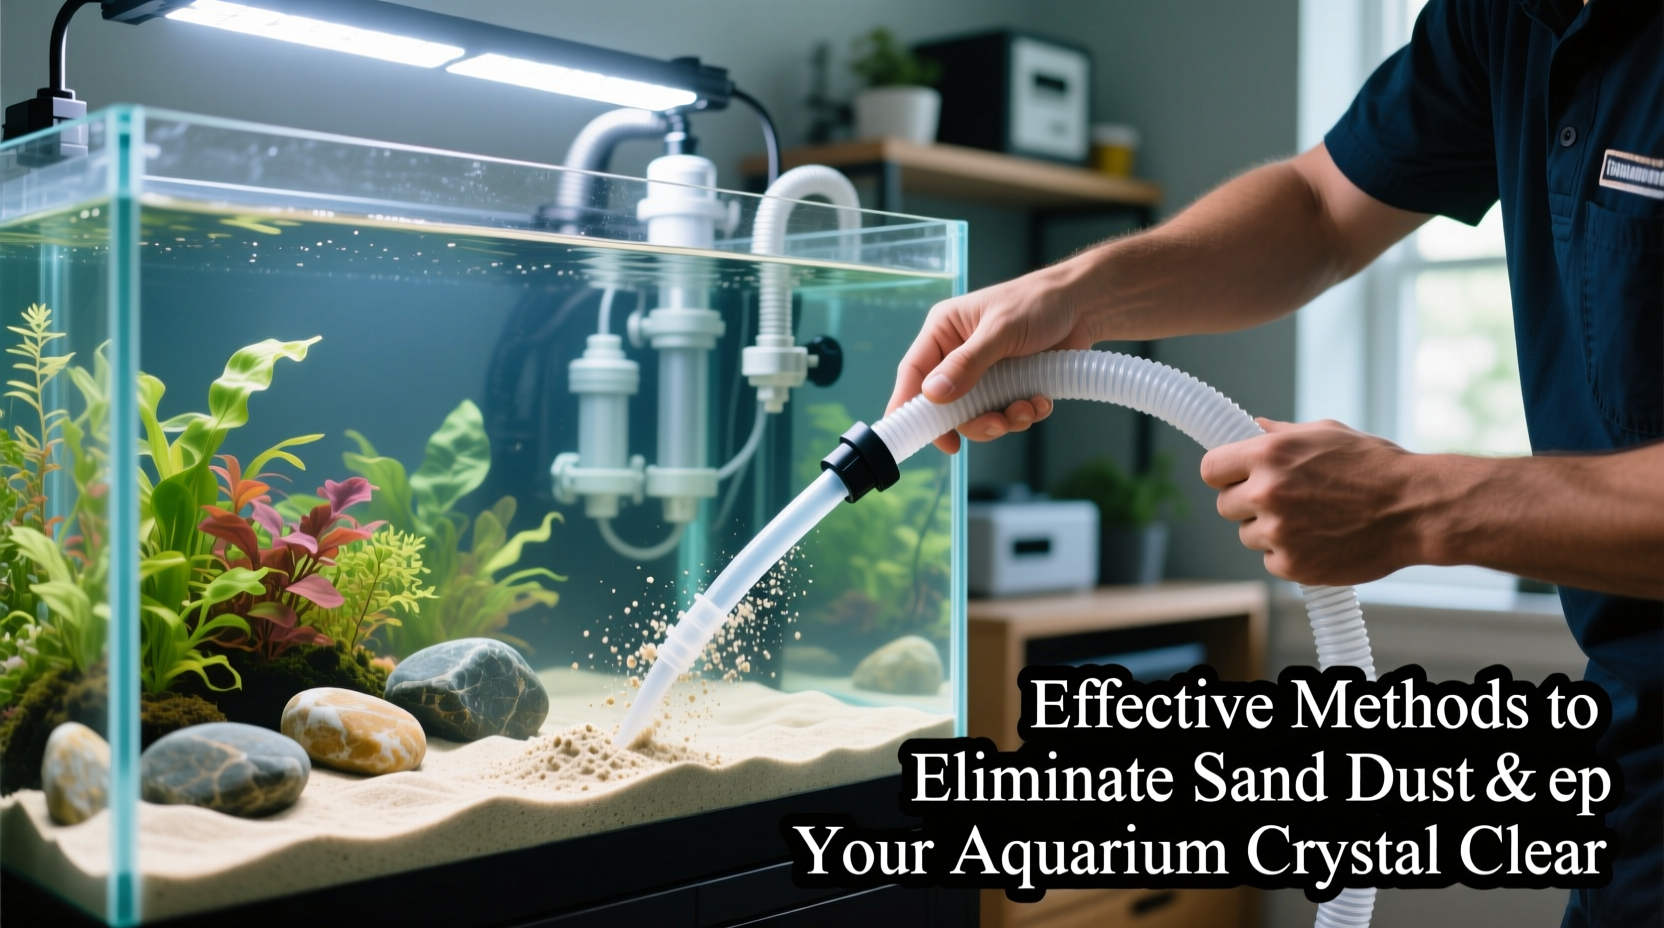
Aquariums are more than just decorative features—they’re living ecosystems that demand consistent care. One of the most common frustrations for both new and experienced aquarists is cloudy water caused by fine sand dust. This particulate matter, often released when setting up a new substrate or disturbing settled layers, can cloud the water, stress fish, and clog filters. While not inherently toxic, persistent dust undermines water clarity, light penetration, and overall tank health. The good news is that with proper preparation, filtration, and maintenance, you can eliminate sand dust effectively and maintain sparkling water long-term.
Understanding the Source of Sand Dust
Sand used in aquariums—whether silica, aragonite, or play sand—often contains microscopic particles loosened during mining, processing, or packaging. These fine grains remain suspended in water due to their low density, creating a hazy appearance. When introduced dry into an aquarium, agitation from filling or initial water flow lifts these particles into suspension, leading to prolonged cloudiness that may last days or even weeks if unmanaged.
The key is recognizing that this issue isn’t about poor water quality per se, but rather physical contamination. Chemical treatments like flocculants or clarifiers may offer temporary relief, but they don’t address the root cause: improperly rinsed or unstable substrate.
Pre-Treatment: How to Rinse Substrate Properly
The most effective way to prevent sand dust is thorough pre-rinsing before adding it to your tank. Skipping this step is the primary reason many hobbyists struggle with cloudy water post-setup.
- Place the sand in a clean bucket or large colander.
- Slowly pour dechlorinated or tap water over the sand while stirring with your hand.
- Continue rinsing until the runoff water runs completely clear—this may take 5–15 minutes depending on volume.
- Let the sand settle briefly between rinses; discard only the top layer of dirty water to avoid losing material.
For larger tanks requiring 20+ pounds of sand, consider rinsing in smaller batches. Some advanced aquarists use a fine mesh strainer or pantyhose to contain the sand while allowing silt to pass through, improving efficiency.
“Never underestimate the impact of proper substrate preparation. A well-rinsed base layer saves days of filter strain and water changes.” — Dr. Lena Torres, Aquatic Ecosystem Specialist
Post-Setup Filtration Strategies
Even with careful rinsing, some residual dust will enter the water column during tank setup. To capture these particles efficiently, rely on mechanical filtration as your first line of defense.
Your filter’s sponge or floss media should be positioned at the intake to trap suspended solids. For best results:
- Use filter floss or polyester pads during the first week after setup—they capture finer particles better than standard sponges.
- Clean or replace mechanical media every 2–3 days initially, as it clogs quickly with dust.
- Run the filter continuously for at least 72 hours post-setup without adding livestock.
Additionally, consider using a diatom filter for severe cases. These specialized units remove particles as small as 1 micron, clearing water within hours. However, they’re designed for short-term use (6–12 hours) due to rapid clogging.
Recommended Filtration Media Comparison
| Media Type | Particle Size Captured | Best Use Case | Lifespan (Initial Phase) |
|---|---|---|---|
| Foam Sponge | 20–50 microns | General mechanical filtration | 5–7 days |
| Filter Floss | 5–20 microns | High-dust startup phase | 2–3 days |
| Diatom Filter Pad | 1–5 microns | Rapid clarification | 6–12 hours |
| Activated Carbon | Not effective for dust | Chemical impurities only | 2–4 weeks |
Step-by-Step Guide to Achieving Crystal Clear Water
Follow this timeline to minimize dust-related cloudiness and establish a stable, clear aquarium environment.
- Day 0 – Pre-Rinse Substrate: Rinse all sand thoroughly until water runs clear. Drain carefully to retain sand.
- Day 1 – Setup & Fill: Add sand gently to tank. Pour water over a plate or bowl to reduce disturbance. Install filter with fresh floss.
- Days 1–3 – Run Filter Continuously: Do not add fish. Monitor water clarity. Replace filter floss as needed.
- Day 4 – Test Water Parameters: Ensure ammonia, nitrite, and pH are stable before cycling begins.
- Days 5–7 – Introduce Beneficial Bacteria: Add bacterial starter culture. Continue mechanical filtration.
- Day 8+ – Gradual Stocking: Once water is clear and cycle progresses, begin adding hardy fish slowly.
This method prevents biological overload while ensuring physical clarity is achieved early.
Common Mistakes That Prolong Cloudiness
Many aquarists unknowingly extend the dust-clearing process through avoidable errors. Recognizing these pitfalls can save time and stress.
- Adding fish too soon: Fish waste increases particulates and stresses animals in unstable conditions.
- Over-cleaning filter media: Replacing biological media removes developing nitrifying bacteria.
- Stirring the substrate: Even slight disturbances reintroduce trapped dust into the water column.
- Using tap water directly: Chlorine harms bacteria; always dechlorinate before filling.
“Patience is the most underrated tool in aquarium keeping. Let the system stabilize before making changes.” — Mark Renolds, Aquarium Technician with 18 years of experience
Real-World Example: Sarah’s 55-Gallon Freshwater Tank
Sarah set up her first planted freshwater tank using untreated play sand. After filling, the water turned milky and remained cloudy for over ten days. Her filter clogged daily, and she panicked, performing multiple large water changes that disrupted potential bacterial growth.
After consulting a local fish store, she learned her mistake: insufficient rinsing. She drained the tank (safely relocating fish), rinsed the sand in five batches using a mesh laundry bag, and refilled slowly over a plate. She installed new filter floss and ran the system for 72 hours before reintroducing fish. Within 48 hours, the water cleared completely. By day seven, her ammonia levels were rising appropriately, signaling the nitrogen cycle had begun.
Sarah now maintains pristine clarity with weekly 10% water changes and monthly vacuuming of surface debris—without disturbing the lower sand layers.
Long-Term Maintenance Checklist
To keep your aquarium consistently clear, follow this ongoing maintenance routine:
- ✅ Rinse all new substrate before use
- ✅ Use mechanical filter media during initial setup
- ✅ Avoid deep digging or aggressive cleaning of sand bed
- ✅ Perform weekly 10–15% water changes
- ✅ Vacuum only the top layer of substrate during changes
- ✅ Monitor filter flow rate; clean intake tubes monthly
- ✅ Test water weekly for clarity and parameters
Frequently Asked Questions
How long does sand dust typically stay in the water?
If properly rinsed, visible dust should clear within 24–48 hours with efficient filtration. Unrinsed sand may cause cloudiness for up to two weeks.
Can I use water clarifiers to fix dusty water?
Yes, liquid clarifiers (polymers that clump fine particles) can help, but they’re a supplement—not a replacement—for mechanical filtration and rinsing. Overuse may lead to filter clogs.
Is sand dust harmful to fish?
Not directly toxic, but prolonged exposure to suspended particles can irritate gills and increase stress, making fish more susceptible to disease.
Conclusion: Clarity Starts with Preparation
Crystal clear aquarium water isn’t magic—it’s the result of thoughtful preparation, smart filtration, and consistent maintenance. Eliminating sand dust begins before the tank is ever filled, continues through careful setup, and extends into disciplined long-term care. By investing time upfront to rinse your substrate and configure your filter correctly, you create a stable foundation for a thriving aquatic environment.


 浙公网安备
33010002000092号
浙公网安备
33010002000092号 浙B2-20120091-4
Comments
No comments yet. Why don't you start the discussion?