
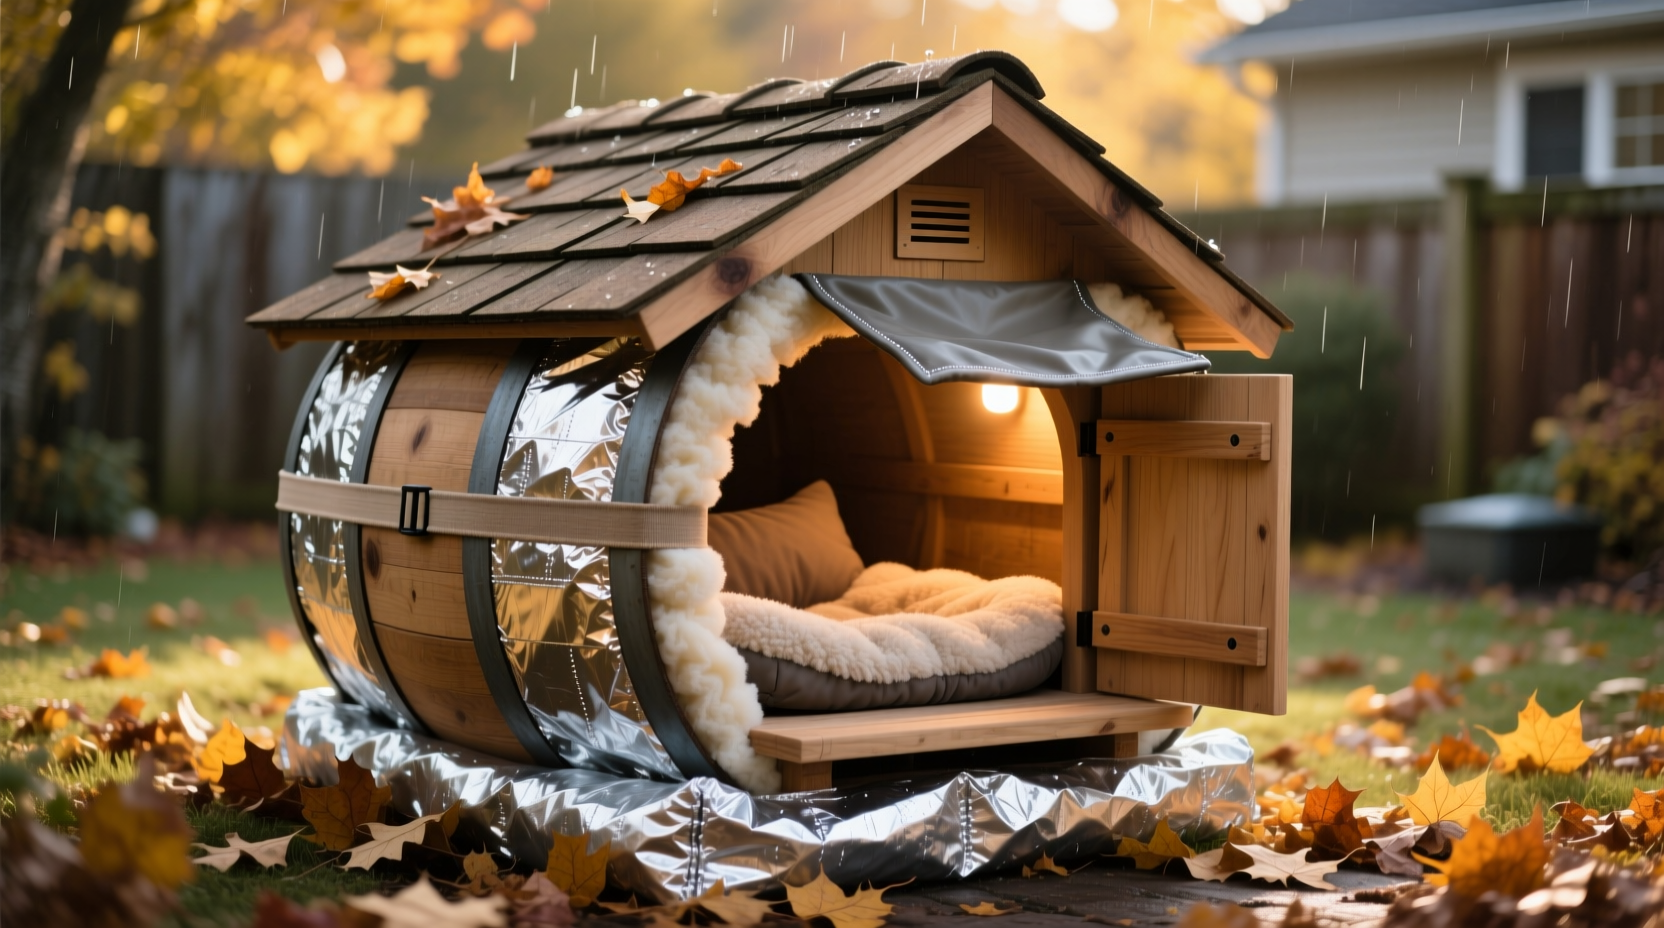
For outdoor or feral cats, surviving winter means finding shelter from wind, moisture, and freezing temperatures. A repurposed barrel cat house offers durability and weather resistance, but without proper insulation, it can become as cold inside as the outside air. Transforming a simple barrel into a warm, insulated refuge requires thoughtful materials, strategic design, and attention to detail. Whether you're building a shelter for community cats or protecting a beloved outdoor pet, these proven insulation techniques ensure comfort, safety, and thermal efficiency.
Why Insulation Matters in Barrel Cat Shelters
A metal or plastic barrel naturally conducts temperature—meaning it absorbs cold in winter and heat in summer. Without insulation, the interior of the barrel mirrors outdoor conditions, offering little protection. Proper insulation creates a thermal barrier, trapping body heat from the cat and minimizing heat loss. The goal isn’t to heat the shelter, but to retain warmth passively. Well-insulated shelters can maintain internal temperatures 20–30°F warmer than the outside air, even without external heating sources.
Additionally, insulation helps manage moisture. Condensation builds up when warm air meets cold surfaces—a common issue in unlined barrels. By adding vapor barriers and breathable materials, you prevent dampness that could lead to hypothermia or respiratory issues in cats.
Choosing the Right Insulation Materials
Not all insulation is safe or effective for animal shelters. Some materials off-gas harmful chemicals, compress over time, or pose ingestion risks if chewed. The best options balance R-value (thermal resistance), safety, and durability.
| Material | R-Value per Inch | Safety for Cats | Durability |
|---|---|---|---|
| Reflectix (bubble foil) | 5.0 | High – non-toxic, no fibers | Moderate – puncture-resistant |
| Extruded polystyrene (XPS) foam board | 5.0 | High – closed-cell, non-fibrous | High – resists moisture |
| Fiberglass batts | 3.0–4.0 | Low – irritant if exposed | Moderate – degrades with moisture |
| Recycled denim insulation | 3.5 | Medium – safe but may attract chewing | Moderate – holds up well if dry |
| Straw (for bedding, not wall insulation) | N/A | High – natural and warm | Low – replace regularly |
Based on performance and safety, extruded polystyrene (pink or blue rigid foam) is the top choice for lining walls and ceilings. It’s moisture-resistant, easy to cut, and maintains its shape over time. Reflectix adds an extra radiant barrier and works well as a secondary layer.
“Cats rely on microclimates within shelters to regulate body temperature. Even a few inches of quality insulation can mean the difference between survival and severe cold stress.” — Dr. Lena Torres, Wildlife Veterinarian & Feral Cat Advocate
Step-by-Step Guide to Insulating a Barrel Cat House
Follow this sequence to convert a standard 55-gallon drum into a thermally efficient cat shelter. Use a plastic or metal barrel with a removable lid or side access for construction.
- Prepare the barrel: Clean thoroughly and drill two small ventilation holes (½ inch) near the top for airflow. Cut an entrance hole (6–8 inches in diameter) low on one side to block wind and drifting snow.
- Elevate the structure: Place the barrel on concrete blocks or pressure-treated wood to avoid ground moisture.
- Seal gaps: Use silicone caulk or weatherstripping around the lid and entry point to prevent drafts.
- Line the interior: Cut XPS foam boards to fit the walls and ceiling. Secure with construction adhesive (pet-safe, low-VOC). Avoid staples or nails that could injure cats.
- Add a vapor barrier: Cover foam with Reflectix, shiny side facing inward to reflect body heat. Tape seams with aluminum foil tape.
- Insulate the floor: Place a thick foam board (2-inch minimum) on the base, then cover with a removable plywood sheet for stability.
- Install a dual-door entry: Create a baffle system using a short PVC pipe or wooden tunnel inside the entry hole to reduce wind penetration.
- Add warm bedding: Use straw (not hay or towels) inside the shelter. Straw sheds water and traps air, providing superior insulation.
Common Mistakes and How to Avoid Them
Even well-intentioned designs can fail due to oversights. These pitfalls undermine insulation effectiveness:
- Over-sizing the entrance: Large openings allow heat to escape and cold air to enter. Keep entry diameter between 6–8 inches.
- Using compressed materials: Flattened insulation loses R-value. Avoid stuffing fiberglass or allowing heavy objects to press down on layers.
- Ignoring ventilation: Without airflow, moisture accumulates and freezes. Small high vents prevent condensation without creating drafts.
- Placing in windy locations: Position the barrel with the entry facing away from prevailing winds and shielded by natural barriers like bushes or fences.
- Leaving the shelter empty: An uninsulated space cools quickly. Always include straw bedding—even one cat’s body heat raises the temperature significantly when retained properly.
Real-World Example: Community Shelter in Upstate New York
In Ithaca, NY, a volunteer-run colony care group retrofitted five plastic barrel shelters for a winter feeding station. Each barrel was lined with 2-inch XPS foam, sealed with Reflectix, and elevated on cinder blocks. Entrance tunnels were added using 8-inch PVC elbows. Straw was replaced monthly.
Temperature data loggers placed inside recorded average internal temps of 42°F when outside temps averaged 18°F—nearly 25 degrees warmer. Over the winter, no cats showed signs of frostbite or illness, compared to previous years when three required treatment for hypothermia. The group attributed the success to layered insulation and strict maintenance protocols.
Essential Checklist for Building an Insulated Barrel Cat House
- Preparation
- ☐ Choose a clean, undamaged barrel
- ☐ Elevate on stable, dry base
- ☐ Drill ventilation holes near the top
- Insulation
- ☐ Line walls and ceiling with 1–2 inch XPS foam
- ☐ Seal joints with construction adhesive
- ☐ Add Reflectix layer over foam, shiny side in
- ☐ Insulate floor with foam + plywood platform
- Entry & Interior
- ☐ Cut entry hole 6–8 inches, low on side
- ☐ Install insulated entry tunnel or baffle
- ☐ Fill with dry straw (not hay or fabric)
- ☐ Check monthly for dampness or pests
Frequently Asked Questions
Can I use a metal barrel, or is plastic better?
Both work, but plastic (polyethylene) barrels have lower thermal conductivity than metal, meaning they transfer less cold. If using metal, ensure full interior insulation and consider wrapping the exterior with Reflectix for added protection.
How often should I maintain the shelter?
Inspect every 4–6 weeks during winter. Replace wet or matted straw immediately. Check for rodent nests, cracks, or loose insulation at least once a month.
Is it safe to add a heated pad?
Only use pet-safe, thermostatically controlled heating pads designed for outdoor use. Standard electric pads can overheat or short-circuit in damp conditions. Most experts agree that proper insulation eliminates the need for electrical heating.
Final Thoughts and Call to Action
Creating a warm, dry sanctuary for outdoor cats doesn’t require advanced tools or expensive materials. With careful insulation using safe, durable products, a simple barrel becomes a life-saving refuge. The key lies in combining passive thermal design with consistent upkeep. Every insulated shelter reduces suffering and increases survival during harsh months.


 浙公网安备
33010002000092号
浙公网安备
33010002000092号 浙B2-20120091-4
Comments
No comments yet. Why don't you start the discussion?