
Purchasing new clothing only to discover an unyielding security tag still attached is a common frustration. While retail stores use these devices to deter theft, they can sometimes be left on by accident—or you might acquire secondhand garments with tags intact. Removing them improperly can damage delicate fabrics or even pose a safety risk if ink capsules are involved. Fortunately, with the right knowledge and tools, it’s possible to remove most alarm tags at home safely and effectively.
This guide outlines proven techniques, backed by practical experience and expert insight, to help you detach various types of security tags without harming your clothing or compromising your safety.
Understanding Alarm Tag Types
Before attempting removal, it's crucial to identify the type of alarm tag attached to your garment. Different designs require different approaches:
- Hard plastic RFID tags: These are rigid, dome-shaped tags often used in high-end boutiques. They typically contain a locking mechanism activated by magnets.
- Ink vial tags:
Identifying the tag helps determine whether magnet-based, mechanical, or manual separation methods will work best—and which ones to avoid.
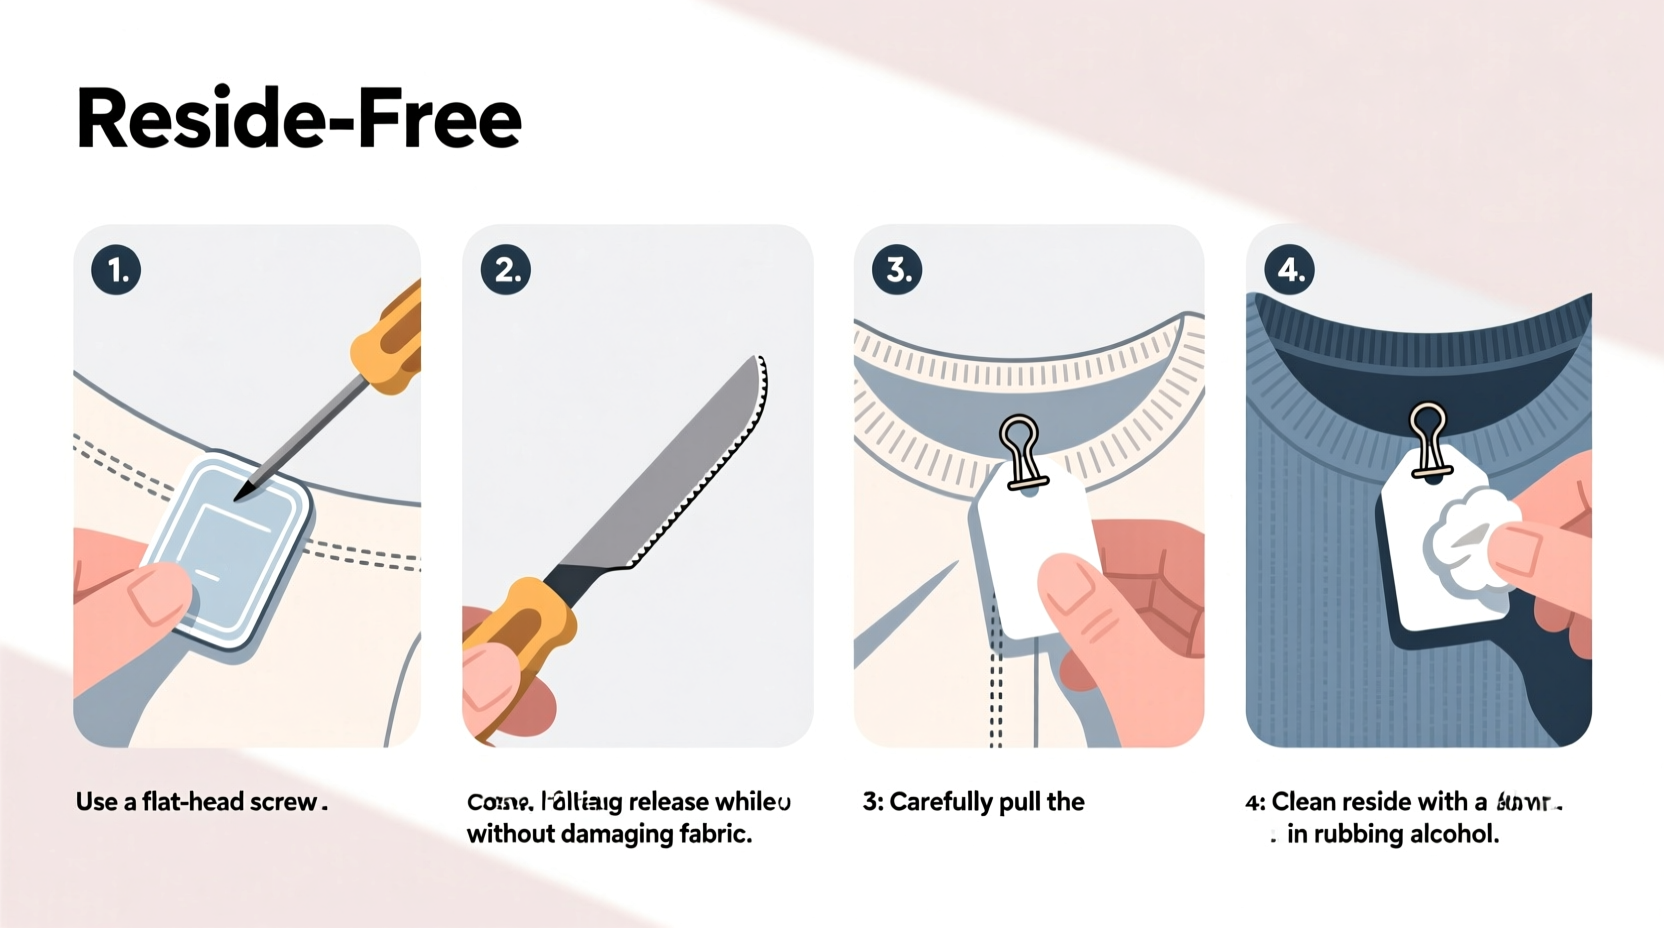
Step-by-Step Guide to Remove Common Alarm Tags
Follow this structured process based on tag type for optimal results:
- Inspect the tag closely. Look for seams, pins, or signs of ink chambers. Hold it up to light if needed.
- Determine the mechanism. Does it have a central pin? Is it bulky and magnetic-sensitive?
- Gather appropriate tools: needle-nose pliers, strong neodymium magnet, flathead screwdriver, gloves (for protection).
- Work over a clean surface. Protect both the garment and your workspace.
- Apply the correct method based on the tag type (see below).
Removing Magnetic RFID Tags
Many hard plastic tags used in apparel stores rely on a magnetic lock. When exposed to a strong enough magnetic field, the internal pin releases.
- Place the tagged side of the garment face down on a soft towel.
- Hold a powerful neodymium magnet (rare earth magnet) against the flat side of the tag.
- Slowly rotate the magnet in small circles. You may hear a faint click as the pin disengages.
- Once released, gently pull the two halves apart using fingers or pliers.
“Using a 5mm x 20mm neodymium magnet is often sufficient to unlock most retail security tags. The key is alignment and steady pressure.” — David Lin, Retail Loss Prevention Consultant
Detaching Wire-Based EAS Tags
These tags consist of a metal pin anchored through fabric into a plastic housing. Forcible pulling damages material. Instead:
- Lay the garment flat with the tag accessible.
- Use needle-nose pliers to grip the protruding end of the pin.
- Gently twist while applying outward pressure. Some models release when rotated 90–180 degrees.
- If resistance persists, try compressing the sides of the plastic casing slightly to loosen internal springs.
Note: This method works best on older-style tags. Newer versions may require specialized detachers available commercially.
Safely Handling Ink Vial Tags
These are among the most dangerous to tamper with. The glass vial inside contains permanent dye that activates upon breakage.
- Do not bend, crush, or puncture the tag.
- Check if the ink chamber is visible—often located near the base.
- If unsure, treat it as an active ink tag.
- The safest option is to return the item to the store for professional removal.
- If you must proceed at home, use extreme caution and wear protective gloves and eyewear.
Do’s and Don’ts of Home Tag Removal
| Do’s | Don’ts |
|---|---|
| Use a strong neodymium magnet for magnetic tags | Never use excessive force that could tear fabric |
| Inspect the tag thoroughly before acting | Avoid cutting near unknown internal components |
| Work slowly and patiently | Don’t assume all tags are removable at home |
| Wear gloves and eye protection when handling suspicious tags | Never attempt removal near open flames or heat sources |
| Test magnet method first—it’s non-invasive | Don’t discard packaging; it may prove purchase origin |
Real Example: Accidental Oversight at Checkout
Sophie purchased a wool-blend coat from a mid-tier retailer during a busy holiday sale. At home, she noticed a large circular tag still fastened under the collar. Assuming it was decorative, she washed the coat—only to find the tag remained after drying.
Research revealed it was a magnetic RFID tag. She retrieved a small neodymium magnet from an old hard drive, placed it against the tag, and rotated slowly. After a soft click, the two halves separated cleanly. The coat suffered no damage, and Sophie saved a trip back to the store.
This scenario underscores how simple mistakes happen—and how basic tools can resolve them efficiently.
Alternative Solutions When DIY Fails
Not all tags are suitable for home removal. In some cases, safer alternatives exist:
- Contact the retailer: Most stores will remove tags free of charge, even without a receipt, especially if you show proof of purchase like a bank statement.
- Visit a tailor: Professionals often have access to commercial detachers and handle delicate fabrics daily.
- Use community resources: Some dry cleaners or alterations shops offer tag removal as a goodwill service.
Attempting risky removal on expensive garments—especially silk, cashmere, or tailored pieces—is rarely worth the potential cost of ruin.
Frequently Asked Questions
Can I use a fridge magnet to remove a security tag?
No. Standard refrigerator magnets lack the magnetic strength required. Only rare earth (neodymium) magnets generate enough field intensity to disengage locking mechanisms in most modern tags.
What should I do if ink leaks onto my clothing?
Act immediately. Blot (don’t rub) the area with a dry cloth. Rinse under cold water, then apply isopropyl alcohol to a cotton pad and dab gently. Launder as soon as possible. Note: Complete stain removal is unlikely once ink sets.
Are all alarm tags magnetic?
No. While many are, others use mechanical locks, adhesives, or RF sensors. Always assess the design before assuming magnetism applies.
Final Checklist: Safe Alarm Tag Removal at Home
- ✔ Identify the tag type before starting
- ✔ Confirm presence or absence of ink vials
- ✔ Gather necessary tools: magnet, pliers, gloves
- ✔ Work over a protected surface
- ✔ Try magnetic method first (non-destructive)
- ✔ Avoid sharp tools near fabric
- ✔ If uncertain, seek professional help
Conclusion
Removing alarm tags at home doesn’t have to be stressful or risky. With careful identification, the right tools, and a methodical approach, most standard tags can be detached safely—preserving both your garment and peace of mind. Remember: patience and precision outweigh brute force every time.


 浙公网安备
33010002000092号
浙公网安备
33010002000092号 浙B2-20120091-4
Comments
No comments yet. Why don't you start the discussion?