
Leather shoes are an investment in both style and comfort. When wax—whether from a candle, polish, or accidental spill—lands on their surface, panic can set in quickly. The instinct might be to scrape it off or use harsh solvents, but these actions risk scuffing, discoloration, or cracking the leather. The good news is that with the right approach, wax can be removed effectively and safely. This guide outlines proven techniques that prioritize the integrity of your footwear while restoring its clean appearance.
Understanding Leather and Wax Interaction
Leather is a porous, natural material treated for durability and water resistance, but not impervious to stains. Wax, especially paraffin or beeswax, adheres strongly to surfaces and can seep into the grain if not addressed promptly. Once cooled, it forms a hard layer that may appear unsightly and interfere with breathability or polish absorption.
The key to removal lies in controlled softening rather than forceful scraping. Aggressive tools or heat sources like hair dryers on high settings can melt wax too quickly, pushing it deeper or warping delicate leather finishes. Instead, gentle heat application followed by careful lifting ensures minimal stress on the material.
“Wax doesn’t chemically bond with leather, which means it can be physically removed without damaging the hide—if done correctly.” — Marcus Reed, Footwear Restoration Specialist
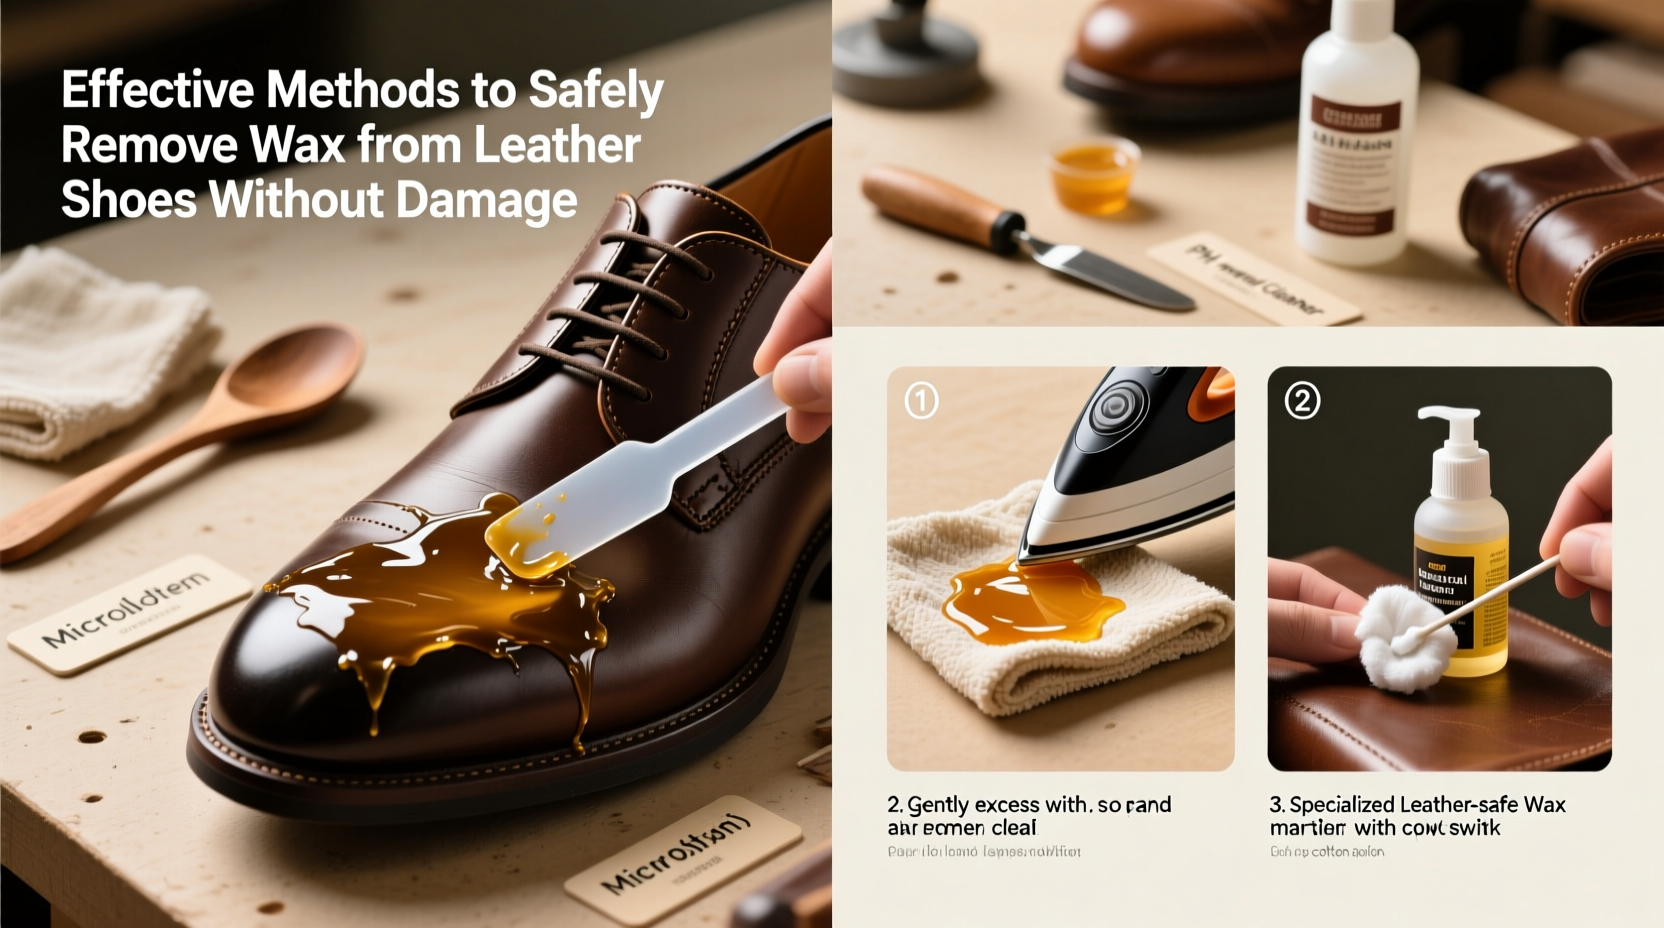
Step-by-Step Guide: Safe Wax Removal Process
Follow this detailed sequence to remove wax safely and efficiently:
- Let the wax cool completely. If fresh, allow it to harden. This prevents smearing and makes removal easier.
- Use a plastic scraper or credit card edge to gently lift excess wax. Work slowly from the outer edges inward, applying minimal pressure to avoid scratching.
- Place a paper towel or brown bag over the wax residue. This will absorb melted wax during heating.
- Apply low heat using a hair dryer on the lowest setting. Hold it 6–8 inches away, moving continuously. Never concentrate heat in one spot.
- As the wax melts, it will transfer into the paper towel. Replace the towel as it becomes saturated.
- Repeat until no more wax transfers. Allow the shoe to cool between rounds.
- Clean the area with a damp cloth and pH-balanced leather cleaner. Wipe gently to remove any oily residue.
- Condition the leather to restore moisture lost during cleaning.
Alternative Methods and Their Risks
While the heat-and-blot method is most reliable, other approaches exist—but come with caveats.
- Freezing Method: Place the shoe in a freezer for 1–2 hours to harden wax further, then chip it off. Best for thick, brittle waxes. Risk: Sudden temperature changes may affect adhesives or cause micro-cracking in aged leather.
- Iron and Paper Technique: Similar to the hair dryer method, but using a warm (not hot) iron over parchment paper. Faster, but higher risk of scorching if misused.
- Solvent Wipes: Some suggest rubbing alcohol or acetone. These are strongly discouraged—they strip natural oils and can permanently alter color and texture.
Do’s and Don’ts Table
| Do | Don't |
|---|---|
| Use low, indirect heat | Apply direct high heat (e.g., open flame) |
| Lift wax with a blunt plastic tool | Scrape with metal knives or keys |
| Blot with absorbent paper | Rub aggressively with cloth |
| Condition after cleaning | Leave cleaned areas untreated |
| Work in a well-ventilated area | Use chemical solvents indoors without ventilation |
Real Example: Removing Candle Wax from Oxfords
James, a finance professional in Chicago, accidentally knocked over a dinner candle onto his favorite pair of dark brown oxford shoes. Initially distressed, he resisted the urge to peel the wax and instead followed a structured removal process.
He placed two layers of paper towel over the wax stain, used a hair dryer on low heat for 30-second intervals, and replaced the paper each time it absorbed melted wax. After three cycles, the stain was nearly gone. He wiped the area with a slightly damp microfiber cloth and applied a matching leather conditioner. Within an hour, the shoes looked untouched. A week later, they passed a casual inspection by his cobbler with no signs of prior damage.
This case underscores the effectiveness of patience and proper tools—even under real-world pressure.
Essential Checklist for Wax Removal Success
Before starting, gather and confirm the following:
- ✅ Plastic scraper or old credit card
- ✅ Clean paper towels or brown paper bags
- ✅ Hair dryer with adjustable low-heat setting
- ✅ pH-balanced leather cleaner
- ✅ Leather conditioner matching your shoe’s finish
- ✅ Soft, lint-free cloths
- ✅ Well-ventilated workspace
- ✅ Time (allow at least 30 minutes for full treatment)
Frequently Asked Questions
Can I use a regular household iron to remove wax?
Yes, but with caution. Set the iron to the lowest heat setting (no steam), place parchment or brown paper over the wax, and press briefly—do not slide. Monitor closely to avoid overheating. This method works faster than a hair dryer but increases risk if not carefully controlled.
Will removing wax lighten the color of my leather shoes?
Potentially, if aggressive solvents are used. However, when using only heat and blotting, color change is unlikely. If you notice fading, it may be due to pre-existing wear or uneven conditioning. Always condition after cleaning to maintain even tone.
What if the wax has already stained the leather underneath?
If a greasy ring remains after wax removal, apply a small amount of leather cleaner designed for oil-based stains. Gently dab—don’t rub—and follow with conditioning. For persistent discoloration, consult a professional restorer.
Prevention and Long-Term Care Tips
Once the wax is gone, take steps to protect your shoes from future incidents:
- Apply a high-quality leather protector spray every 4–6 weeks, especially before winter or event seasons.
- Avoid placing leather shoes near candles, fireplaces, or heated surfaces.
- Store shoes in breathable cotton bags away from heat sources.
- Rotate footwear regularly to reduce exposure and extend lifespan.
Regular conditioning—at least once a month—maintains suppleness and creates a slight barrier against surface contaminants. While no treatment makes leather fully waterproof or wax-proof, consistent care significantly improves resilience.
Final Thoughts: Preserve Value Through Smart Action
Removing wax from leather shoes doesn’t require magic—just method and mindfulness. Rushing the process or using untested hacks can do more harm than the original stain. By relying on gentle heat, absorbent materials, and post-cleaning conditioning, you preserve not only appearance but also structural integrity.
Every scratch avoided and every stain properly treated adds months, even years, to your shoes’ life. Whether you own a single prized pair or a rotating collection, treating them with informed care reflects respect for craftsmanship and personal style.


 浙公网安备
33010002000092号
浙公网安备
33010002000092号 浙B2-20120091-4
Comments
No comments yet. Why don't you start the discussion?