
Many people assume their sports watch is fully waterproof simply because it’s marketed for swimming or diving. However, water resistance varies significantly between models, and even minor damage can compromise a seal. Rather than risking failure during a swim or triathlon, testing your watch’s waterproof integrity at home using safe, practical methods can prevent costly damage and ensure reliability when it matters most.
This guide outlines proven techniques you can use at home—without specialized equipment—to assess whether your watch remains capable of withstanding moisture under real-world conditions. These approaches prioritize safety, accuracy, and long-term device care.
Understanding Water Resistance Ratings
Before conducting any test, it's essential to understand what your watch's water resistance rating actually means. Manufacturers use terms like \"water-resistant\" rather than \"waterproof,\" as no timepiece is entirely impervious to water over time. Common ratings include:
| Rating (ATM) | Depth Equivalent | Suitable For |
|---|---|---|
| 3 ATM (30m) | 30 meters | Hand washing, rain, splashes |
| 5 ATM (50m) | 50 meters | Swimming, snorkeling (surface only) |
| 10 ATM (100m) | 100 meters | Recreational diving |
| 20 ATM+ (200m+) | 200 meters+ | Professional diving |
Note that these depths refer to static pressure in controlled lab conditions—not dynamic movement like diving into water or high-speed swimming, which increases stress on seals.
“Water resistance isn’t permanent. Gaskets degrade, cases get dented, and crowns loosen—all compromising protection.” — Daniel Reyes, Watch Technician & Horology Consultant
Step-by-Step Guide to Safe Home Testing
You don’t need a pressure chamber to evaluate your watch’s condition. The following sequence allows you to perform non-invasive checks that reveal early signs of vulnerability.
- Inspect the Case and Crown: Examine the watch under bright light. Look for cracks, dents, or misalignment around the crystal and crown. Ensure the crown screws down tightly if applicable.
- Check for Condensation: Breathe onto the crystal. If fog forms and doesn't clear within seconds, moisture may already be inside—or seals are compromised.
- Perform the Tape Test (Dry Method): Place a small piece of transparent tape over the back of the watch and wear it for 24 hours. If moisture appears beneath the tape, perspiration or ambient humidity is penetrating the case.
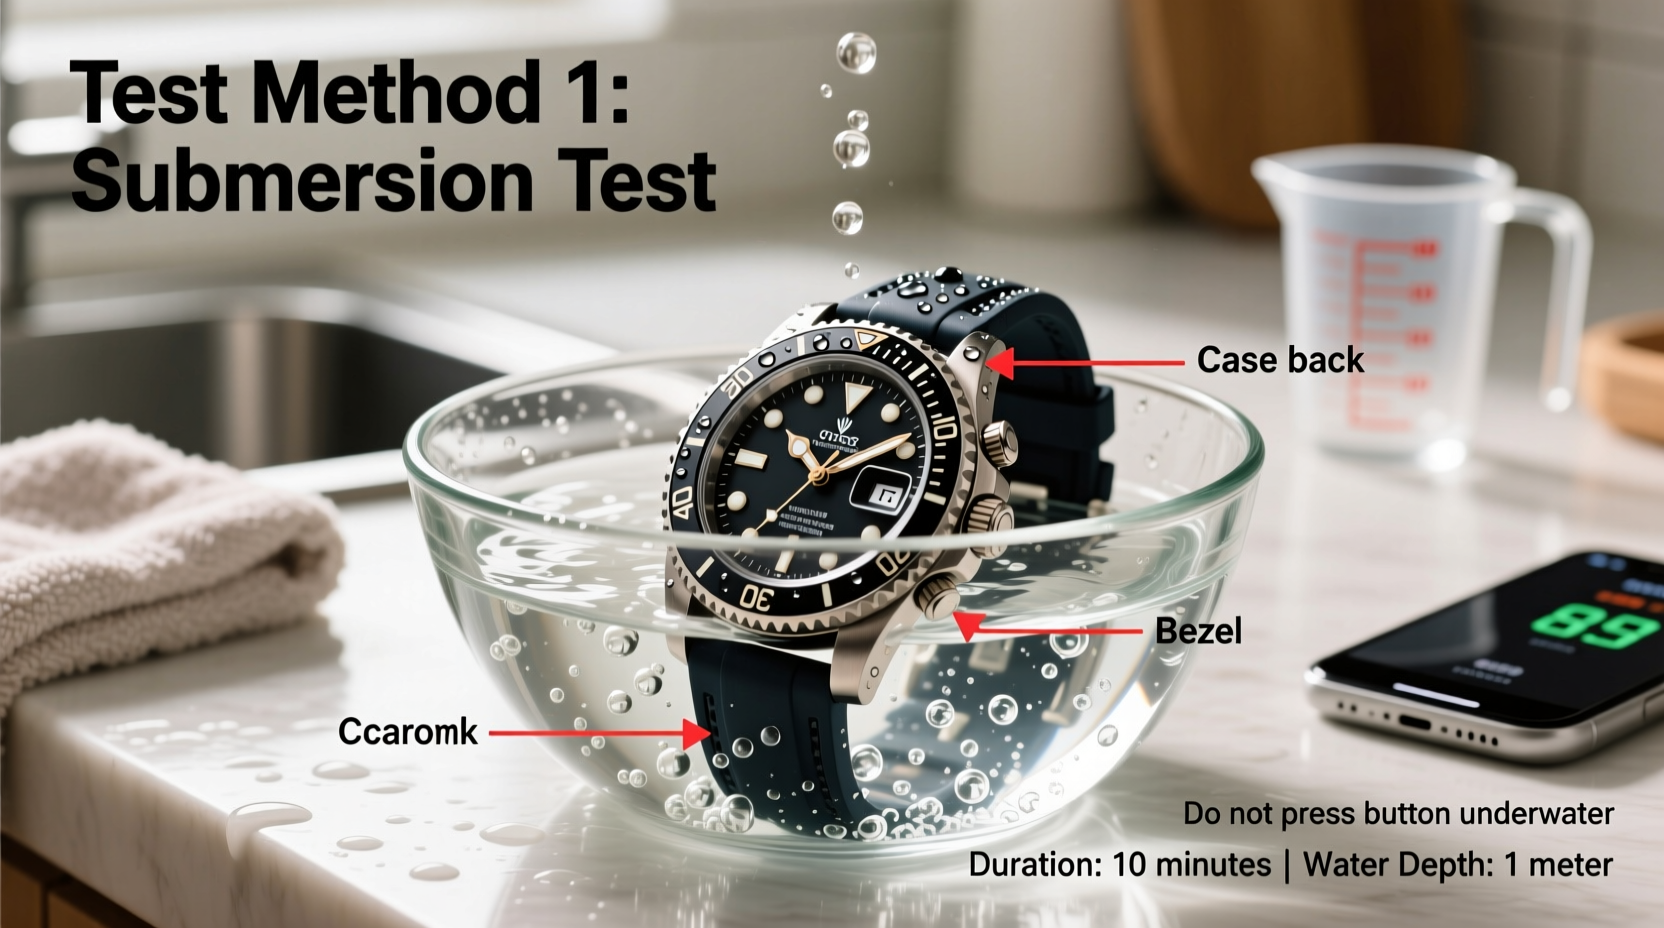
- Submersion in Still Water: Fill a bowl with room-temperature water deep enough to cover the watch. Submerge it face-up for 10–15 minutes. Avoid hot water or sudden temperature changes.
- Dry and Monitor: Remove the watch, wipe thoroughly, and observe for internal fogging over the next few hours. Also check for discoloration of the dial or hands.
Do’s and Don’ts When Testing Waterproof Performance
To avoid accidental damage while assessing water resistance, follow this checklist of recommended practices.
| Do’s | Don’ts |
|---|---|
| Use lukewarm or room-temperature water | Expose to hot showers or saunas during testing |
| Clean the watch before and after testing with fresh water | Test immediately after exposing the watch to extreme temperatures |
| Ensure pushers and crown are fully seated or screwed down | Press buttons underwater unless rated for it |
| Dry completely with a soft cloth and air-dry upside-down | Use heat sources like hairdryers to speed drying |
| Repeat tests every 6–12 months | Assume past performance guarantees future protection |
Real Example: A Triathlete’s Close Call
Mark, an amateur triathlete from Colorado, trusted his 5 ATM-rated watch for open-water swims. After noticing slight fogging post-swim, he decided to conduct a controlled home test. He submerged the watch in a bowl of tap water for 12 minutes, simulating race conditions. Upon removal, he discovered tiny droplets forming near the crown—a sign of failing gasket integrity.
He took the watch to a technician who confirmed a worn-out stem seal. Replacing it cost $45. Had Mark continued using it in lakes and pools, prolonged exposure could have damaged the movement, leading to replacement costs exceeding $300. His proactive test saved both money and training continuity.
When to Seek Professional Testing
While home methods help identify obvious issues, they cannot replicate factory-grade pressure testing. Consider professional evaluation if:
- Your watch has been dropped or exposed to chemicals
- You plan frequent deep-water activities (e.g., scuba diving)
- The manufacturer recommends annual servicing
- You notice recurring condensation despite passing home tests
A jeweler or authorized service center uses a device called a *watch pressure tester* (e.g., Witschi) to simulate depth conditions without submerging the watch. This dry test detects micro-leaks by measuring air leakage from a sealed chamber around the timepiece.
Frequently Asked Questions
Can I use saltwater or chlorinated water for testing?
No. Salt and chlorine are corrosive and can accelerate seal degradation. Use only clean, fresh water for home testing. If used in pools or oceans, rinse the watch afterward with fresh water.
Is it safe to press buttons underwater during the test?
Only if your watch is explicitly rated for it (typically 10 ATM or higher). Most manufacturers advise against operating controls underwater unless designed for diving. Doing so under lower ratings risks forcing water past seals.
What should I do if my watch fogs up after testing?
Remove it immediately, dry the exterior, and place it near a warm (not hot) airflow—like beside a dehumidifier—for several hours. Persistent fogging indicates internal moisture; seek professional servicing promptly to prevent rust or circuit damage.
Conclusion: Stay Proactive, Not Reactive
Water damage is one of the most common causes of premature sports watch failure—and often isn’t covered under warranty. By applying these simple, safe home testing strategies, you gain peace of mind knowing your device can handle the demands of your active lifestyle.
Regular inspection, cautious testing, and timely maintenance preserve not just functionality but also accuracy and longevity. Don’t wait for fogged glass or a dead battery to signal trouble. Take action now, protect your investment, and train with confidence.


 浙公网安备
33010002000092号
浙公网安备
33010002000092号 浙B2-20120091-4
Comments
No comments yet. Why don't you start the discussion?