
Sheetrock cracks are a common household issue, especially in homes built more than a few years ago. While small hairline cracks may seem harmless, they can worsen over time, affecting both aesthetics and structural integrity. The key to long-term success isn’t just patching the crack—it’s understanding why it formed and applying the right repair method. Whether caused by settling, temperature fluctuations, or poor installation, effective solutions exist to fix sheetrock cracks permanently.
Understanding Why Sheetrock Cracks Occur
Before attempting any repair, it's essential to diagnose the root cause. Ignoring the underlying reason often leads to recurring cracks, no matter how well the surface is patched.
- House settling: All homes shift slightly over time, especially during the first few years after construction. This movement can stress joints between drywall panels, leading to visible cracks.
- Temperature and humidity changes: Fluctuations cause building materials to expand and contract. Drywall tape at seams is particularly vulnerable.
- Poor taping or finishing: Inadequate joint compound application or insufficient drying time during initial installation can result in weak seams that crack early.
- Structural issues: In rare cases, persistent or widening cracks may indicate foundation problems or framing weaknesses that require professional assessment.
“Most drywall cracks are cosmetic, but if you see diagonal cracks near windows or doors wider than 1/8 inch, have a structural engineer evaluate them.” — Mark Reynolds, Residential Construction Inspector
The Right Tools and Materials for Lasting Repairs
Using proper supplies makes a significant difference in durability. A quick spackle touch-up might hide a crack temporarily, but only the correct combination of materials ensures a permanent fix.
| Material | Purpose | Recommended Type |
|---|---|---|
| Joint Compound | Fills gaps and bonds layers | All-purpose or lightweight (for easier sanding) |
| Drywall Tape | Reinforces seams and prevents recurrence | Fiberglass mesh or paper tape (paper preferred for high-stress areas) |
| Utility Knife | Cleans out cracked edges | Retractable blade for precision |
| Sanding Sponge | Smooths finished surface | Medium grit (120–150) |
| Putty Knives | Applies and smooths compound | 4\", 6\", and 10\" sizes for different stages |
Step-by-Step Guide to Fixing Sheetrock Cracks Permanently
A successful repair goes beyond filling the crack. It involves preparation, reinforcement, and finishing. Follow this timeline-based approach for durable results.
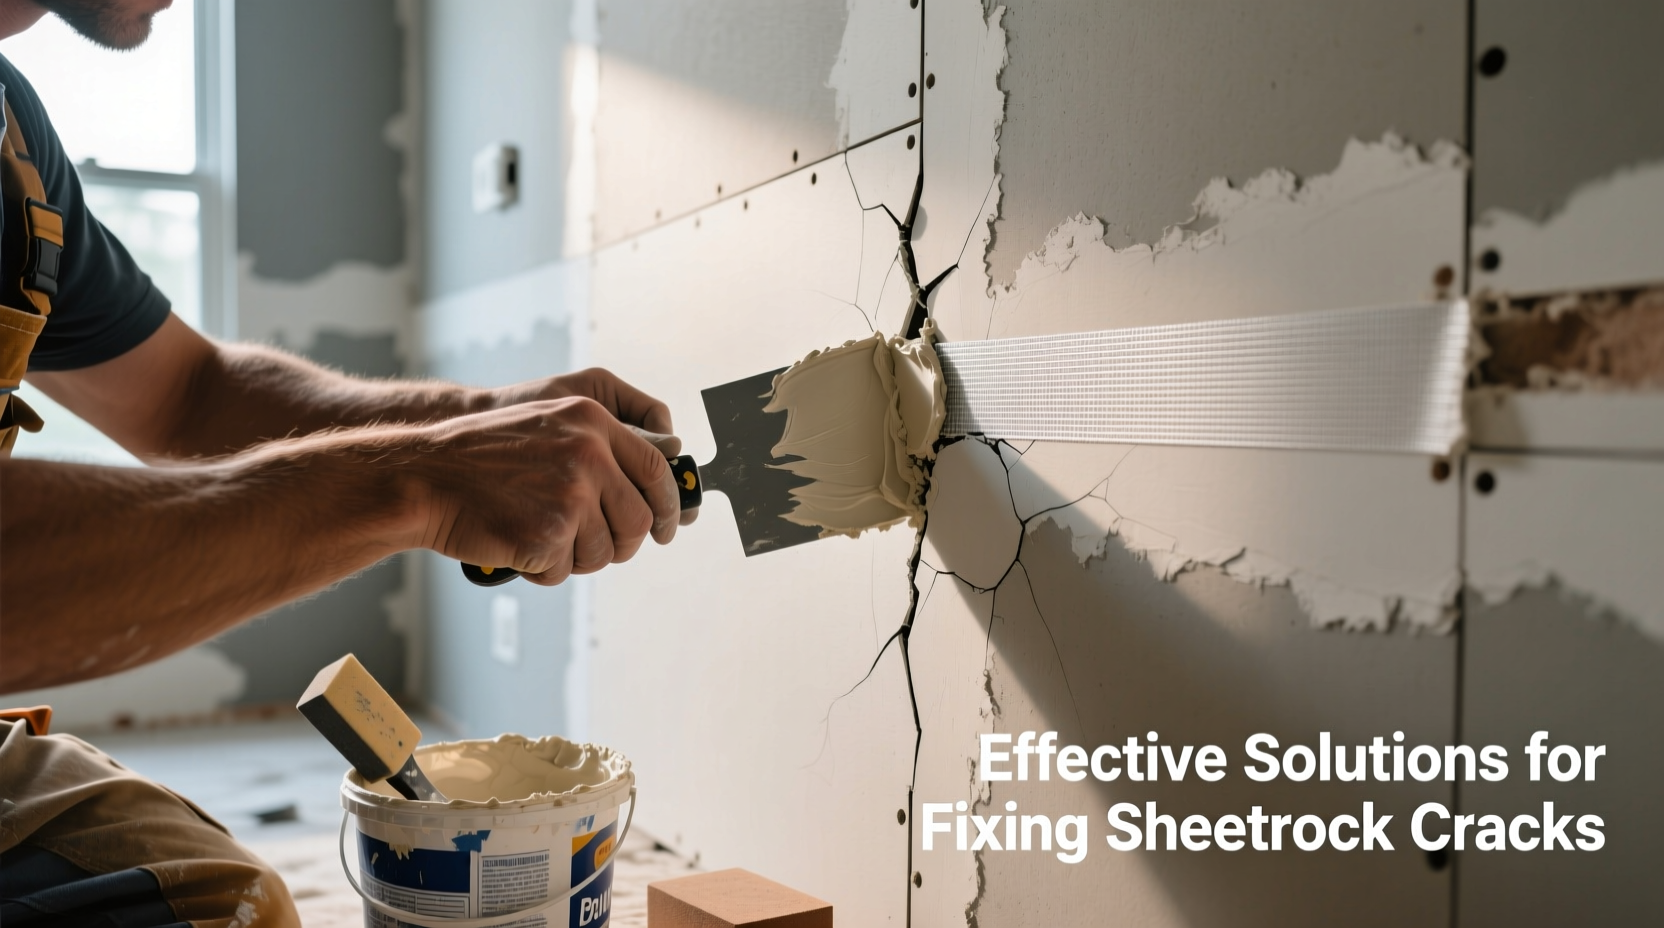
- Clean and widen the crack (15 minutes): Use a utility knife to V-groove the crack, removing loose debris and creating space for compound adhesion. Avoid shallow, flat surfaces—depth allows better grip.
- Vacuum the area: Remove dust and particles with a brush attachment to ensure a clean bonding surface.
- Apply base layer of joint compound (10 minutes + 2 hours drying): Using a 4\" putty knife, fill the groove with all-purpose compound. Don’t overfill—just enough to be flush or slightly below the surface.
- Embed drywall tape (immediately after step 3): Press paper or fiberglass tape into the wet compound. Smooth out air bubbles with light pressure. Paper tape offers superior strength for seams under tension.
- Apply second coat (next day): Use a 6\" knife to apply a thin layer over the taped area, feathering edges outward to blend with surrounding wall. Let dry 24 hours.
- Third coat (optional for high-visibility areas): For corners or large walls, a final 10\" wide coat further blends the repair. Sand lightly once dry.
- Sand and prime (after final dry): Use a sanding sponge to smooth without gouging. Wipe clean, then apply primer before painting to prevent flashing.
When Standard Repair Isn't Enough: Advanced Solutions
In high-movement areas like ceilings above doorways or long-span walls, standard taping may fail due to ongoing stress. Reinforcement strategies improve longevity.
- Use metal corner bead for inside/outside corners: Provides rigid support where drywall is prone to chipping and cracking.
- Install a drywall seam splitter or expansion joint: In commercial settings or very long walls, flexible inserts absorb movement. Not common in homes but useful in problem zones.
- Switch to setting-type joint compound for base layers: Also known as “hot mud,” this chemical-hardening compound shrinks less than premixed varieties, ideal for deep fills.
Mini Case Study: Fixing a Recurring Ceiling Crack
A homeowner in Denver noticed a zigzag crack reappearing above their living room entryway every winter. After two failed patch jobs using only spackle and mesh tape, they consulted a contractor. The solution involved cutting out the damaged section, installing backing wood across the joists, then applying three layers of paper tape with setting compound. The crack has not returned in over three years. The key was addressing movement from seasonal temperature swings and reinforcing the joint structurally.
Do’s and Don’ts of Sheetrock Crack Repair
| Do’s | Don’ts |
|---|---|
| Feather edges widely to blend with wall texture | Apply thick, uneven layers of compound |
| Prime before painting to avoid patch visibility | Paint directly over unprimed joint compound |
| Allow 24 hours between coats for full curing | Rush drying with heaters (causes cracking) |
| Use paper tape on high-stress seams | Depend solely on spackling paste for structural cracks |
FAQ
Can I paint over a repaired crack immediately?
No. Always apply a coat of primer after sanding and let it dry completely. Painting too soon can highlight the repair due to differing absorption rates between compound and drywall.
Why does my crack keep coming back?
Recurring cracks usually mean the repair didn’t address movement. If the crack returns in the same place, consider reinforcing with backing, using stronger tape, or evaluating home settling patterns.
Is caulk ever appropriate for drywall cracks?
Only in non-structural, low-movement areas like crown molding joints. Caulk is flexible but doesn’t provide the rigidity needed for wallboard seams and won’t accept texture or paint like joint compound.
Expert Insight: Pro Tips for Long-Term Results
“The biggest mistake homeowners make is treating drywall cracks like surface blemishes. They’re symptoms of movement. Address the symptom, yes—but always reinforce like you expect the wall to move again.” — Lena Patel, Master Drywaller with 22 years in residential renovation
Checklist: Permanent Sheetrock Crack Repair
- Identify the type and cause of the crack
- Gather tools: utility knife, joint compound, tape, putty knives, sanding sponge
- Cut a V-groove along the crack and clean the area
- Apply first layer of joint compound
- Embed drywall tape while compound is wet
- Apply second (and third, if needed) compound layer with wider knife
- Allow 24 hours drying between coats
- Sand smoothly and wipe clean
- Prime the repaired area before painting
- Monitor for recurrence over the next few months
Conclusion
Fixing sheetrock cracks effectively requires more than a quick patch. By understanding the causes, using the right materials, and following a structured repair process, you can eliminate unsightly flaws and prevent future damage. Whether you're dealing with a minor hairline fracture or a recurring seam split, these methods offer reliable, professional-grade results. Take the time to do it right—your walls will stay smooth and intact for years to come.


 浙公网安备
33010002000092号
浙公网安备
33010002000092号 浙B2-20120091-4
Comments
No comments yet. Why don't you start the discussion?