
Purchasing a used washing machine can be a smart, budget-friendly decision. However, without proper cleaning and maintenance, it may harbor mold, mildew, detergent buildup, and lingering odors that compromise both hygiene and efficiency. A thorough deep clean not only restores the appliance’s function but also ensures your laundry comes out truly clean. Whether you’ve acquired a secondhand unit from a thrift store, online marketplace, or inherited one from a previous tenant, following a systematic cleaning process is essential for safety, performance, and long-term reliability.
Why Deep Cleaning a Used Washing Machine Matters
A washing machine works hard to remove dirt, but ironically, it can become a breeding ground for grime itself. Over time, soap scum, fabric softener residue, hard water minerals, and organic matter accumulate in hidden areas—especially in rubber seals, drain pumps, and detergent dispensers. These buildups foster bacterial growth and mold, leading to foul smells and potential cross-contamination of clothes.
According to the American Society of Home Inspectors, over 60% of household washing machines show signs of microbial contamination within three years of use. In a used machine, this risk is significantly higher, especially if its maintenance history is unknown. Deep cleaning eliminates these hazards and resets the machine to near-new condition.
“Many people assume their washer is self-cleaning, but without regular maintenance, it becomes less efficient and can actually make clothes dirtier.” — Dr. Lena Patel, Appliance Hygiene Specialist
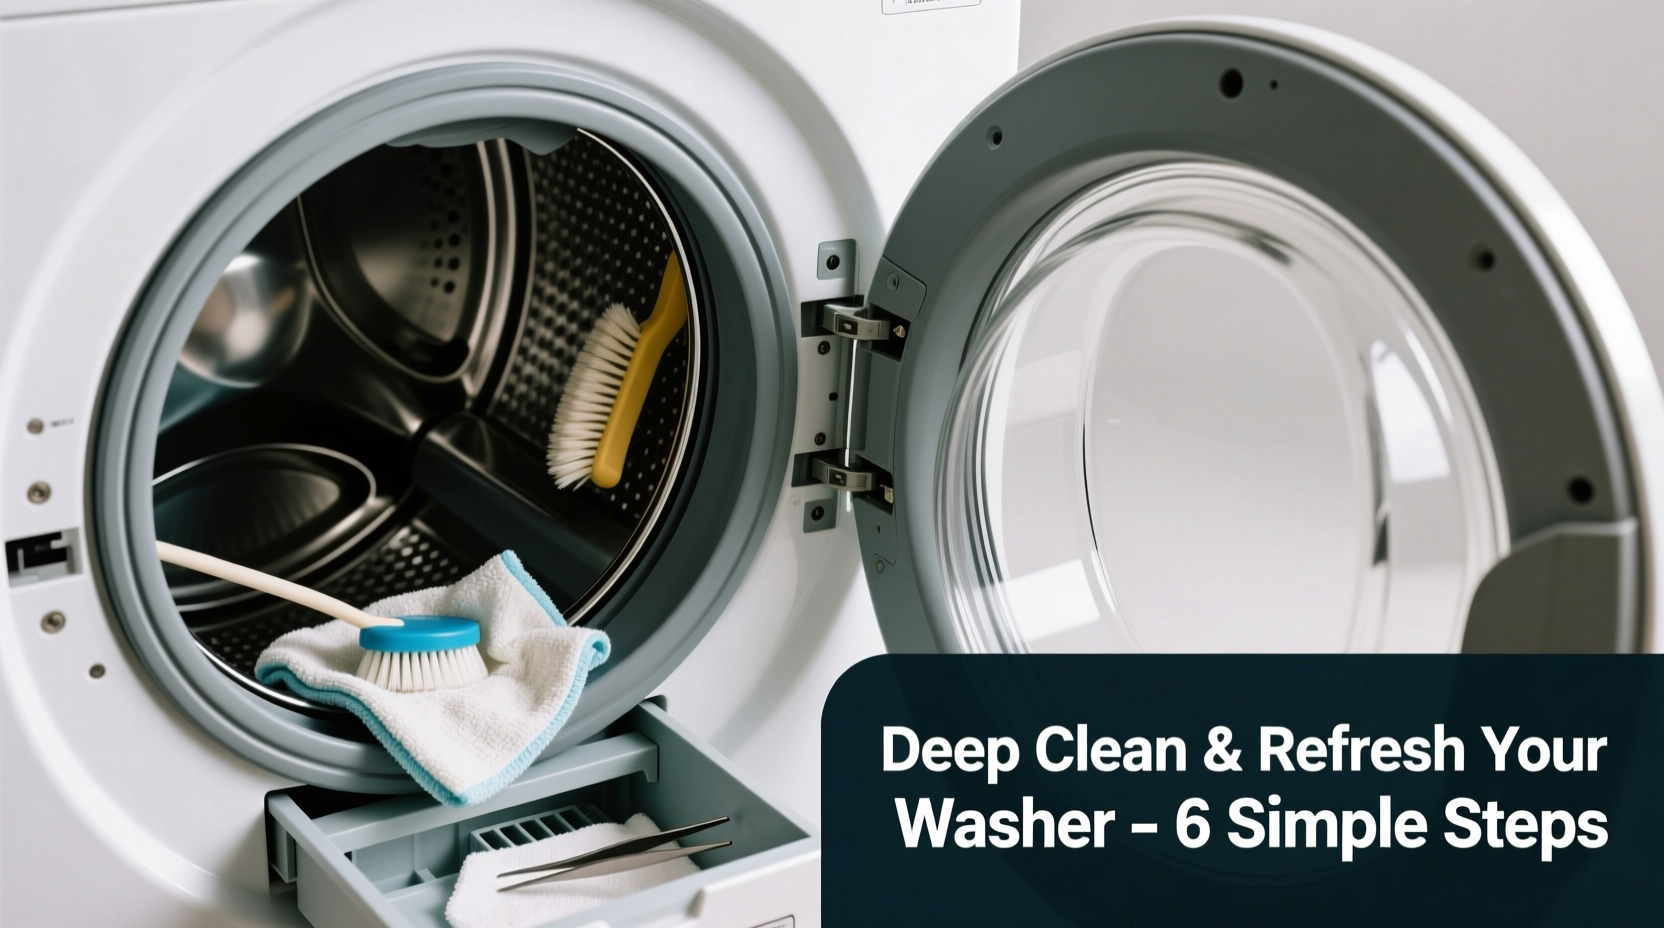
Step-by-Step Guide to Deep Clean Your Used Washing Machine
Cleaning a used washing machine isn’t just about wiping the exterior. It requires attention to internal components, drainage systems, and hidden crevices where contaminants thrive. Follow this comprehensive timeline to ensure every part is sanitized and refreshed.
- Unplug and inspect the machine: Safety first. Disconnect the power and water supply. Visually check hoses for cracks, kinks, or leaks. Replace any damaged parts before proceeding.
- Remove and clean the detergent drawer: Pull out the dispenser tray. Soak it in warm, soapy water. Use an old toothbrush to scrub away residue. Rinse thoroughly and let dry.
- Clean the door seal (front-load models): Wipe down the rubber gasket with a vinegar-soaked cloth. Pay special attention to folds where mold collects. Use a cotton swab for tight spots.
- Run a hot water cycle with cleaning agent: Add 2 cups of white vinegar or 1 cup of oxygen-based bleach (not chlorine) to the drum. Run the longest, hottest cycle available.
- Scrub the drum manually: After the cycle, wipe the interior with a microfiber cloth. For stubborn stains, make a paste of baking soda and water and gently scrub.
- Clean the filter and pump trap: Locate the access panel (usually at the front bottom). Place a towel underneath, open slowly, and remove debris. Flush the filter under running water.
- Flush the drain hose: Detach the hose if possible and rinse with hot water to remove sludge. Reconnect securely.
- Wipe exterior and control panel: Use a damp cloth with mild detergent. Avoid abrasive cleaners that can damage finishes.
- Run a rinse cycle: Complete the process with an empty rinse cycle to flush out any remaining residue.
- Dry and ventilate: Leave the door and detergent drawer slightly open for 24–48 hours to prevent moisture buildup.
Do’s and Don’ts: Best Practices for Washing Machine Maintenance
| Do’s | Don’ts |
|---|---|
| Use high-efficiency (HE) detergent in correct amounts | Overload the machine beyond capacity |
| Leave the door and dispenser open after use | Use regular bleach weekly—it degrades rubber seals |
| Clean the filter every 1–3 months | Ignore strange noises or leaks |
| Inspect hoses annually for wear | Store wet clothes in the drum overnight |
| Run a maintenance cycle monthly | Mix vinegar and bleach—they create toxic fumes |
Real Example: Reviving a Neglected Secondhand Washer
Jamal purchased a gently used front-loading Whirlpool from a local buy-sell group for $150. The machine turned on, but it emitted a sour, musty odor and left gray streaks on light-colored clothes. He followed the deep-cleaning steps outlined above, discovering thick black mold in the door seal and a clogged filter filled with lint and coins. After two cleaning cycles and replacing the inlet hoses, the odor disappeared, and subsequent loads came out fresh and spotless. Jamal now runs a vinegar cycle monthly and reports his “used” machine performs better than his old new one.
Essential Checklist for Immediate Action
- ☑ Unplug the machine and shut off water valves
- ☑ Remove and clean detergent drawer
- ☑ Inspect and clean door gasket thoroughly
- ☑ Run hot cycle with 2 cups white vinegar
- ☑ Locate and clear the pump filter
- ☑ Flush drain hose and reattach securely
- ☑ Wipe down exterior and control panel
- ☑ Perform final rinse cycle
- ☑ Leave door and drawer open to dry
- ☑ Schedule monthly maintenance reminders
Frequently Asked Questions
Can I use bleach to clean my washing machine?
Yes, but sparingly. Oxygen-based bleach (like OxiClean) is safer for regular use. Chlorine bleach should only be used occasionally and never mixed with vinegar or ammonia, as it produces dangerous gases. Always follow manufacturer guidelines.
How often should I deep clean a used washing machine?
After initial deep cleaning, maintain it with a monthly cleaning cycle. High-use households or those in hard water areas may benefit from bi-weekly cycles. The filter should be cleaned every 1–3 months depending on usage.
Why does my washer still smell after cleaning?
Residual moisture or hidden mold in the outer drum or behind the panel could be the culprit. Ensure full drying after each use. Consider using a commercial washing machine cleaner designed to penetrate deep into internal components.
Optimizing Performance After Cleaning
Cleaning is just the beginning. To maintain peak performance, adopt habits that prevent future buildup. Use only HE detergent in measured amounts—excess suds don’t rinse away completely and feed microbial growth. Avoid fabric softeners when possible; they coat drum surfaces and reduce absorbency over time. Wash towels and bedding at higher temperatures periodically to sanitize the drum. Additionally, consider installing a water softener if you live in a hard water area, as mineral deposits accelerate wear and reduce efficiency.
Conclusion
Deep cleaning a used washing machine is not optional—it’s essential for health, efficiency, and longevity. With the right tools and consistent care, even a neglected unit can deliver reliable, hygienic performance for years. By following these proven steps, you protect your investment, your clothing, and your household’s well-being. Don’t let a dirty machine undermine clean laundry. Take action today, establish a simple maintenance routine, and enjoy the confidence that comes with knowing your washer is as clean as the clothes it handles.


 浙公网安备
33010002000092号
浙公网安备
33010002000092号 浙B2-20120091-4
Comments
No comments yet. Why don't you start the discussion?