
Trigger finger—medically known as stenosing tenosynovitis—affects millions of people worldwide. It occurs when a finger or thumb gets stuck in a bent position and then snaps straight, often with pain or a popping sensation. While mild cases may resolve on their own, untreated trigger finger can lead to permanent stiffness and loss of function. The good news is that most cases can be resolved permanently using non-surgical, evidence-based strategies focused on reducing inflammation, restoring tendon glide, and retraining movement patterns.
This guide outlines practical, long-term solutions that go beyond temporary fixes like cortisone injections or splinting alone. By combining targeted exercises, lifestyle adjustments, and early intervention techniques, you can regain full hand mobility and prevent recurrence.
Understanding the Root Cause of Trigger Finger
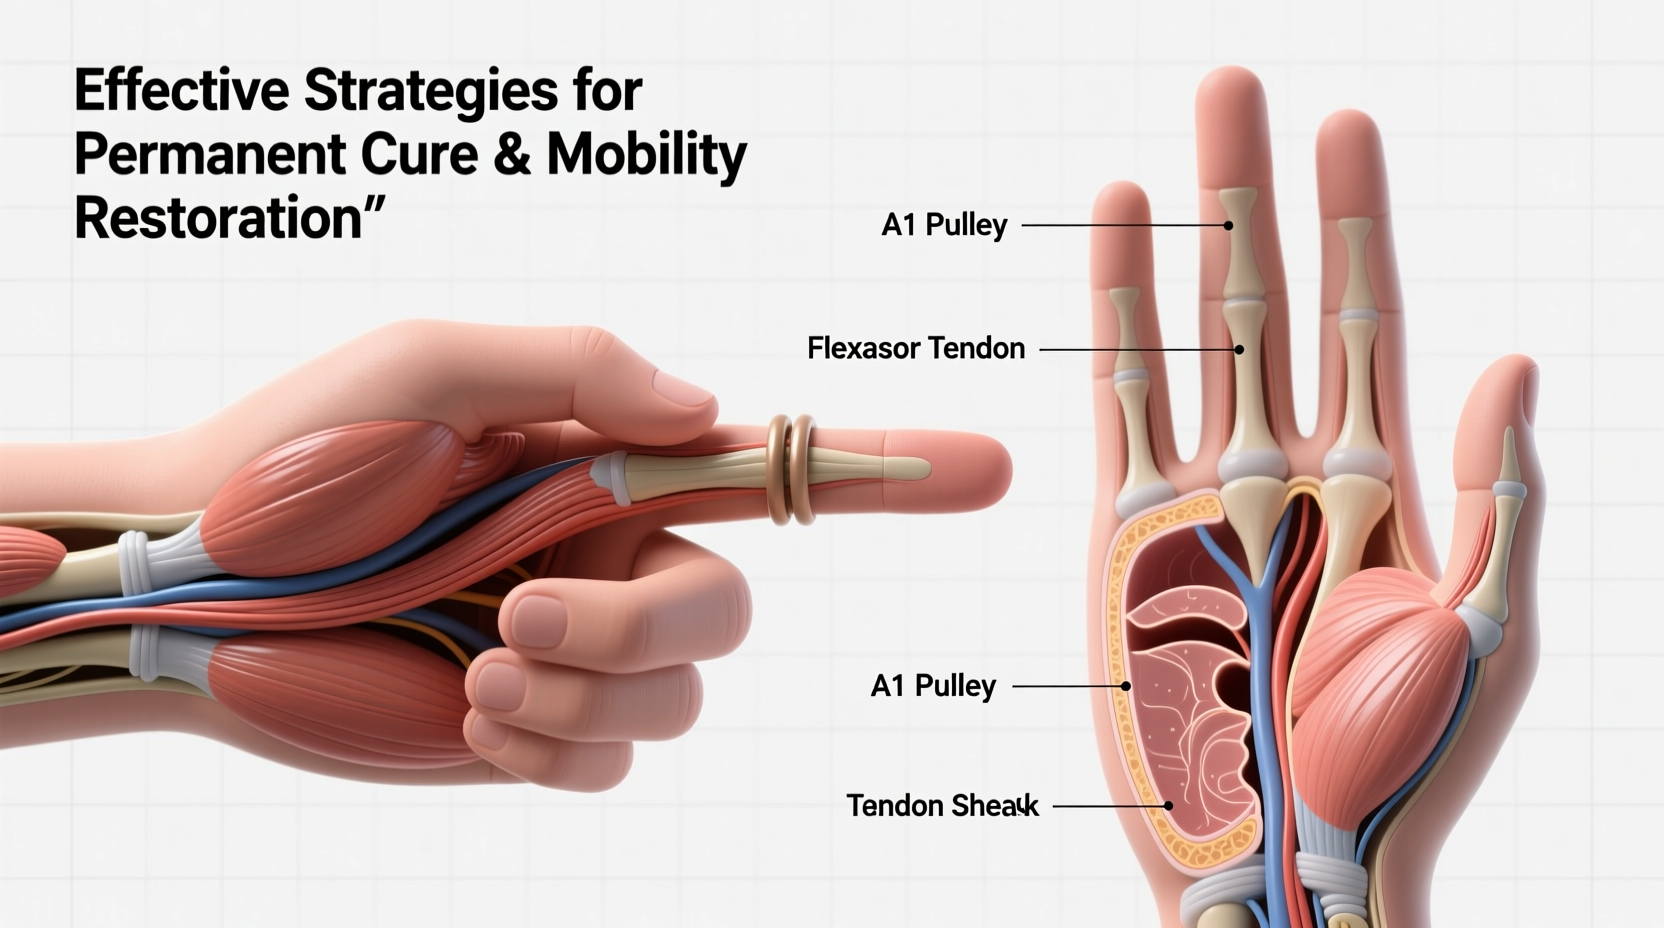
Trigger finger develops when the flexor tendons in the fingers become inflamed or thickened, making it difficult for them to glide smoothly through the A1 pulley—a fibrous sheath near the base of the finger. Overuse, repetitive gripping, arthritis, or diabetes can contribute to this condition. As the tendon swells, it forms nodules or becomes irritated, catching on the pulley during movement.
Many assume that rest alone will fix the issue, but without addressing the underlying biomechanical dysfunction, symptoms often return. Long-term resolution requires a multifaceted approach: reducing inflammation, improving tendon gliding, strengthening supporting muscles, and modifying daily habits that strain the hand.
“Treating trigger finger isn’t just about symptom relief—it’s about restoring the functional mechanics of the entire hand.” — Dr. Laura Nguyen, Hand Therapist & Certified Occupational Therapy Specialist
Proven Non-Surgical Treatment Strategies
Surgery (A1 pulley release) is sometimes recommended, but research shows that over 60% of patients respond well to conservative treatments when applied consistently and early. The key is persistence and proper technique.
1. Daily Stretching and Tendon Gliding Exercises
Restoring smooth tendon motion is essential. Perform these exercises twice daily:
- Full Fist to Hook Fist Progression: Start by making a loose fist, then progress to a tight fist, followed by a hook fist (fingertips to palm). Reverse slowly.
- Table Top Stretch: Place fingertips on a flat surface, palms down. Gently lean forward to stretch the palm and fingers.
- Finger Extension with Rubber Band: Wrap a rubber band around all five fingertips. Open fingers against resistance, promoting extensor strength.
2. Inflammation Management Through Lifestyle Adjustments
Chronic inflammation fuels tendon irritation. Address systemic contributors:
- Reduce intake of processed sugars and trans fats, which increase inflammatory markers.
- Incorporate omega-3 fatty acids (found in fish, flaxseed, chia) to support joint health.
- Stay hydrated—tendons require adequate fluid balance to glide efficiently.
- Treat underlying conditions like diabetes or rheumatoid arthritis under medical supervision.
3. Ergonomic Modifications at Work and Home
Repetitive gripping motions are a primary trigger. Identify and modify high-risk activities:
- Use ergonomic tools with padded, larger-diameter handles (e.g., jar openers, electric screwdrivers).
- Avoid prolonged use of smartphones or gaming controllers; take breaks every 20 minutes.
- Switch to voice-to-text or dictation software if typing aggravates symptoms.
Step-by-Step Recovery Timeline (8 Weeks)
Following a structured plan increases the likelihood of permanent recovery. Here’s a realistic 8-week protocol:
- Weeks 1–2: Reduce inflammation with ice massage (5 minutes, 3x/day), begin gentle stretches, and eliminate aggravating tasks.
- Weeks 3–4: Introduce tendon gliding exercises twice daily; start using a night splint to keep the affected finger in extension.
- Weeks 5–6: Add resistance training with therapy putty; gradually reintroduce light gripping tasks.
- Weeks 7–8: Focus on functional retraining—practice buttoning shirts, typing, or playing instruments with controlled form.
By week 8, most patients report significant improvement in range of motion and reduced locking. Continue maintenance exercises 3x/week thereafter to prevent relapse.
Do’s and Don’ts: Quick Reference Table
| Do | Don’t |
|---|---|
| Apply warm compresses before exercise | Forcefully straighten a locked finger |
| Use a night splint during recovery | Ignore numbness or tingling (could indicate nerve involvement) |
| Perform daily tendon gliding routines | Continue repetitive gripping without breaks |
| Modify tools and grips for ergonomics | Rely solely on cortisone shots without rehab |
Real-World Example: Maria’s Recovery Journey
Maria, a 52-year-old seamstress, developed trigger finger in her right ring finger after months of hand-sewing dense fabrics. Initially, she ignored the occasional snapping, assuming it would pass. Within three months, her finger began locking mid-day, causing sharp pain.
After a cortisone injection provided only two weeks of relief, she consulted a hand therapist. Following the 8-week protocol—daily stretching, using a thimble with a wide grip, wearing a night splint, and switching to an electric sewing machine pedal—her symptoms resolved completely by week 10. Now, she performs maintenance exercises weekly and has returned to her craft without limitations.
When to Consider Medical Intervention
While conservative methods work for most, some cases require additional support:
- Corticosteroid Injections: Effective in 50–70% of cases, especially when combined with physical therapy. Limit to 2–3 injections per site to avoid tendon weakening.
- Ultrasound-Guided Percutaneous Release: A minimally invasive alternative to surgery, where a needle is used to release the pulley under imaging.
- Surgery: Recommended only if symptoms persist after 6 months of consistent non-surgical care. Success rates exceed 95%, with low complication risk.
“Patients who combine post-injection rehab with behavioral changes have the lowest recurrence rates.” — Dr. Alan Zhou, Orthopedic Surgeon specializing in hand disorders
Prevention Checklist: Avoid Future Episodes
To ensure lasting results, adopt these habits permanently:
- ✅ Perform 5-minute hand warm-ups before manual tasks
- ✅ Use ergonomic tools with cushioned grips
- ✅ Take micro-breaks every 15–20 minutes during repetitive work
- ✅ Maintain blood sugar control if diabetic
- ✅ Practice tendon gliding exercises 2–3 times per week
- ✅ Monitor early signs (clicking, morning stiffness) and act immediately
Frequently Asked Questions
Can trigger finger heal on its own without treatment?
In very mild cases, yes—especially if activity modification begins early. However, most cases worsen without intervention due to progressive tendon swelling and scarring. Proactive care significantly improves the odds of full recovery.
Is heat or ice better for trigger finger?
Use heat before activity or exercise to loosen tissues and improve circulation. Apply ice after activity or at day’s end to reduce inflammation. Ice massage (frozen water cup) directly over the palm’s tender spot for 5 minutes is particularly effective.
How long does it take to cure trigger finger naturally?
With consistent effort, noticeable improvement typically occurs within 4–6 weeks. Full resolution may take 8–12 weeks. Chronic cases (over 6 months) may require longer rehabilitation and professional guidance.
Take Control of Your Hand Health Today
Permanent relief from trigger finger is achievable—not through quick fixes, but through disciplined, intelligent self-care. The strategies outlined here address both symptoms and root causes, empowering you to restore natural hand function and prevent future setbacks. Whether you're a musician, artisan, office worker, or retiree, your hands deserve lasting comfort and mobility.


 浙公网安备
33010002000092号
浙公网安备
33010002000092号 浙B2-20120091-4
Comments
No comments yet. Why don't you start the discussion?