
Palm plants bring a touch of the tropics into homes and gardens, but many enthusiasts wonder how to expand their collection without purchasing new specimens. While not all palms are easy to propagate, several species can be multiplied using proven methods. Understanding the right techniques—based on plant biology and environmental conditions—is essential for success. This guide outlines practical, effective approaches to propagating palm plants, from seed germination to division and offshoot removal, ensuring healthy growth at every stage.
Understanding Palm Propagation: What Works and What Doesn’t
Unlike many houseplants that root easily from stem cuttings, most palms cannot be propagated from leaf or trunk cuttings. This is due to their unique growth structure—they grow from a single apical meristem (the growing tip). If this tip is damaged or removed, the plant typically dies. Therefore, traditional cutting methods used for pothos or philodendrons won’t work here.
Successful palm propagation relies on three primary methods:
- Seed propagation – Ideal for species like Areca, Queen, and Canary Island Date palms.
- Division – Suitable for clumping varieties such as Pygmy Date Palm.
- Offshoot (pup) removal – Effective for palms that produce side shoots, including some Phoenix and Bismarckia species.
Each method has specific requirements in terms of timing, tools, and aftercare. Choosing the right one depends on the palm species you’re working with and its natural growth habits.
Step-by-Step Guide to Seed Propagation
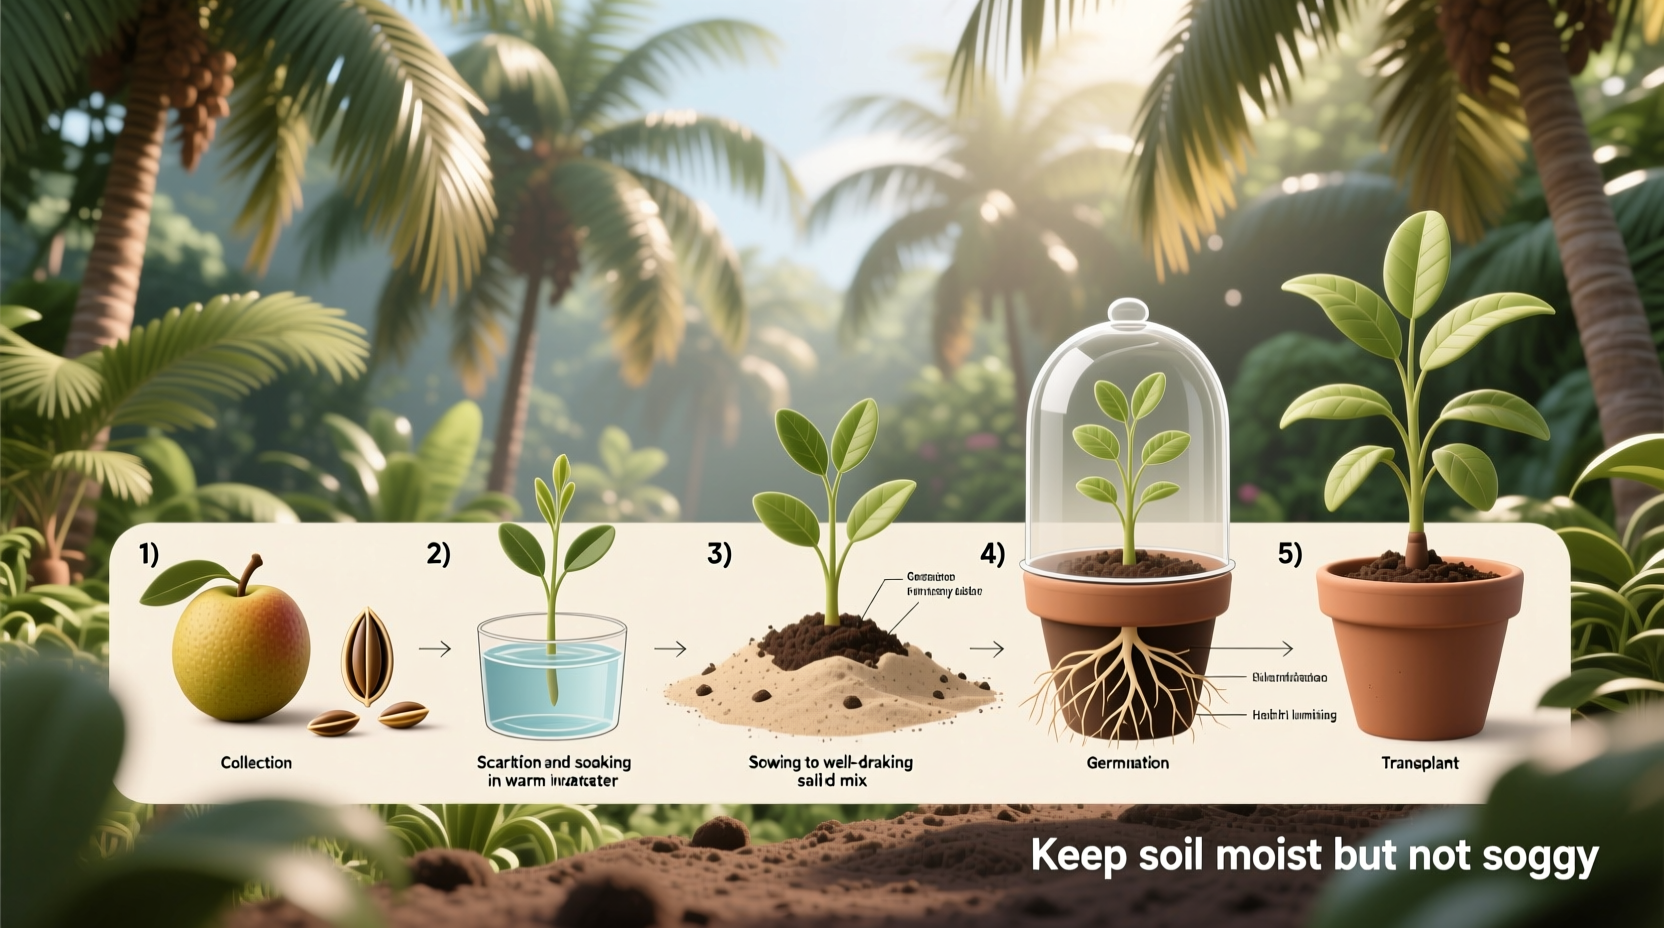
Seed propagation is the most common way to grow new palms, especially for gardeners starting from scratch. However, it requires patience—some palm seeds take weeks or even months to germinate.
- Collect or purchase fresh seeds. Use ripe, undamaged seeds. For best results, sow them within a few weeks of harvest.
- Soak seeds in warm water for 24–48 hours to soften the outer coat and improve germination rates.
- Prepare a well-draining seed mix using equal parts peat moss, perlite, and coarse sand.
- Plant seeds about 1 inch deep in small pots or trays, keeping the medium consistently moist but not soggy.
- Maintain warmth and humidity. Place containers in a warm area (75–85°F / 24–29°C), ideally using a heat mat and plastic cover to retain moisture.
- Wait for germination. Most palm seeds sprout within 4–8 weeks, though some may take up to six months.
- Transplant seedlings once they develop two or more true leaves and have established roots.
Keep young palms in bright, indirect light and avoid overwatering, which can lead to damping-off disease.
Common Challenges in Seed Germination
| Issue | Possible Cause | Solution |
|---|---|---|
| No germination after 3 months | Old or non-viable seeds | Test seed viability by soaking; viable ones sink |
| Mold on soil surface | Excess moisture and poor airflow | Ventilate daily; sprinkle cinnamon as a natural fungicide |
| Weak, leggy seedlings | Insufficient light | Move under grow lights or near a south-facing window |
Propagating Palms Through Division and Pup Removal
For clumping palms like the Dwarf Date Palm (Phoenix roebelenii) or Bamboo Palm (Chamaedorea seifrizii), division offers a faster alternative to seeds. These palms naturally produce multiple stems from a shared root system, making them ideal candidates for separation.
How to Divide a Clumping Palm
- Remove the parent plant from its container during spring or early summer—the optimal growing season.
- Gently shake off excess soil to expose the root ball and identify individual stems.
- Using sterilized pruning shears or a sharp knife, carefully cut through connecting roots to separate each stem with its own root cluster.
- Trim any damaged or rotting roots and dust cut surfaces with powdered charcoal or fungicide.
- Repot each division in a well-draining potting mix designed for palms.
- Water lightly and place in a warm, shaded area for 2–3 weeks to reduce transplant shock.
Root establishment usually takes 4–6 weeks. New growth indicates successful adaptation.
“Dividing clumping palms during active growth gives them the energy needed to recover quickly and thrive.” — Dr. Linda Torres, Horticulturist & Tropical Plant Specialist
Propagating from Offshoots (Pups)
Some solitary-trunked palms occasionally produce lateral offshoots, commonly called “pups,” at the base. While less common than division, pup removal can yield genetically identical clones of the parent plant.
When and How to Remove Pups
- Wait until pups are at least 6 inches tall and show signs of root development.
- Use a clean, sharp trowel or knife to gently pry or cut the pup away from the main trunk, preserving as many roots as possible.
- Allow the wound on both pup and parent to callus for 24 hours in a dry, shaded location.
- Plant the pup in a small pot filled with sandy, well-aerated mix.
- Keep the soil slightly moist and maintain high humidity using a plastic dome or misting routine.
Rooting may take 6–10 weeks. Resist pulling on the pup to test for roots; instead, look for new leaf emergence as a sign of success.
Species Most Likely to Produce Pups
- Pygmy Date Palm (Phoenix roebelenii)
- Canary Island Date Palm (Phoenix canariensis) – rarely
- Cabbage Palm (Sabal palmetto) – in mature outdoor specimens
- Bismarck Palm (Bismarckia nobilis) – under ideal conditions
Essential Care Tips After Propagation
Newly propagated palms are vulnerable and require careful attention during their first few months. Follow these guidelines to ensure strong development:
Checklist: Post-Propagation Care Routine
- ✅ Keep soil evenly moist—not wet—for the first month.
- ✅ Provide bright, indirect light; avoid direct midday sun.
- ✅ Maintain temperatures above 70°F (21°C) for consistent growth.
- ✅ Increase humidity with a pebble tray or humidifier if indoors.
- ✅ Do not fertilize for at least 6–8 weeks after planting.
- ✅ Inspect regularly for pests like spider mites or scale.
Gradually acclimate new plants to normal conditions once steady growth resumes. Begin feeding with a diluted, balanced liquid fertilizer every 6–8 weeks during the growing season.
Frequently Asked Questions
Can I propagate a palm from a leaf cutting?
No. Palm plants do not regenerate from leaf or stem cuttings because they lack the necessary meristematic tissue in those areas. Attempting this will result in decay rather than growth.
How long does it take for palm seeds to germinate?
Germination time varies widely by species. Some, like the Areca palm, sprout in 4–6 weeks, while others—such as the Coconut palm—can take 3–6 months. Freshness and temperature play major roles in speed and success.
Why did my palm pup die after repotting?
Dying pups are often due to overwatering, insufficient warmth, or premature removal before root formation. Ensure pups are mature enough and avoid soggy soil, which leads to rot.
Conclusion: Grow Your Palm Collection with Confidence
Propagating palm plants doesn’t require advanced skills—just knowledge, timing, and attentive care. Whether you're nurturing seeds into seedlings, dividing a lush clump, or harvesting a resilient pup, each method opens a rewarding path to expanding your green space. Success lies in matching the technique to the species and providing stable, supportive conditions during early development.


 浙公网安备
33010002000092号
浙公网安备
33010002000092号 浙B2-20120091-4
Comments
No comments yet. Why don't you start the discussion?