
Cooking a steak on the stove is one of the most reliable ways to achieve restaurant-quality results at home. With precise heat control, proper technique, and attention to detail, you can produce a deeply seared exterior and a perfectly cooked interior without needing a grill or oven. The key lies in understanding heat management, seasoning, timing, and resting. Whether you're using a ribeye, strip, or filet mignon, mastering this method transforms an ordinary dinner into something exceptional.
Choosing the Right Cut and Preparing It Properly
The foundation of a great stovetop steak starts long before it hits the pan. Selecting a well-marbled cut like a ribeye, New York strip, or bone-in sirloin ensures rich flavor and juiciness. Thickness matters—aim for steaks at least 1 to 1.5 inches thick. Thinner cuts overcook easily under high heat.
Before cooking, bring the steak to room temperature by letting it sit out for 30 to 45 minutes. This promotes even cooking. Pat the surface dry with paper towels; moisture is the enemy of a good sear. Then, season generously with coarse kosher salt and freshly ground black pepper. For enhanced crust development, some chefs recommend applying salt up to 40 minutes in advance to draw out moisture, then re-drying and seasoning again just before cooking.
Essential Equipment and Pan Selection
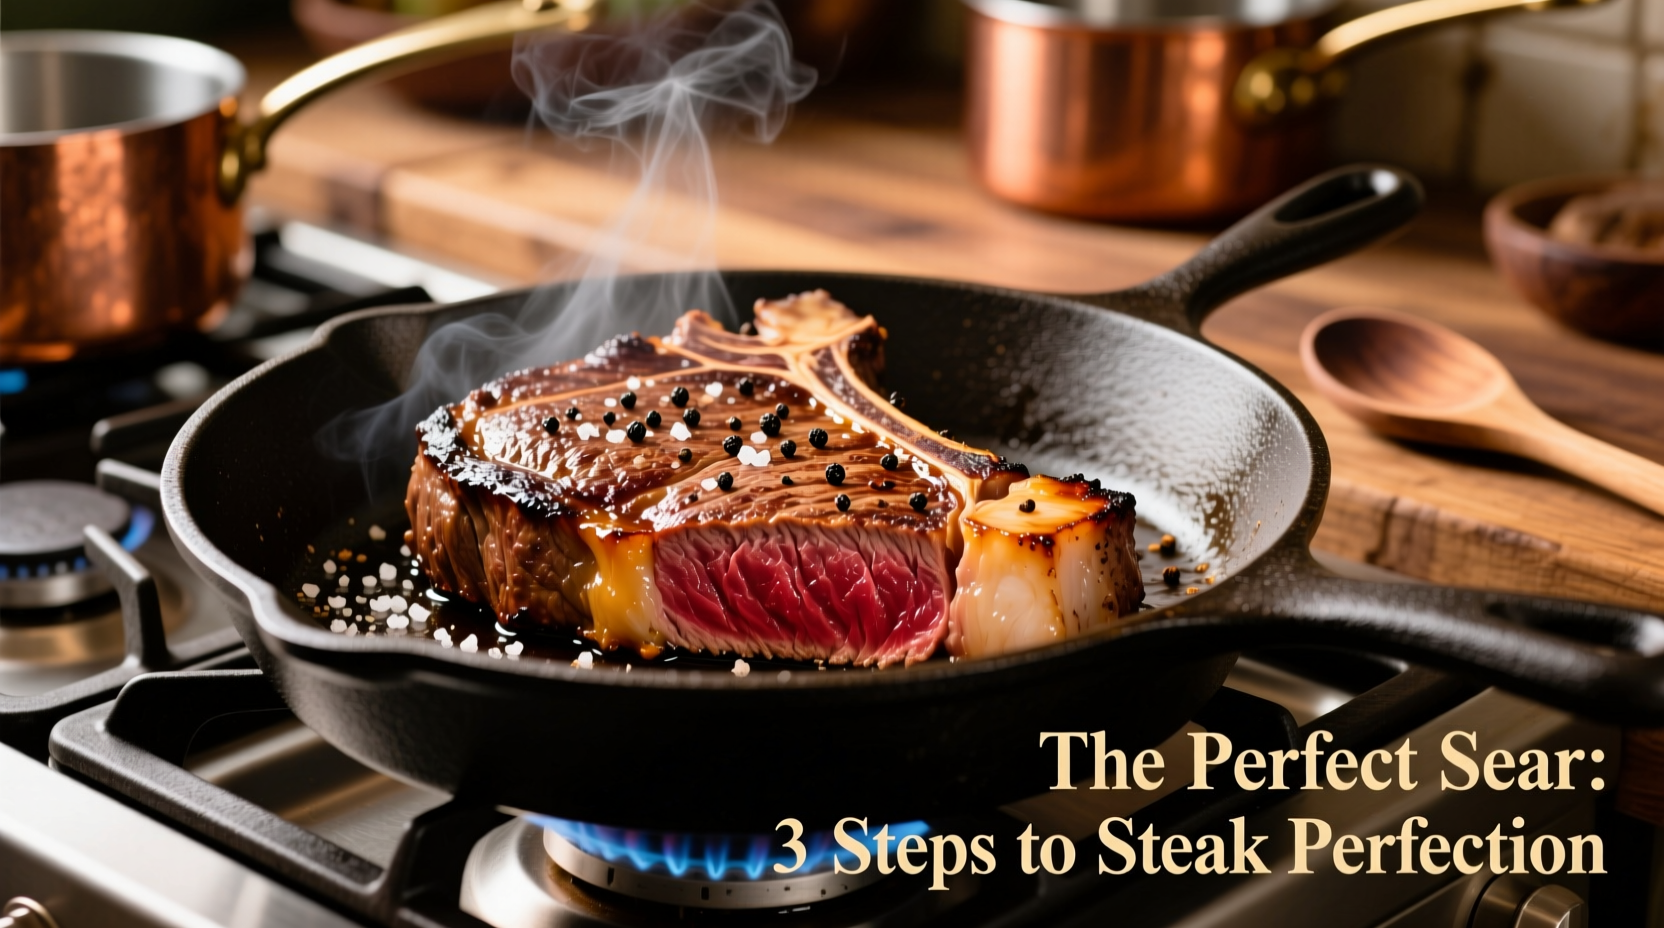
Not all pans are created equal when it comes to stovetop steak cooking. The ideal pan must withstand extremely high heat and retain it evenly. Cast iron skillets are the gold standard for this task. Their superior heat retention allows for a deep, caramelized crust. Carbon steel pans are a close second. Avoid nonstick pans—they cannot handle the temperatures needed for proper searing.
Ensure your pan is large enough to hold the steak without overcrowding. Overcrowding lowers the pan’s temperature and leads to uneven browning. Have tongs ready (not a fork, which pierces the meat and releases juices), and keep a splatter screen nearby if desired.
Step-by-Step Guide to Stovetop Perfection
- Preheat the pan: Place your cast iron skillet over medium-high to high heat for 5–7 minutes until it’s very hot. You should see a slight shimmer when oil is added.
- Add high-smoke-point oil: Use an oil with a high smoke point such as avocado, grapeseed, or refined canola oil. Add just enough to coat the bottom of the pan.
- Sear the first side: Carefully place the steak in the pan. It should sizzle immediately. Do not move it—let it develop a crust for 3–4 minutes depending on thickness.
- Flip once: Use tongs to flip the steak. Press gently only if necessary to ensure full contact. Sear the second side for another 3–4 minutes.
- Baste with butter (optional): Reduce heat slightly, add a tablespoon of butter, crushed garlic, and fresh herbs like thyme or rosemary. Tilt the pan and spoon the melted fat over the steak continuously for 1–2 minutes.
- Check internal temperature: Use an instant-read thermometer to monitor doneness. Remove the steak 5°F below your target temperature, as it will continue to rise while resting.
- Rest the steak: Transfer to a cutting board or warm plate and let rest for 5–10 minutes. This allows juices to redistribute, ensuring a moist bite.
Doneness Guide and Timing Reference
Steak doneness is best judged by internal temperature, not time alone. However, timing provides a useful baseline. Below is a reference table for a 1-inch thick steak cooked in a preheated cast iron skillet:
| Doneness | Internal Temp (°F) | Approximate Total Time | Description |
|---|---|---|---|
| Rare | 120–125°F | 6–7 minutes | Very red, cool center |
| Medium Rare | 130–135°F | 7–8 minutes | Warm red center, most popular choice |
| Medium | 140–145°F | 8–9 minutes | Pink center, slightly firm |
| Medium Well | 150–155°F | 9–10 minutes | Slightly pink, firmer texture |
| Well Done | 160°F+ | 10–12+ minutes | Little to no pink, firm throughout |
Common Mistakes and How to Avoid Them
- Moving the steak too soon: Resist the urge to peek or shift the steak. Let it form a crust before flipping.
- Overcrowding the pan: Cook one or two steaks at a time. Multiple steaks drop the pan temperature and steam instead of sear.
- Skipping the rest: Cutting into a steak immediately after cooking causes juices to spill out, resulting in dryness.
- Using low heat: High heat is essential for Maillard reaction—the chemical process that creates complex flavor and color.
- Seasoning too late: Salting early enhances flavor penetration and surface drying for better browning.
“Searing isn’t about sealing in juices—that’s a myth. It’s about creating flavor through the Maillard reaction. That crust is where the magic happens.” — Dr. Nathan Myhrvold, co-author of *Modernist Cuisine*
Real Example: From Tough to Tender
Consider Mark, a home cook who used to struggle with tough, gray steaks. He’d use a thin cut, skip drying the surface, and cook over medium heat to avoid burning. His results were consistently disappointing. After switching to a 1.25-inch ribeye, bringing it to room temperature, patting it dry, and using a scorching-hot cast iron pan with avocado oil, his steaks transformed. By following the sear-baste-rest method and checking temperature with a digital thermometer, he achieved a perfect medium-rare with a dark, flavorful crust. The difference wasn’t luck—it was technique.
Frequently Asked Questions
Can I finish the steak in the oven?
Yes, especially for thicker cuts (over 1.5 inches). After searing both sides, transfer the pan to a preheated 400°F oven until the desired internal temperature is reached. This ensures even cooking without over-charring the exterior.
Should I oil the steak or the pan?
Both methods work, but oiling the pan gives you more control over quantity and prevents excess oil from pooling. Lightly coating the steak can also help seasoning adhere.
Why did my steak stick to the pan?
Sticking usually occurs when the pan isn’t hot enough or the steak is moved too soon. Ensure the pan is properly preheated and allow the steak to sear undisturbed until it naturally releases.
Final Checklist for Success
- ✔️ Choose a thick-cut, well-marbled steak
- Select ribeye, strip, or filet mignon at least 1 inch thick.
- ✔️ Bring steak to room temperature
- Let sit out for 30–45 minutes before cooking.
- ✔️ Use a cast iron or carbon steel pan
- These retain high heat best for optimal searing.
- ✔️ Preheat the pan thoroughly
- Heat for 5–7 minutes on medium-high to high.
- ✔️ Dry the steak surface and season well
- Pat dry and apply salt and pepper generously.
- ✔️ Sear without moving, then flip once
- Allow a crust to form before turning.
- ✔️ Baste with butter and aromatics (optional)
- Add butter, garlic, and herbs during the final minute.
- ✔️ Use a meat thermometer
- Remove steak 5°F below target temperature.
- ✔️ Rest before slicing
- Wait 5–10 minutes to preserve juiciness.
Mastery Is Within Reach
Cooking the best steak on a stove isn’t reserved for professional kitchens. With the right tools, a few science-backed principles, and disciplined execution, anyone can achieve a restaurant-worthy result. The beauty of this method lies in its simplicity and consistency. Once you’ve mastered the balance of heat, timing, and patience, you’ll never settle for a bland or overcooked steak again.


 浙公网安备
33010002000092号
浙公网安备
33010002000092号 浙B2-20120091-4
Comments
No comments yet. Why don't you start the discussion?