
Rusted license plate screws are a common frustration for car owners, especially in regions with high humidity, road salt, or frequent rain. Over time, exposure to the elements causes metal fasteners to corrode, making them difficult—or seemingly impossible—to remove. Forcing them can strip the heads, break the screws, or damage the surrounding bumper or mounting bracket. However, with the right tools and methods, you can safely loosen and extract rusted screws without causing harm to your vehicle. This guide provides practical, field-tested techniques that mechanics and DIYers rely on to tackle this stubborn issue.
Understanding Why License Plate Screws Rust
License plate screws are typically made of steel or low-grade stainless steel and are exposed to moisture, dirt, and road debris. Unlike interior components, they receive no protection from undercoating or paint, making them vulnerable to oxidation. Once rust forms, it expands slightly, creating pressure between the screw and its housing. This expansion is often what makes the screw feel \"frozen\" in place.
The key to successful removal isn’t brute force—it’s patience, lubrication, and controlled heat application. Rushing the process increases the risk of snapping the screw shaft or stripping the head, which turns a simple task into a complex repair job.
“Rust is predictable, but so is success when you work with chemistry and physics instead of against them.” — Daniel Reeves, Automotive Restoration Specialist
Essential Tools and Materials
Before attempting removal, gather the following items. Having everything ready prevents interruptions and maintains momentum during the process:
- Penetrating oil (e.g., WD-40 Specialist, PB Blaster, or Liquid Wrench)
- Rubber mallet or small hammer
- Heat source (butane torch or hair dryer)
- Correct-sized screwdriver or socket bit (Phillips, flathead, or Torx)
- Vise-grips or locking pliers (for damaged heads)
- Fine wire brush or toothbrush
- Clean rags
- Replacement screws (stainless steel recommended)
Step-by-Step Guide to Removing Rusted Screws Safely
Follow this proven sequence to maximize your chances of success while minimizing damage:
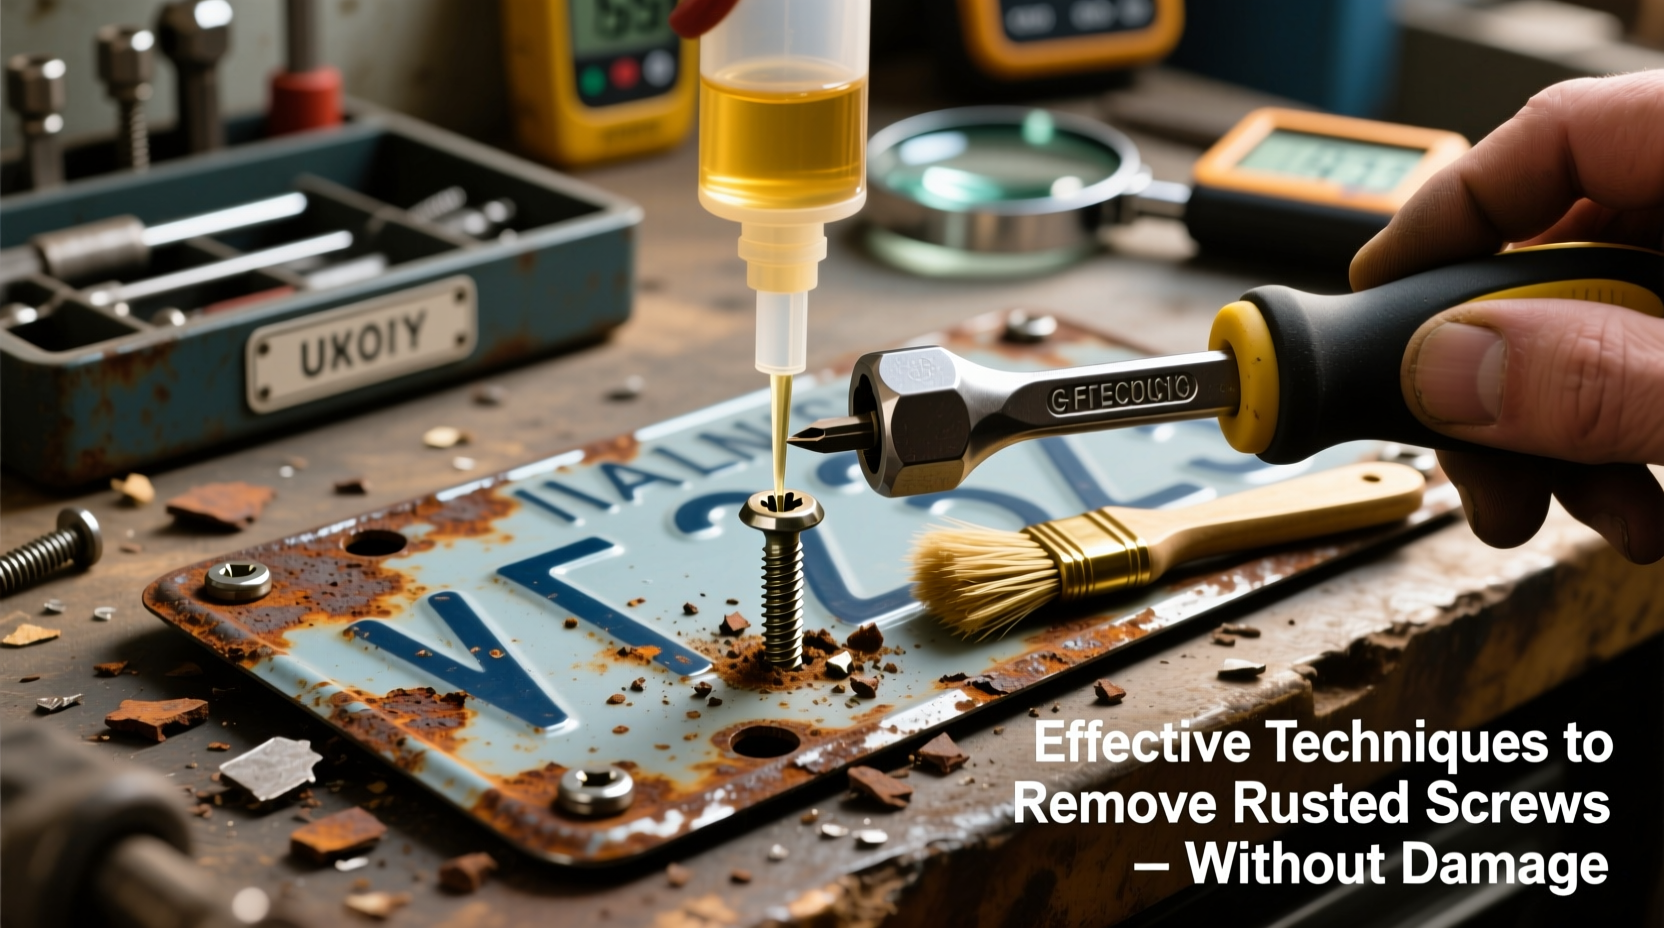
- Clean the area: Use a wire brush and rag to remove surface grime around the screw head. This ensures better contact with tools and improves oil penetration.
- Apply penetrating oil: Spray generously onto the screw head and base. Let it sit for at least 10–15 minutes. For severe cases, reapply and wait up to an hour.
- Tap the screw lightly: Gently strike the screw head with a hammer. This helps break internal rust bonds through vibration—a technique known as “shock release.”
- Apply controlled heat: If oil alone doesn’t work, use a butane torch to heat the screw for 10–20 seconds. Metal expands when heated, breaking the grip of rust. Allow a few seconds to cool—this contraction can further loosen the bond.
- Turn slowly with proper tools: Use a well-fitting driver bit. Apply steady, gradual pressure while turning counterclockwise. Avoid jerking motions that can strip the head.
- Use vise-grips if necessary: If the head is damaged, clamp locking pliers onto the remaining shaft and twist gently.
- Replace immediately: Once removed, install new stainless steel screws to prevent recurrence.
Alternative Methods When Standard Techniques Fail
Sometimes, even after oil and heat, a screw remains immovable. In these cases, consider these advanced but safe alternatives:
Using a Screw Extractor Bit
If the screw head is stripped or broken, drill a small pilot hole into the center of the shaft. Then insert a reverse-threaded screw extractor bit into a drill set to reverse mode. As you turn counterclockwise, the bit grips and removes the screw.
Drilling Out the Screw
As a last resort, carefully drill through the screw using progressively larger bits. This destroys the screw but preserves the surrounding material. After removal, clean the threaded hole with a tap tool if reuse is needed.
Epoxy Method for Stripped Heads
For Phillips or flathead screws with worn slots, apply two-part epoxy to a matching bit, insert it into the head, and let cure for 30 minutes. The hardened epoxy creates a strong bond, allowing torque transfer without slippage.
| Method | Best For | Risk Level | Time Required |
|---|---|---|---|
| Penetrating Oil + Tapping | Mild to moderate rust | Low | 15–30 min |
| Heat Application | Severe rust, frozen screws | Medium (heat damage risk) | 20–40 min |
| Screw Extractor | Stripped or broken heads | Medium (drilling required) | 30–60 min |
| Epoxy Bit Bonding | Worn screw heads | Low | 45 min (incl. cure) |
Mini Case Study: Restoring a Classic Car’s Rear Plate
A 1978 Ford F-150 restoration project hit a snag when both rear license plate screws refused to budge after decades of exposure. The owner attempted removal with a standard screwdriver, resulting in completely stripped heads. A mechanic applied PB Blaster and allowed it to soak overnight. The next day, he used a mini torch to heat each screw for 15 seconds, followed by light tapping. After cooling, he clamped vise-grips onto the shafts and slowly turned counterclockwise. Both screws came free without damaging the aluminum plate holder. New stainless steel screws were installed with a drop of anti-seize compound to prevent future issues.
Do’s and Don’ts of Rusty Screw Removal
| Do’s | Don’ts |
|---|---|
| Use penetrating oil specifically formulated for rust | Use excessive force with worn tools |
| Allow oil time to penetrate (minimum 10 minutes) | Apply heat near plastic bumpers without shielding |
| Tap the screw to disrupt rust bonds | Use a worn or incorrect-sized bit |
| Replace old screws with stainless steel | Leave holes exposed to moisture after removal |
FAQ
Can I use vinegar or cola to loosen rusted screws?
While household acids like vinegar or cola can dissolve surface rust over time, they are far less effective than commercial penetrating oils. These liquids lack the viscosity to stay in place and don’t contain rust-penetrating additives. They may help in emergencies but aren’t reliable for stuck automotive screws.
What if the screw breaks during removal?
If the shaft snaps, stop immediately. Use a center punch to mark the center of the broken piece, then drill a small hole. Insert a screw extractor bit to remove the remainder. If the hole becomes too large, a helical thread insert (helicoil) can restore the threads.
How can I prevent license plate screws from rusting again?
Replace original screws with stainless steel or coated hardware. Apply a small amount of anti-seize compound before installation. Inspect annually and reapply protection if needed. Consider rubber grommets to reduce direct metal-to-metal contact.
Final Tips for Long-Term Prevention
Prevention is always easier than repair. Stainless steel screws cost slightly more but resist corrosion far better than standard zinc-coated hardware. Pair them with rubber washers to create a moisture barrier. During routine car washes, spray the license plate area with a water-displacing lubricant every few months, especially before winter.
Additionally, avoid pressure-washing directly at screw heads, as this forces water into the threads. Instead, rinse from the side and dry thoroughly.
Conclusion
Removing rusted license plate screws doesn’t require expensive tools or professional skills—just the right approach. By combining penetrating oil, mechanical vibration, and controlled heat, most seized screws can be freed without damage. The real victory lies in preventing recurrence through proper replacement and maintenance. Taking a few extra minutes during reinstallation can save hours of frustration down the road.


 浙公网安备
33010002000092号
浙公网安备
33010002000092号 浙B2-20120091-4
Comments
No comments yet. Why don't you start the discussion?